
Introduction
There are few culinary experiences as satisfying as a perfectly cooked ribeye steak. Juicy, tender, and bursting with rich, beefy flavor, the ribeye stands as a testament to simple ingredients prepared with expert technique. This isn’t just a meal; it’s an occasion, a celebration of one of the finest cuts of beef available. Whether you’re aiming to impress dinner guests or simply treat yourself to an unparalleled dining experience at home, mastering the art of the ribeye is a skill that will serve you well. Forget expensive steakhouses; with this guide, you’ll be crafting restaurant-quality steaks right in your own kitchen.
What makes the ribeye so special? It all comes down to its incredible marbling—those beautiful streaks of intramuscular fat that weave through the meat. As the steak cooks, this marbling renders down, infusing every bite with an unparalleled succulence and depth of flavor that leaner cuts simply can’t match. Cut from the rib section of the cow, this area is known for its tenderness, making it a joy to eat. Our approach focuses on achieving that coveted deep, dark crust on the exterior while preserving a juicy, flavorful interior, ensuring a truly unforgettable steak.
This recipe is designed for both the novice and the seasoned home cook. We’ll guide you through every step, from selecting the perfect steak to the crucial resting period, ensuring you achieve flawless results every time. We’ll cover the essential techniques for pan-searing to develop that irresistible crust, and how to finish your steak to your desired doneness, whether on the stovetop or in the oven. Prepare to elevate your home cooking and discover the true potential of a magnificent ribeye steak.
Nutritional Information
Per serving (approximate values for a 12oz ribeye):
- Calories: 900-1100
- Protein: 70-85g
- Carbohydrates: 0-2g
- Fat: 65-85g
- Fiber: 0g
- Sodium: 600-800mg
Ingredients
- 2 (1.5-inch thick, 12-14 ounce) bone-in or boneless ribeye steaks
- 1-2 tablespoons high smoke point oil (such as avocado, grapeseed, or canola oil)
- 1 tablespoon unsalted butter (optional, for basting)
- 2-3 sprigs fresh rosemary or thyme (optional)
- 2-3 cloves garlic, smashed (optional)
- 1-2 teaspoons coarse sea salt or kosher salt, to taste
- 1 teaspoon freshly ground black pepper, to taste
Instructions
- Prepare the Steaks: Remove the ribeye steaks from the refrigerator at least 30-60 minutes before cooking to allow them to come closer to room temperature. This promotes more even cooking. Pat the steaks thoroughly dry on all sides with paper towels. This is a crucial step for achieving a good sear, as moisture on the surface will steam the meat rather than sear it.
- Season Generously: Season both sides and the edges of each steak liberally with coarse sea salt or kosher salt and freshly ground black pepper. Don’t be shy with the seasoning; a thick steak can handle it. If desired, you can also add a pinch of garlic powder or onion powder at this stage.
- Preheat the Pan: Place a heavy-bottomed skillet, preferably cast iron, over high heat. Allow the pan to heat for 3-5 minutes until it is screaming hot and just beginning to smoke lightly. A hot pan is essential for developing a deep, flavorful crust.
- Add Oil: Add the high smoke point oil to the hot pan. Swirl to coat the bottom evenly. The oil should shimmer, but not smoke excessively.
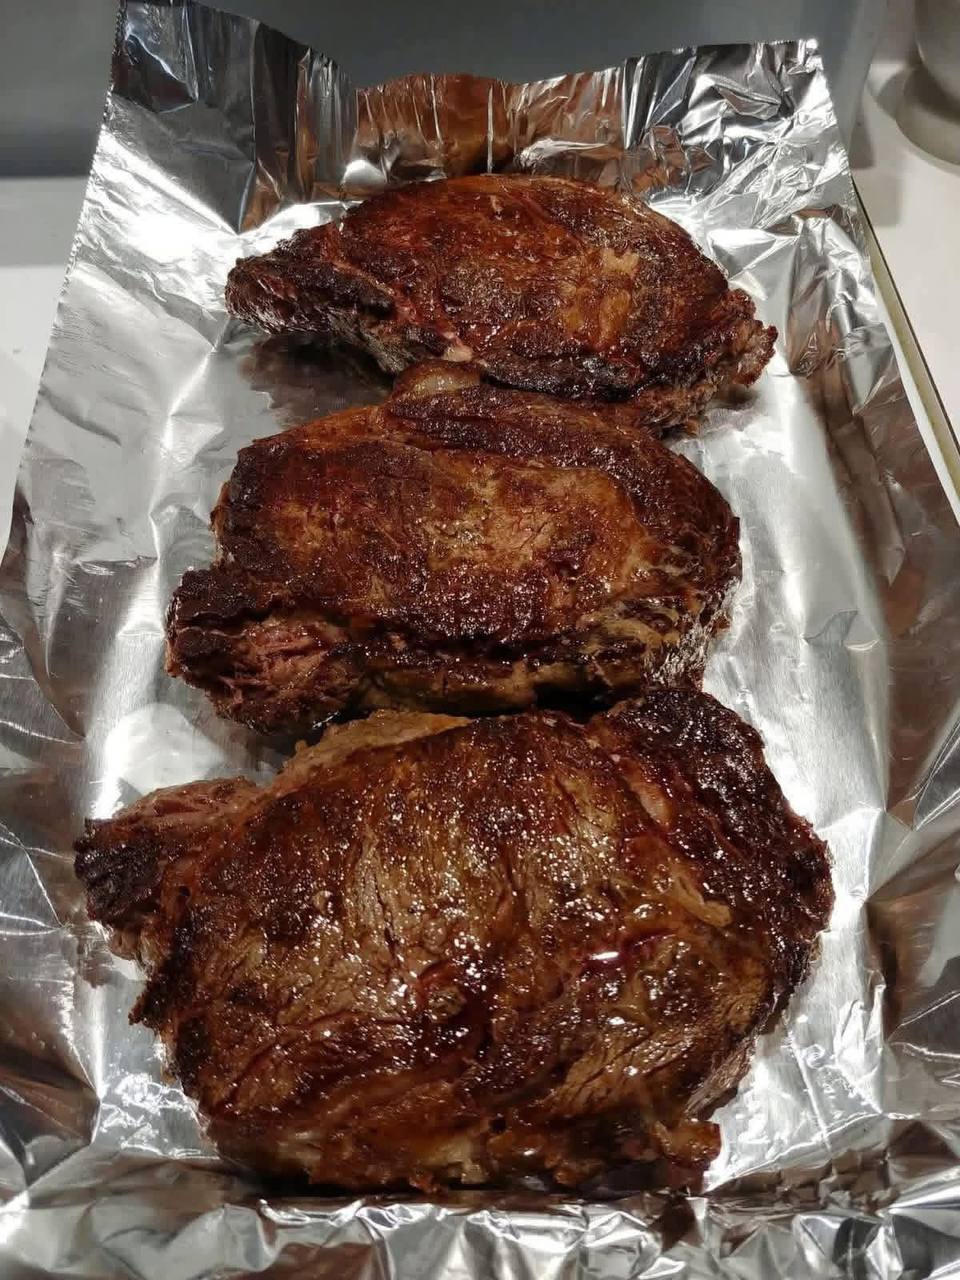
- Sear the Steaks: Carefully place the seasoned ribeye steaks into the hot pan. Do not overcrowd the pan; if cooking more than two steaks, sear them in batches to maintain the pan’s high temperature. Sear for 2-3 minutes per side without moving the steak. This initial sear is what creates that beautiful, dark brown crust.
- Develop the Crust and Cook Edges: After searing both flat sides, use tongs to hold the steaks on their fatty edges for 1-2 minutes to render some of the fat and create a crust all around the steak.
- Baste (Optional, but Recommended): Reduce the heat to medium. Add the unsalted butter, fresh rosemary or thyme sprigs, and smashed garlic cloves to the pan. Once the butter has melted and is fragrant, tilt the pan slightly and use a spoon to continuously baste the steaks with the melted butter and aromatics for 1-2 minutes. This adds incredible flavor and helps to even out the cooking.
- Finish Cooking (Stovetop or Oven):
- Stovetop Only (for thinner steaks or higher doneness): Continue cooking over medium heat, flipping every 1-2 minutes and basting, until the desired internal temperature is reached.
- Oven Finish (for thicker steaks or more even cooking): If you have a very thick steak or prefer a more controlled cook, transfer the entire oven-safe skillet with the steaks (and aromatics) to a preheated oven at 400°F (200°C). Cook for 5-10 minutes, or until the desired internal temperature is reached.
- Check Doneness: Use an instant-read meat thermometer inserted into the thickest part of the steak, avoiding any bone.
- Rare: 120-125°F (49-52°C)
- Medium-Rare: 130-135°F (54-57°C)
- Medium: 135-140°F (57-60°C)
- Medium-Well: 140-145°F (60-63°C)
Remember that the steak’s temperature will rise by 5-10 degrees during resting.
- Rest the Steaks: This is a critical step! Once the steaks reach 5-10 degrees below your target internal temperature, remove them from the pan and transfer them to a cutting board. Tent loosely with aluminum foil and let them rest for at least 5-10 minutes (10-15 minutes for very thick steaks). Resting allows the juices to redistribute throughout the meat, preventing them from Gushing out when sliced and ensuring a tender, juicy steak.
- Slice and Serve: After resting, slice the steaks against the grain into thick pieces. Serve immediately with your favorite sides.
Cooking Tips and Variations
Achieving the perfect ribeye is a blend of technique and personal preference. Here are some tips and variations to help you master your steak game:
Tips for Success:
- Bring to Room Temperature: Don’t skip this step! A cold steak will cook unevenly, resulting in a well-done exterior and a rare center. Allowing it to sit out for 30-60 minutes ensures a more consistent cook from edge to edge.
- Pat Dry, Pat Dry, Pat Dry: We can’t stress this enough. Moisture is the enemy of a good sear. Remove as much surface moisture as possible with paper towels before seasoning.
- Don’t Be Afraid of Heat: That beautiful, dark crust (Maillard reaction) requires high heat. Ensure your pan is smoking hot before adding the steak.
- Use a High Smoke Point Oil: Olive oil has a low smoke point and will burn at the temperatures needed for searing. Opt for avocado, grapeseed, canola, or refined sunflower oil.
- Don’t Overcrowd the Pan: If you’re cooking multiple steaks, work in batches. Overcrowding lowers the pan’s temperature, leading to steaming rather than searing, and a lack of crust.
- Flip Infrequently (Initially): For the initial sear, resist the urge to flip the steak constantly. Let it sit undisturbed for 2-3 minutes per side to build that crust. Once the crust is formed, you can flip more frequently if you prefer to cook more evenly.
- Invest in a Good Thermometer: An instant-read meat thermometer is your best friend when cooking steak. It takes the guesswork out of determining doneness and ensures consistent results.
- The Power of Resting: This is non-negotiable. Skipping the rest will result in a dry, less flavorful steak. The juices need time to redistribute after the heat of cooking forces them to the center. Tent loosely with foil; don’t wrap tightly, or you’ll steam the crust.
- Clean Up As You Go: Be mindful of splattering oil. A splatter screen can be helpful, and wiping down surfaces immediately after cooking will save you a lot of scrubbing later.
Variations to Elevate Your Ribeye:
- Compound Butter: While the butter basting adds flavor, you can take it a step further. Before resting, place a medallion of homemade compound butter (butter mixed with minced garlic, herbs like chives or parsley, and a pinch of lemon zest) on top of the hot steak. As it melts, it will seep into the meat, adding an extra layer of richness and aroma.
- Pan Sauce: After removing the steaks to rest, deglaze the pan with a splash of red wine, beef broth, or even a little balsamic vinegar. Scrape up all the flavorful bits from the bottom, reduce slightly, and swirl in a pat of butter for a simple, delicious pan sauce to drizzle over your sliced steak.
- Garlic and Herb Rub: Instead of just salt and pepper, create a dry rub with garlic powder, onion powder, paprika, dried thyme, and dried rosemary. Apply this rub to the steaks an hour before cooking for a more complex flavor profile.
- Spice It Up: For a bolder flavor, consider adding a pinch of cayenne pepper, chili powder, or even a coffee rub to your seasoning blend.
- Reverse Sear: For very thick steaks (1.5 inches or more), the reverse sear method is fantastic for ultimate control and even doneness. Bake the steaks in a low oven (250°F / 120°C) until they are about 10-15 degrees below your target internal temperature. Then, transfer to a screaming hot pan for a quick, intense sear (1-2 minutes per side) to develop the crust.
- Cast Iron Grate: If you have a cast iron grill grate that fits inside your oven, you can use this for a smoky, grill-like finish after searing, or even for an entire cook after an initial sear.
Storage and Reheating
While a freshly cooked ribeye is always best, sometimes you have leftovers. Proper storage and reheating are key to enjoying your steak without completely sacrificing its quality.
Storage:
- Cool Quickly: Allow any leftover steak to cool to room temperature within two hours of cooking. Do not leave it out for longer than that to prevent bacterial growth.
- Airtight Container: Once cooled, transfer the steak to an airtight container. This will protect it from air, which can cause drying and freezer burn.
- Refrigeration: Cooked ribeye steak can be safely stored in the refrigerator for 3-4 days.
- Freezing: For longer storage, wrap individual slices or portions of steak tightly in plastic wrap, then again in aluminum foil, or place in a freezer-safe bag, removing as much air as possible. Frozen cooked steak can last for 2-3 months. Thaw overnight in the refrigerator before reheating.
Reheating:
The goal when reheating steak is to warm it through without overcooking it, which can make it tough and dry. Low and slow is generally the best approach.
- Oven Method (Recommended for best results):
- Preheat your oven to a low temperature, around 250°F (120°C).
- Place the leftover steak on a wire rack set over a baking sheet. This allows for even heating and prevents the bottom from getting soggy.
- Heat for 15-20 minutes, or until the internal temperature reaches about 110-120°F (43-49°C). The exact time will depend on the thickness of the steak.
- For a refreshed crust, you can quickly sear the steak in a hot skillet with a tiny bit of oil for 30-60 seconds per side after oven reheating.
- Skillet Method:
- Heat a cast iron skillet or heavy-bottomed pan over medium-low heat.
- Add a small amount of oil or butter.
- Once warm, add the steak and heat gently, flipping every minute or two, until warmed through. This method is quicker but has a higher risk of drying out the steak if the heat is too high.
- Microwave (Use with Caution):
The microwave is generally not recommended for reheating steak as it can quickly overcook and toughen the meat, making it rubbery. If you must use it, heat in short 30-second bursts at a lower power setting, checking frequently, and flipping the steak. A splash of beef broth or water can help create a little steam to prevent drying.
Frequently Asked Questions
What is the best way to tell when my ribeye steak is done without cutting into it?
The most accurate way to determine doneness without cutting into your ribeye is by using an instant-read meat thermometer. Insert the thermometer into the thickest part of the steak, avoiding any bone. For medium-rare, aim for 130-135°F (54-57°C) before resting, as the temperature will rise several degrees. Another less precise method is the “touch test,” where you compare the firmness of the steak to the flesh on your palm (e.g., rare feels like the fleshy part below your thumb when your thumb and index finger are lightly touching). However, this method requires practice and is less reliable than a thermometer.
Why is it so important to rest the steak after cooking?
Resting the steak is absolutely crucial for a juicy and tender result. When meat cooks, the muscle fibers contract, pushing the internal juices towards the center of the steak. If you cut into it immediately, all those flavorful juices will Gush out onto your cutting board, leaving you with a dry steak. Resting allows the muscle fibers to relax and reabsorb those juices, redistributing them evenly throughout the meat. This results in a much more succulent and flavorful bite. For a thick ribeye, aim for at least 5-10 minutes of resting time, tented loosely with foil.
Can I grill a ribeye steak using a similar method?
Absolutely! The principles for grilling a ribeye are very similar to pan-searing. You’ll want to get your grill grates screaming hot to achieve a good sear. Season the steak thoroughly and place it over direct high heat for 2-3 minutes per side to develop that crust and beautiful grill marks. For thicker steaks, move them to indirect heat to finish cooking to your desired doneness, using a meat thermometer. Just like with pan-searing, proper resting after grilling is essential. You can also baste with butter and herbs on the grill, either directly on the steak or by brushing it on as it cooks.