
Introduction
Step right up, food enthusiasts and Disney dreamers! Prepare to embark on a culinary adventure that’s as heartwarming and iconic as the man himself: Walt Disney. We’re not talking about theme park snacks today, but a deeply personal, comforting classic straight from the Disney family kitchen – Walt Disney’s Family Chili. Imagine a dish so beloved, so ingrained in family tradition, that it fueled the creative genius behind Mickey Mouse and Disneyland. This isn’t just any chili; it’s a taste of history, a spoonful of nostalgia, and a testament to the simple, wholesome pleasures Walt Disney cherished.
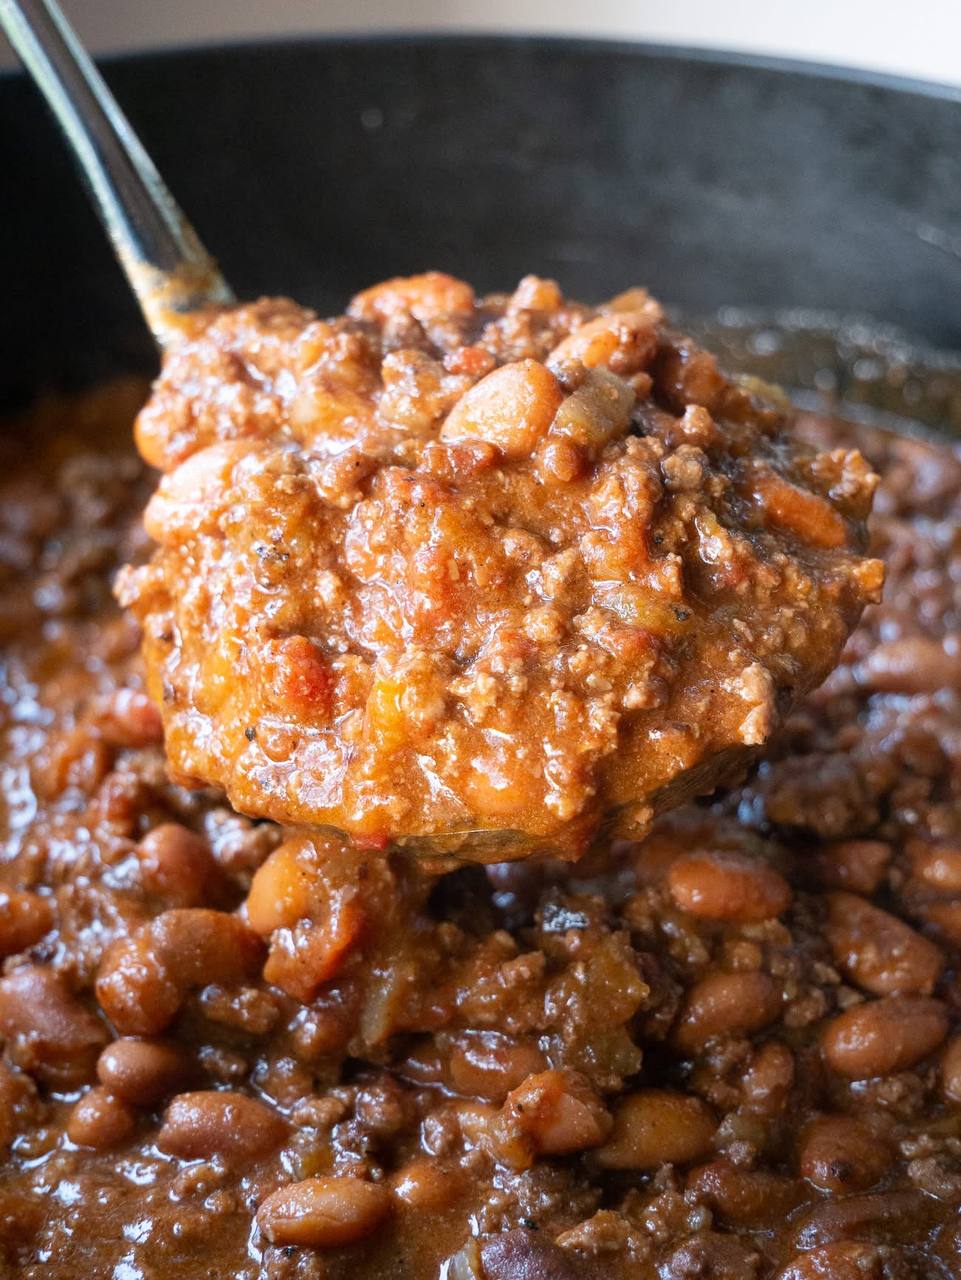
What makes this chili truly special? It’s its unwavering authenticity and soul-satisfying flavor profile. Forget overly complicated ingredients or trendy twists; Walt’s chili is all about robust, honest-to-goodness taste that speaks to the heart of American comfort food. It’s a hearty, savory blend of perfectly browned ground meat, tender beans, and a rich, tomato-based sauce, all seasoned with a symphony of spices that sing of home. This recipe isn’t just about feeding a crowd; it’s about gathering loved ones, sharing stories, and creating those magical moments that Walt Disney understood so well. It’s the kind of dish that warms you from the inside out, perfect for a cozy family dinner, a lively game day, or any occasion that calls for a truly satisfying meal.
Beyond its incredible flavor, this chili offers a unique connection to an American icon. While Walt Disney brought fantasy to life on screen and in parks, his personal life often revolved around simple, comforting traditions. This chili recipe embodies that spirit – unpretentious, deeply satisfying, and designed to bring joy. It’s a culinary hug, a reminder that even the busiest dreamers find solace in the familiar and the delicious. So, roll up your sleeves, because we’re about to unlock the secrets to a timeless family favorite that promises to become a cherished tradition in your own home.
Nutritional Information
Per serving (approximate values):
- Calories: 380
- Protein: 30g
- Carbohydrates: 35g
- Fat: 15g
- Fiber: 10g
- Sodium: 850mg
Ingredients
- 2 tablespoons olive oil
- 2 pounds lean ground beef (80/20 recommended for flavor)
- 2 large yellow onions, chopped
- 4 cloves garlic, minced
- 1 (28-ounce) can crushed tomatoes
- 2 (15-ounce) cans pinto beans, drained and rinsed
- 1 (15-ounce) can kidney beans, drained and rinsed
- 1 (14.5-ounce) can diced tomatoes, undrained
- 1 cup beef broth (low sodium preferred)
- 1/4 cup chili powder (or more, to taste)
- 2 tablespoons ground cumin
- 1 tablespoon smoked paprika
- 1 teaspoon dried oregano
- 1/2 teaspoon cayenne pepper (optional, for heat)
- 1 teaspoon salt (or to taste)
- 1/2 teaspoon black pepper (or to taste)
- 1 tablespoon brown sugar (optional, to balance acidity)
- 1 bay leaf
Instructions
- Heat the olive oil in a large, heavy-bottomed pot or Dutch oven over medium-high heat.
- Add the ground beef to the pot, breaking it up with a spoon. Cook until thoroughly browned, about 8-10 minutes.
- Once the beef is browned, drain off any excess fat from the pot. This step is crucial for a less greasy chili.
- Reduce the heat to medium. Add the chopped onions to the pot with the browned beef. Sauté the onions until they are softened and translucent, about 5-7 minutes.
- Add the minced garlic to the pot. Cook for another 1-2 minutes until fragrant, being careful not to burn the garlic.
- Stir in the chili powder, ground cumin, smoked paprika, dried oregano, and cayenne pepper (if using). Cook for 1 minute, stirring constantly, to toast the spices and release their aromas.
- Pour in the crushed tomatoes, diced tomatoes (with their juices), pinto beans, kidney beans, and beef broth. Stir everything together until well combined.
- Add the salt, black pepper, brown sugar (if using), and bay leaf to the pot. Stir gently.
- Bring the chili to a gentle simmer, then reduce the heat to low. Cover the pot and let the chili simmer for at least 1 hour, or preferably 2-3 hours, stirring occasionally. The longer it simmers, the more the flavors will meld and deepen.
- After simmering, remove the bay leaf. Taste the chili and adjust seasonings as needed. You might want to add more salt, pepper, chili powder, or a pinch more brown sugar to achieve your desired flavor balance.
- Serve hot with your favorite toppings.
Cooking Tips and Variations
Achieving the perfect Walt Disney Family Chili is all about building layers of flavor and allowing time for those flavors to meld. For the best results, start with high-quality ingredients. Using 80/20 lean ground beef strikes the ideal balance between flavor and leanness; while you’ll drain excess fat, the fat renders flavor during browning. Don’t skip the step of browning the meat thoroughly and draining the fat – this prevents a greasy chili and ensures a rich, meaty base. Sautéing the onions until translucent and then toasting the spices with the aromatics are fundamental steps that unlock their full potential, creating a fragrant foundation for your chili.
The simmering time is perhaps the most critical component of this recipe. While an hour will give you a delicious chili, allowing it to simmer for 2-3 hours, or even longer on low heat, will transform it. This slow cooking process allows the tomatoes to break down, the beans to become incredibly tender, and all the spices to marry beautifully, creating a depth of flavor that can’t be rushed. Stir occasionally to prevent sticking and ensure even cooking. If your chili seems too thick, add a little more beef broth or water; if it’s too thin, simmer it uncovered for the last 30 minutes to allow some liquid to evaporate.
For variations, consider adjusting the heat level. If you prefer a milder chili, omit the cayenne pepper or reduce its quantity. For those who love a kick, increase the cayenne or add a pinch of red pepper flakes along with the other spices. You can also experiment with different types of beans; black beans or cannellini beans can be substituted for some of the pinto or kidney beans for a different texture and flavor profile. To add more vegetables, consider diced bell peppers (red, green, or yellow) or even shredded carrots, added along with the onions. For a smoky undertone, a small amount of chipotle powder or a dash of liquid smoke can be incorporated. If you’re looking for a vegetarian option, you can substitute the ground beef with plant-based ground crumbles, increasing the amount of olive oil slightly for sautéing.
Storage and Reheating
Walt Disney’s Family Chili is one of those magical dishes that often tastes even better the next day, as the flavors have more time to deepen and meld. To store leftover chili, allow it to cool completely at room temperature (this usually takes 1-2 hours) before transferring it to an airtight container. Refrigerate promptly within two hours of cooking. Properly stored chili will keep well in the refrigerator for 3-4 days. For longer storage, chili freezes exceptionally well. Portion the cooled chili into freezer-safe bags or containers, leaving a little headspace if using rigid containers (as liquids expand when frozen). Label with the date. Frozen chili can be stored for up to 4-6 months.
When you’re ready to enjoy your chili again, reheating is simple. If frozen, it’s best to thaw the chili in the refrigerator overnight before reheating, though it can also be reheated directly from frozen on the stovetop or in the microwave at a lower quality. To reheat on the stovetop, transfer the chili to a pot or Dutch oven over medium-low heat. Stir frequently, adding a splash of beef broth or water if it seems too thick, until it’s heated through and simmering gently. This usually takes 10-15 minutes for refrigerated chili and longer for frozen. For microwave reheating, place a single serving in a microwave-safe bowl, cover loosely, and heat on high for 2-3 minutes, stirring halfway through, until hot. Be careful, as chili can splatter in the microwave. Always ensure the chili is heated to an internal temperature of 165°F (74°C) before serving.
Frequently Asked Questions
Can I make this chili in a slow cooker?
Absolutely! This recipe adapts beautifully to a slow cooker. Brown the ground beef and sauté the onions and garlic as directed in a separate pan. Drain the fat, then transfer the beef, onions, and garlic to your slow cooker. Add all remaining ingredients, stir well, and cook on low for 6-8 hours or on high for 3-4 hours. The longer, slower cook time will allow the flavors to develop wonderfully, making it a fantastic make-ahead option.
What are the best toppings for Walt Disney’s chili?
The classic toppings are often the best! Shredded cheddar cheese, a dollop of sour cream or plain Greek yogurt, finely chopped green onions or red onions, and a side of oyster crackers or cornbread are all fantastic choices. Other popular options include sliced jalapeños (fresh or pickled), a sprinkle of fresh cilantro, or even a dash of your favorite hot sauce for an extra kick. Don’t be afraid to get creative and serve it Frito pie style!
My chili is too thin/too thick. How can I fix it?
If your chili is too thin, simply remove the lid and continue to simmer it on low heat, stirring occasionally, for an additional 20-30 minutes. This will allow some of the liquid to evaporate and the chili to thicken naturally. Alternatively, you can create a slurry of 1 tablespoon cornstarch mixed with 2 tablespoons cold water, stir it into the simmering chili, and cook for another 2-3 minutes until thickened. If your chili is too thick, stir in an additional 1/4 to 1/2 cup of beef broth or water until it reaches your desired consistency.