
Introduction
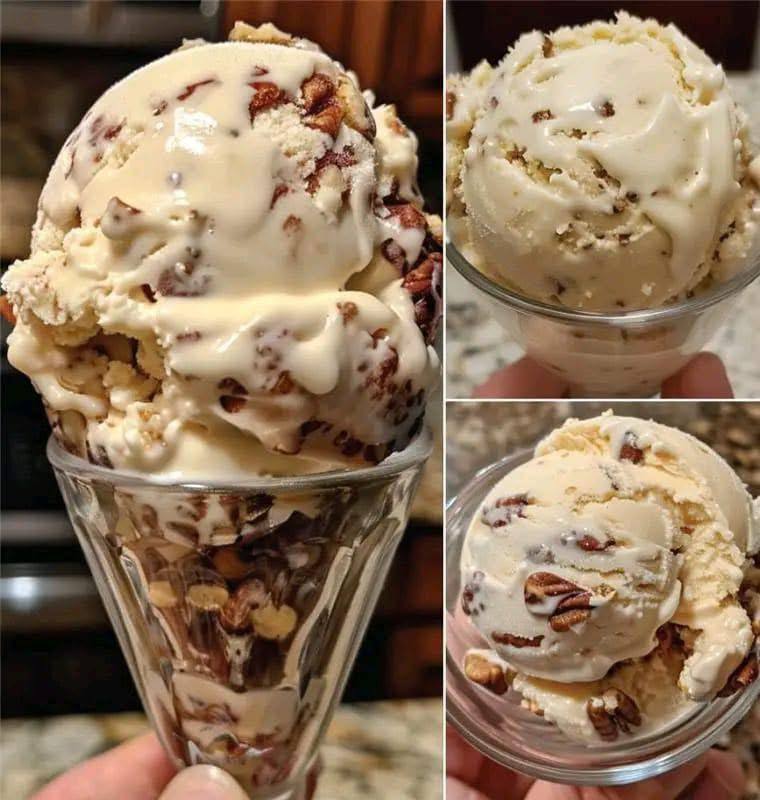
Imagine a scoop of pure bliss, a symphony of creamy luxury and crunchy, toasted nuts dancing on your palate. That’s precisely what awaits you with this recipe for “Deliciously Indulgent Pecan Ice Cream.” Forget the bland, store-bought versions; this homemade masterpiece elevates the humble pecan to new heights, transforming it into a rich, velvety frozen treat that’s impossible to resist. Each spoonful delivers a decadent experience, a perfect balance of sweet, buttery custard and the earthy, robust flavor of perfectly roasted pecans.
What makes this pecan ice cream truly special isn’t just its incredible taste, but the sheer joy of creating something so gourmet in your own kitchen. We’re talking about an indulgence that goes beyond a simple dessert – it’s a celebration of flavor and texture. The base is crafted with care, ensuring a smooth, rich consistency, while the generous distribution of pecans guarantees a delightful crunch in every bite. This isn’t just ice cream; it’s an experience, a sweet reward for your efforts, and a guaranteed crowd-pleaser that will have everyone asking for your secret recipe.
Get ready to embark on a culinary adventure that promises to tantalize your taste buds and leave you utterly satisfied. This recipe emphasizes abundance – plenty of rich cream, luscious egg yolks, and, most importantly, a lavish amount of those irresistible pecans. We’ll guide you through each step, from toasting the nuts to churning the perfect custard, ensuring your homemade pecan ice cream is not just delicious, but truly unforgettable. So, grab your apron and prepare to churn your way to dessert perfection!
Nutritional Information
Per serving (approximate values):
- Calories: 420
- Protein: 6g
- Carbohydrates: 35g
- Fat: 30g
- Fiber: 2g
- Sodium: 60mg
Ingredients
- 2 cups heavy cream
- 1 cup whole milk
- 3/4 cup granulated sugar, divided
- 1/4 teaspoon salt
- 6 large egg yolks
- 1 teaspoon pure vanilla extract
- 1 1/2 cups pecan halves, plus extra for garnish
- 2 tablespoons unsalted butter
- 2 tablespoons packed light brown sugar (optional, for candied pecans)
Instructions
- Prepare the Pecans: Preheat your oven to 350°F (175°C). Spread the pecan halves in a single layer on a baking sheet. Toast for 8-10 minutes, stirring halfway through, until fragrant and lightly browned. Watch carefully to prevent burning. If making candied pecans, melt 2 tablespoons of unsalted butter in a skillet over medium heat. Add the toasted pecans and 2 tablespoons of packed light brown sugar. Cook, stirring constantly, for 3-5 minutes until the sugar melts and coats the pecans. Spread them back on the baking sheet to cool completely. Once cooled, roughly chop the pecans to your desired size.
- Make the Custard Base: In a medium saucepan, combine the heavy cream, whole milk, 1/2 cup of the granulated sugar, and salt. Heat over medium heat, stirring occasionally, until the mixture just begins to simmer around the edges and small bubbles appear. Do not boil.
- Temper the Egg Yolks: In a separate medium bowl, whisk the 6 large egg yolks with the remaining 1/4 cup of granulated sugar until light in color and slightly thickened.
- Combine and Cook the Custard: Slowly pour about half of the hot cream mixture into the egg yolk mixture, whisking constantly to temper the yolks (this prevents them from scrambling). Once combined, pour the egg yolk mixture back into the saucepan with the remaining hot cream mixture.
- Thicken the Custard: Return the saucepan to medium-low heat. Cook, stirring continuously with a wooden spoon or spatula, until the custard thickens enough to coat the back of the spoon (it should leave a clear path when you run your finger across it). This usually takes 8-12 minutes and the temperature should reach 175-180°F (79-82°C). Do not boil, as this can curdle the eggs.
- Add Vanilla and Chill: Remove the custard from the heat and stir in the 1 teaspoon of pure vanilla extract. Pour the custard through a fine-mesh sieve into a clean bowl to remove any small bits of cooked egg, ensuring a silky smooth base. Cover the bowl with plastic wrap, pressing it directly onto the surface of the custard to prevent a skin from forming. Refrigerate for at least 4 hours, or preferably overnight, until thoroughly chilled.
- Churn the Ice Cream: Once the custard base is completely chilled, pour it into your ice cream maker. Churn according to the manufacturer’s instructions. This typically takes 20-30 minutes, or until the ice cream is thick and resembles soft-serve consistency.
- Incorporate Pecans: During the last 5 minutes of churning, add the chopped roasted (or candied) pecans to the ice cream maker. This ensures even distribution throughout the ice cream.
- Freeze for Firmness: Transfer the freshly churned ice cream to an airtight container. Press a piece of plastic wrap directly onto the surface to minimize ice crystal formation. Freeze for at least 4-6 hours, or until firm, before serving.
Cooking Tips and Variations
Achieving truly indulgent pecan ice cream involves a few key techniques and considerations. For starters, always ensure your custard base is thoroughly chilled before churning. This is paramount for preventing icy textures and achieving that desirable creamy consistency. A warm base will result in a grainy, less satisfying ice cream. When it comes to the pecans, roasting them is non-negotiable. The heat draws out their natural oils, intensifying their nutty flavor and giving them a delightful crunch that raw pecans simply can’t match. Don’t skimp on the vanilla extract either; a good quality pure vanilla can significantly elevate the overall flavor profile of your ice cream.
To ensure a perfectly smooth custard, always temper your egg yolks slowly and whisk continuously. If you rush this step, you risk scrambling the eggs, which will ruin the texture. Cooking the custard to the correct consistency is also crucial; it should be thick enough to coat the back of a spoon but not so thick that it becomes clumpy. Using a thermometer to reach 175-180°F (79-82°C) is the most accurate way to prevent overcooking. After churning, resist the urge to eat it all immediately! Freezing the ice cream for several hours allows it to firm up properly, developing its full flavor and ideal scoopable texture.
For variations, consider a Brown Butter Pecan version by browning 1/4 cup of unsalted butter until nutty and fragrant, then adding it to the cream mixture before heating. For Maple Pecan, substitute 1/4 cup of the granulated sugar with pure maple syrup in the custard base. If you enjoy a boozy kick, a Bourbon Pecan ice cream can be made by adding 1-2 tablespoons of good quality bourbon to the custard base after it’s removed from the heat (before chilling). For extra indulgence, swirl in a homemade caramel or butterscotch sauce during the last few minutes of churning, or when layering into your freezer container. Don’t be afraid to experiment with a pinch of cinnamon or nutmeg in the custard for a warmer spice note.
Storage and Reheating
Proper storage is key to maintaining the creamy texture and fresh flavor of your homemade pecan ice cream. Once the ice cream is firm, transfer it to an airtight, freezer-safe container. Press a piece of plastic wrap directly onto the surface of the ice cream before sealing the container. This creates a barrier that helps prevent the formation of ice crystals and freezer burn, which can compromise the texture. Stored correctly, your Deliciously Indulgent Pecan Ice Cream will retain its quality for up to 2-3 weeks in a standard freezer. While it can last longer, the texture and flavor may begin to degrade after this period.
There’s no “reheating” ice cream in the traditional sense, as the goal is to enjoy it frozen. However, if your ice cream is rock-hard straight from the freezer, allow it to soften on the counter for 5-15 minutes before serving. This brief period allows the ice cream to reach a perfectly scoopable consistency, enhancing its creamy mouthfeel and allowing the flavors to truly shine. Avoid microwaving or rapidly thawing, as this can lead to an uneven texture with melted edges and icy centers. For the best experience, simply let it temper naturally at room temperature until it’s just soft enough to scoop easily.
Frequently Asked Questions
What makes my homemade ice cream icy?
Icy ice cream is typically caused by a few factors: insufficient chilling of the base before churning, a base that doesn’t have enough fat or sugar (which act as anti-freeze), or churning for too short a time. Ensure your base is thoroughly cold (at least 4 hours, preferably overnight), use full-fat dairy, and churn until the ice cream reaches a soft-serve consistency to incorporate enough air and create small ice crystals.
Can I make this recipe without an ice cream maker?
While an ice cream maker yields the best results, you can make a no-churn version. After chilling the custard, pour it into a shallow freezer-safe container. Freeze for 30 minutes, then remove and whisk vigorously with a hand mixer or a sturdy whisk to break up ice crystals. Repeat this process every 30-45 minutes for 3-4 hours, until the ice cream is thick and creamy. Fold in the pecans during the last whisking session.
How can I prevent my pecans from sinking to the bottom?
The best way to prevent pecans from sinking is to add them during the last few minutes of churning. At this point, the ice cream is thick enough to suspend the nuts evenly. If you’re using a no-churn method, fold them in when the mixture is quite thick, just before the final freeze. Coating the pecans lightly with a tablespoon of flour or cornstarch before adding them can also help them stay suspended.
Why did my custard curdle?
Custard curdles when the egg yolks are cooked too quickly or at too high a temperature, causing them to scramble. To prevent this, always temper the egg yolks by slowly whisking in a small amount of the hot cream mixture first. Then, cook the combined custard over medium-low heat, stirring constantly, and remove it from the heat as soon as it coats the back of a spoon, ideally before it reaches a full boil.