
Introduction
Step into the comforting embrace of home baking with a dessert that whispers simplicity and sings with flavor: the Cuppa Cuppa Cake! This delightful creation isn’t just a cake; it’s an invitation to a bygone era of straightforward recipes, where measurements were often intuitive and the joy of baking was found in its unpretentious charm. The “Cuppa Cuppa” moniker itself hints at its origins – often referring to recipes where key ingredients are measured in equal “cups,” making it incredibly accessible even for the most novice baker. Imagine a cake that’s effortlessly moist, studded with juicy fruit, and crowned with a golden, slightly crisp top – that’s precisely what awaits you with this easy-to-master recipe.
What makes the Cuppa Cuppa Cake so special? It’s the perfect marriage of convenience and deliciousness. This isn’t a dessert that demands hours of intricate work or a pantry full of exotic ingredients. Instead, it relies on pantry staples and fresh or canned fruit to deliver a comforting treat that feels both nostalgic and utterly satisfying. Whether you’re looking for a quick after-dinner dessert, a delightful addition to your breakfast or brunch spread, or a simple yet impressive offering for a casual gathering, this cake rises to the occasion. Its versatility is truly remarkable, easily adapting to whatever seasonal fruits you have on hand, ensuring that every bake can be a unique experience.
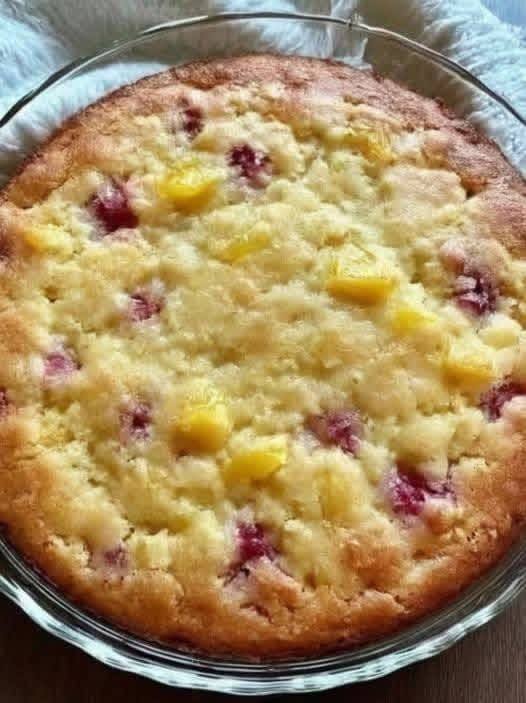
Prepare to fall in love with its tender, moist crumb, which provides the perfect canvas for the vibrant bursts of flavor from the fruit. The visible pineapple chunks, with their sweet and tangy notes, mingle beautifully with the slightly tart raspberries, creating a harmonious balance that dances on your palate. The golden-brown crust adds a subtle textural contrast, providing a delicate chew that complements the cake’s soft interior. This Cuppa Cuppa Cake is more than just a recipe; it’s a celebration of simple pleasures, a testament to the fact that some of the most delicious things in life are also the easiest to create. Get ready to bake a cake that will become a beloved staple in your home!
Nutritional Information
Per serving (approximate values):
- Calories: 320 kcal
- Protein: 4g
- Carbohydrates: 48g
- Fat: 13g
- Fiber: 2g
- Sodium: 280mg
Ingredients
- 1 ½ cups all-purpose flour
- 1 cup granulated sugar
- 1 teaspoon baking powder
- ½ teaspoon baking soda
- ¼ teaspoon salt
- ½ cup unsalted butter, melted
- ½ cup buttermilk (or ½ cup milk + ½ tablespoon lemon juice/vinegar)
- 2 large eggs
- 1 teaspoon vanilla extract
- 1 (8-ounce) can crushed pineapple, well drained
- 1 cup fresh or frozen raspberries (if frozen, do not thaw)
- 2 tablespoons all-purpose flour, for tossing fruit (optional, but recommended)
- Non-stick cooking spray or butter for greasing the pan
Instructions
- Preheat your oven to 350°F (175°C). Grease and lightly flour a 9-inch round baking dish or an 8×8 inch square baking pan. If using non-stick spray, ensure it coats the entire surface.
- In a large mixing bowl, whisk together the 1 ½ cups all-purpose flour, granulated sugar, baking powder, baking soda, and salt until well combined and no lumps remain. This ensures even distribution of the leavening agents.
- In a separate medium bowl, whisk together the melted butter, buttermilk (or milk and lemon juice/vinegar mixture), eggs, and vanilla extract until smooth. Ensure the buttermilk has sat for 5 minutes if you’re making it from milk and acid.
- Pour the wet ingredients into the dry ingredients. Stir with a spatula or wooden spoon until just combined. Be careful not to overmix; a few small lumps are acceptable. Overmixing can lead to a tough cake.
- If using fresh raspberries or frozen raspberries that you plan to thaw, gently pat them dry. If using frozen raspberries directly, skip this step. In a small bowl, lightly toss the drained crushed pineapple and raspberries with the extra 2 tablespoons of flour. This step helps prevent the fruit from sinking to the bottom of the cake during baking and ensures it’s evenly distributed.
- Gently fold the floured pineapple and raspberries into the cake batter. Do this with minimal stirring to avoid crushing the delicate fruit and to keep the batter from becoming overmixed.
- Pour the batter evenly into the prepared baking pan. Use a spatula to spread it to the edges and smooth the top.
- Bake for 35-45 minutes, or until a wooden skewer or toothpick inserted into the center of the cake comes out clean. The top should be golden brown and spring back lightly when touched.
- Once baked, remove the cake from the oven and let it cool in the pan on a wire rack for at least 15-20 minutes. This allows the cake to set properly and prevents it from breaking when removed.
- After cooling in the pan, carefully invert the cake onto the wire rack to cool completely before slicing and serving. If you prefer, you can serve it directly from the pan once it’s cooled enough to handle. Serve warm or at room temperature.
Cooking Tips and Variations
To ensure your Cuppa Cuppa Cake turns out perfectly every time, consider these cooking tips. Firstly, always make sure your buttermilk is at room temperature before adding it to the batter. Cold ingredients can cause the melted butter to seize up, affecting the cake’s texture. If you don’t have buttermilk, you can easily make your own by adding ½ tablespoon of lemon juice or white vinegar to ½ cup of regular milk and letting it sit for 5-10 minutes until it slightly curdles. This homemade buttermilk substitute will provide the necessary acidity to activate the baking soda, resulting in a lighter and more tender crumb.
When it comes to the fruit, proper preparation is key. If you’re using canned crushed pineapple, drain it very thoroughly. Excess liquid will make your cake soggy. For frozen raspberries, there’s no need to thaw them; simply toss them directly with the extra flour. Tossing both the pineapple and raspberries in a tablespoon or two of flour before folding them into the batter is a crucial step. This light coating helps to suspend the fruit throughout the cake, preventing it from sinking to the bottom during baking. Without this step, you might end up with all your delicious fruit concentrated at the base of the cake.
Do not overmix the batter! Once you combine the wet and dry ingredients, stir only until just combined. A few lumps are perfectly fine and often indicate a properly mixed batter. Overmixing develops the gluten in the flour too much, leading to a tough and dry cake. For an extra golden crust, you can sprinkle a tablespoon of granulated sugar over the top of the batter just before baking. This will create a slightly caramelized and sparkling finish that adds both visual appeal and a pleasant texture contrast.
The Cuppa Cuppa Cake is incredibly versatile, making it perfect for endless variations. Feel free to experiment with different fruits. Blueberries, sliced peaches, diced apples, or a medley of mixed berries would all be fantastic substitutes for the pineapple and raspberries. If using larger fruits like apples or peaches, ensure they are diced into small, uniform pieces to ensure even cooking. For a tropical twist, you could add shredded coconut to the batter along with the fruit. A pinch of cinnamon or a dash of nutmeg can also be incorporated into the dry ingredients if you prefer a spiced cake, especially when using apples or pears.
Consider adding a simple glaze for an extra touch of sweetness and moisture. A basic glaze can be made by whisking powdered sugar with a little milk or lemon juice until it reaches a pourable consistency. Drizzle it over the cooled cake before serving. For a nutty crunch, fold in ½ cup of chopped walnuts or pecans along with the fruit. This adds another layer of texture and flavor that complements the fruit beautifully. This cake is also delicious with a dollop of whipped cream or a scoop of vanilla ice cream, making it an ideal dessert for any occasion.
Storage and Reheating
To keep your Cuppa Cuppa Cake fresh and delicious, proper storage is essential. Once the cake has cooled completely to room temperature, you can store it in an airtight container. If you have any remaining slices, place them in a container with a tight-fitting lid or wrap them tightly in plastic wrap to prevent them from drying out. Stored at room temperature, the cake will remain fresh for up to 2-3 days. For longer storage, you can refrigerate the cake, which will extend its freshness for up to 5-7 days. If refrigerating, it’s best to allow the cake to come to room temperature for about 15-20 minutes before serving, as the flavors and texture are often more pronounced when not served chilled.
If you’ve baked a larger batch or want to enjoy the cake over an extended period, the Cuppa Cuppa Cake freezes beautifully. To freeze, ensure the cake is completely cooled. You can freeze it whole, in halves, or as individual slices. Wrap the cake tightly in plastic wrap, then add another layer of aluminum foil to prevent freezer burn. Label with the date. Frozen cake can be stored for up to 2-3 months. To thaw, simply transfer the wrapped cake from the freezer to the refrigerator overnight, or leave it at room temperature for a few hours. Once thawed, it can be enjoyed as usual.
Reheating this cake is simple and can revive its freshly baked warmth. If you have individual slices, you can gently warm them in the microwave for 15-30 seconds, or until just warm through. Be careful not to overheat, as this can dry out the cake. Alternatively, you can place slices on a baking sheet and warm them in a preheated oven at 300°F (150°C) for about 5-10 minutes. This method helps to crisp up the edges slightly and brings out the cake’s comforting aromas. Whether served warm with a scoop of ice cream or at room temperature with a cup of coffee, the Cuppa Cuppa Cake is delightful in every bite.
Frequently Asked Questions
Can I use fresh pineapple instead of canned?
Yes, you can absolutely use fresh pineapple! If opting for fresh, make sure to peel, core, and dice it into small, uniform pieces, similar in size to crushed pineapple. It’s also a good idea to pat the fresh pineapple dry with paper towels to remove any excess moisture, as fresh pineapple can release more liquid than canned. Make sure to still toss it with a little flour before adding it to the batter to help prevent it from sinking.
What if I don’t have buttermilk?
No problem at all! You can easily make a homemade buttermilk substitute. Simply measure ½ cup of regular milk (dairy or non-dairy works) and stir in ½ tablespoon of lemon juice or white vinegar. Let the mixture sit for 5-10 minutes until it appears slightly curdled. This acidic mixture will react with the baking soda in the recipe, providing the necessary leavening and contributing to the cake’s moist and tender texture.
How can I prevent the fruit from sinking to the bottom of the cake?
The best way to prevent fruit from sinking is to lightly toss it with a tablespoon or two of all-purpose flour before folding it into the batter. This creates a thin coating around the fruit, which helps it to suspend more evenly throughout the cake as it bakes. Additionally, ensure your batter isn’t too thin; if it seems overly runny, the fruit is more likely to sink. Using the correct measurements for ingredients like buttermilk helps maintain the right batter consistency.
Can I make this cake ahead of time for an event?
Absolutely! The Cuppa Cuppa Cake is an excellent make-ahead dessert. It actually tastes even better the next day as the flavors have more time to meld together. Bake the cake according to the instructions, allow it to cool completely, and then store it in an airtight container at room temperature for up to 2-3 days, or in the refrigerator for up to 5-7 days. You can serve it at room temperature or gently warm individual slices just before serving.