
Introduction
Get ready to transform your weeknight dinners with a dish that’s a true celebration of flavor: Baked Sweet and Sour Chicken! This iconic takeout favorite, beloved for its irresistible combination of sweet, tangy, and savory notes, often comes with the guilt of deep-fried indulgence. But what if we told you that you could enjoy all the crispy, saucy goodness without the excessive oil and fuss? Our homemade baked version delivers on every front, offering a healthier, equally delicious, and incredibly satisfying meal that will have everyone asking for seconds.
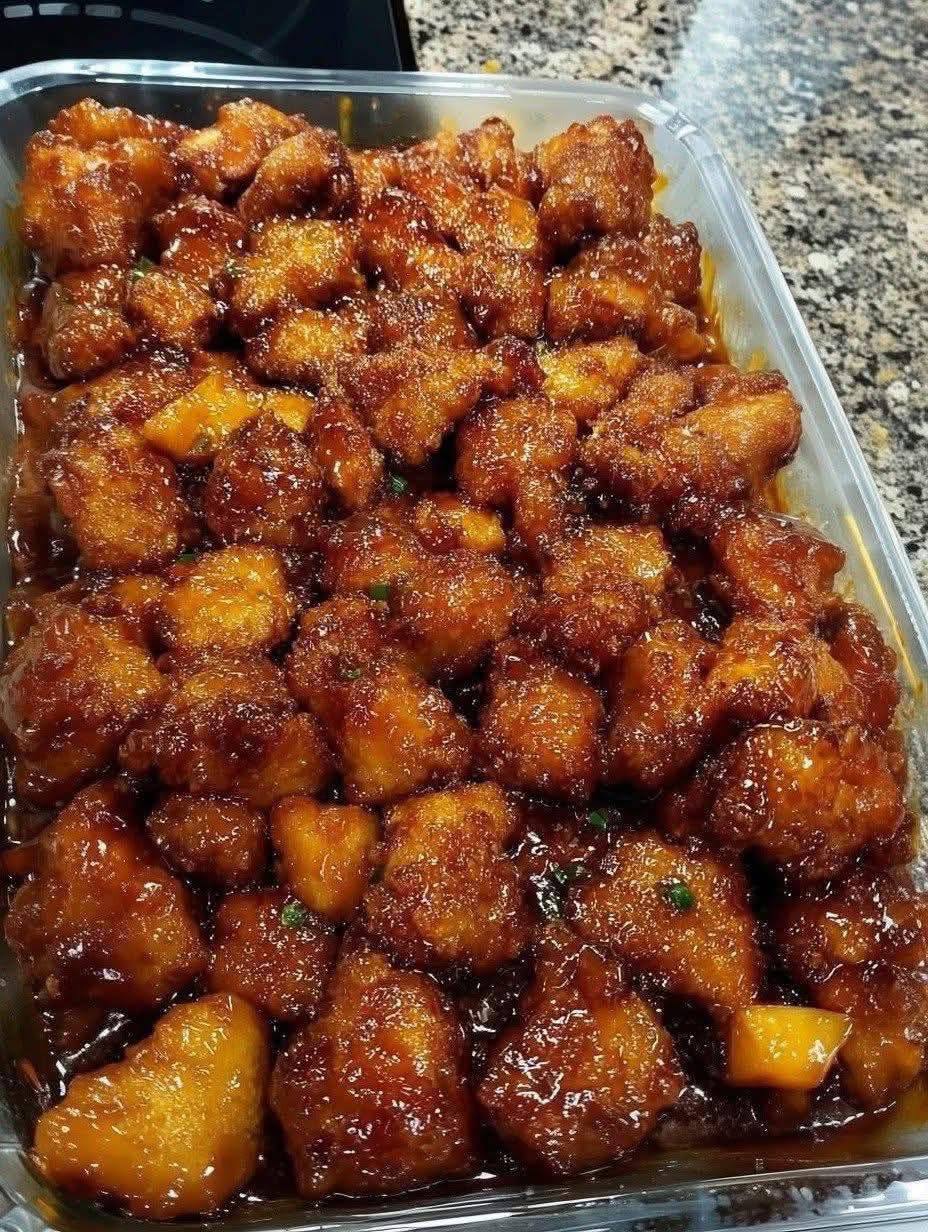
Imagine tender, bite-sized pieces of chicken, perfectly coated and baked to a golden crisp, then tossed in a vibrant, glossy sweet and sour sauce bursting with fresh pineapple. This isn’t just a meal; it’s an experience that brightens your plate and tantalizes your taste buds. Forget the greasy takeout containers and questionable ingredients; this recipe brings the magic of sweet and sour chicken right into your kitchen, empowering you to create a dish that’s both wholesome and utterly delicious. It’s an approachable take on a classic that proves you don’t need to sacrifice flavor for health.
This Baked Sweet and Sour Chicken recipe is designed for ease and maximum flavor impact. We’ve perfected the technique to ensure your chicken achieves that coveted crispy texture without a deep fryer, while our balanced sauce recipe hits all the right notes – not too sweet, not too sour, just pure perfection. It’s a family-friendly meal that’s quick enough for a busy weeknight but impressive enough for a weekend gathering. So, ditch the takeout menu and prepare to impress yourself and your loved ones with this fantastic homemade rendition. Let’s get cooking!
Nutritional Information
Per serving (approximate values):
- Calories: 420 kcal
- Protein: 35g
- Carbohydrates: 50g
- Fat: 10g
- Fiber: 3g
- Sodium: 650mg
Ingredients
For the Crispy Baked Chicken:
- 1.5 lbs boneless, skinless chicken breasts, cut into 1-inch pieces
- 1/2 teaspoon salt
- 1/4 teaspoon black pepper
- 1/2 teaspoon garlic powder
- 1 large egg, beaten
- 1/2 cup cornstarch
- 1 tablespoon olive oil (for baking sheet)
For the Sweet and Sour Sauce:
- 1/2 cup ketchup
- 1/4 cup rice vinegar
- 1/4 cup soy sauce (low sodium preferred)
- 1/4 cup packed light brown sugar (or honey/maple syrup)
- 1/4 cup pineapple juice (from canned pineapple or fresh)
- 1 tablespoon cornstarch
- 2 tablespoons water (for cornstarch slurry)
- 1 clove garlic, minced
- 1 teaspoon fresh ginger, grated (optional)
- 1/4 teaspoon red pepper flakes (optional, for a kick)
For Assembly and Garnish:
- 1 (8-ounce) can pineapple chunks, drained (reserve juice for sauce)
- 2 green onions, chopped (for garnish)
- Steamed white rice, for serving
- Steamed broccoli or bell peppers, for serving (optional)
Instructions
- Prepare the Chicken: Preheat your oven to 400°F (200°C). Line a large baking sheet with parchment paper for easy cleanup, then lightly grease it with 1 tablespoon of olive oil.
- Cut the chicken breasts into uniform 1-inch bite-sized pieces. Pat them dry with paper towels to ensure a crispy coating.
- In a medium bowl, season the chicken pieces with salt, black pepper, and garlic powder, tossing to coat evenly.
- In a separate shallow bowl, whisk the egg. In another shallow bowl, place the cornstarch.
- Working in batches, dip each chicken piece into the beaten egg, allowing excess to drip off. Then, dredge the chicken piece in the cornstarch, ensuring it’s fully coated. Gently shake off any excess cornstarch.
- Arrange the coated chicken pieces in a single layer on the prepared baking sheet, making sure they are not touching. This is crucial for crispiness.
- Bake the Chicken: Bake the chicken for 15-20 minutes, flipping halfway through, until golden brown, crispy, and cooked through (internal temperature reaches 165°F or 74°C). The exact time may vary depending on the size of your chicken pieces and oven.
- Make the Sweet and Sour Sauce: While the chicken bakes, prepare the sauce. In a medium saucepan, combine the ketchup, rice vinegar, soy sauce, brown sugar, pineapple juice, minced garlic, and grated ginger (if using). Whisk until well combined.
- Bring the sauce mixture to a simmer over medium heat, stirring occasionally.
- In a small bowl, whisk together the 1 tablespoon of cornstarch with 2 tablespoons of water to create a cornstarch slurry.
- Once the sauce is simmering, slowly pour the cornstarch slurry into the saucepan while continuously whisking. Continue to cook and stir for 1-2 minutes, until the sauce thickens to your desired consistency. Remove from heat. If using, stir in the red pepper flakes now.
- Combine and Serve: Once the chicken is baked and crispy, carefully remove it from the oven.
- In a large bowl, combine the baked chicken pieces with the drained pineapple chunks.
- Pour the thickened sweet and sour sauce over the chicken and pineapple. Gently toss everything together until all the chicken pieces are evenly coated in the glossy sauce.
- Transfer the Baked Sweet and Sour Chicken to a serving platter. Garnish generously with chopped green onions.
- Serve immediately with freshly steamed white rice and your favorite steamed vegetables like broccoli or bell peppers for a complete and satisfying meal.
Cooking Tips and Variations
Tips for Success:
- Don’t Overcrowd the Baking Sheet: For truly crispy chicken, ensure there’s space between each piece on the baking sheet. If crowded, the chicken will steam instead of crisp, resulting in a softer texture. Use two baking sheets if necessary.
- Pat Chicken Dry: Excess moisture on the chicken prevents the cornstarch coating from sticking properly and inhibits crisping. Always pat your chicken pieces thoroughly dry with paper towels before seasoning and coating.
- Adjust Sauce to Taste: The beauty of homemade sauce is customization! Taste the sweet and sour sauce as it simmers. If you prefer it sweeter, add a touch more brown sugar. If you like it tangier, add a bit more rice vinegar.
- Cornstarch Slurry Consistency: Ensure your cornstarch slurry is smooth and lump-free before adding it to the sauce. This prevents lumps in your final sauce. Add it slowly while whisking to control the thickness.
- Air Fryer Option: For an even crispier chicken with less oil, you can cook the coated chicken pieces in an air fryer at 375°F (190°C) for 12-15 minutes, shaking the basket halfway through, until golden and cooked.
- Fresh Ginger and Garlic: While garlic powder works in a pinch for the chicken, fresh minced garlic and grated ginger in the sauce add a depth of flavor that really elevates the dish. Don’t skip them if you have them.
- Serving Immediately: For the best texture, serve the sweet and sour chicken as soon as it’s tossed with the sauce. The sauce will gradually soften the crispiness of the chicken over time.
Variations:
- Add Vegetables: Boost the nutrition and color by adding bell peppers (red, green, yellow), sliced onions, or carrots to the dish. You can either sauté them lightly and add them to the sauce with the pineapple, or roast them alongside the chicken during the last 10 minutes of baking.
- Different Proteins: This recipe is incredibly versatile. Substitute chicken with shrimp (reduce cooking time significantly, about 5-7 minutes in the oven or air fryer), firm tofu (pressed and cubed, then coated and baked), or even pork tenderloin.
- Spicy Kick: For those who love a little heat, increase the amount of red pepper flakes in the sauce, or add a dash of sriracha or a few drops of chili oil to the finished dish.
- Honey-Garlic Variation: For a slightly different flavor profile, reduce the brown sugar and add a tablespoon or two of honey to the sauce. You can also increase the garlic for a more pronounced garlic flavor.
- Sesame Twist: A drizzle of toasted sesame oil at the very end, just before serving, can add a wonderful nutty aroma to the dish. A sprinkle of toasted sesame seeds also makes a beautiful garnish.
- Fruit Alternatives: While pineapple is classic, you can experiment with other fruits like mandarin orange segments (add at the end to avoid mushiness) or even sliced peaches for a unique twist.
Storage and Reheating
Storage:
To store leftover Baked Sweet and Sour Chicken, allow it to cool completely to room temperature first. Transfer the chicken and sauce to an airtight container. It can be stored in the refrigerator for up to 3-4 days. For optimal freshness and to prevent the chicken from becoming too soggy, it’s best to store the chicken and sauce separately if possible, especially if you anticipate having a good amount of leftovers. However, if already tossed, storing together is fine.
Reheating:
While the chicken will lose some of its original crispiness once it’s been coated in sauce and refrigerated, you can still reheat it effectively to enjoy your leftovers.
- Oven/Toaster Oven (Recommended for best texture): Preheat your oven or toaster oven to 350°F (175°C). Spread the leftover sweet and sour chicken in a single layer on a baking sheet. Reheat for 10-15 minutes, or until heated through and slightly crisped on the edges. This method helps to re-crisp the chicken slightly and prevent it from becoming overly soft.
- Microwave (Quickest, but softer texture): For a quick reheat, place the desired portion of chicken and sauce in a microwave-safe dish. Cover loosely and microwave on medium power for 1-2 minutes, stirring halfway through, until heated through. Be careful not to overheat, as this can make the chicken tough.
- Stovetop: Heat a non-stick skillet over medium heat with a tiny bit of oil (if needed). Add the leftover sweet and sour chicken and stir-fry gently for 5-7 minutes, breaking up any clumps, until heated through. This can help evaporate some moisture and improve the texture slightly.
Regardless of the reheating method, it’s a good idea to serve reheated sweet and sour chicken with freshly made rice and perhaps some steamed vegetables to complement the flavors and textures.
Frequently Asked Questions
How do I ensure my baked chicken is crispy and not soggy?
The key to crispy baked chicken lies in a few crucial steps. First, always pat your chicken pieces thoroughly dry with paper towels before coating. Moisture is the enemy of crispiness. Second, ensure that each chicken piece is completely coated in cornstarch, as this creates the crispy exterior. Finally, and most importantly, arrange the chicken in a single layer on your baking sheet with plenty of space between each piece. Overcrowding causes the chicken to steam rather than bake and crisp. Using a preheated oven and not opening the oven door too frequently also helps maintain consistent heat for optimal crisping.
Can I prepare the sweet and sour sauce ahead of time?
Absolutely! The sweet and sour sauce is an excellent component to prepare in advance. You can make the sauce up to 2-3 days ahead of time and store it in an airtight container in the refrigerator. When you’re ready to serve, simply reheat the sauce gently on the stovetop over low heat, stirring frequently, until it’s warmed through and returns to its desired consistency. If it’s too thick after chilling, you can thin it out with a tablespoon of water or pineapple juice until it reaches your preferred pourable consistency.
What are some good side dishes to serve with Baked Sweet and Sour Chicken?
This dish pairs wonderfully with simple sides that complement its vibrant flavors. The classic choice is steamed white rice, which soaks up the delicious sauce beautifully. For added nutrition and color, consider serving it alongside steamed or lightly stir-fried vegetables such as broccoli florets, snap peas, sliced bell peppers, or carrots. A simple side salad with a light vinaigrette would also be a refreshing contrast. For a heartier meal, you could even serve it with brown rice or quinoa.
Can I use chicken thighs instead of chicken breasts?
Yes, you can absolutely use boneless, skinless chicken thighs instead of chicken breasts for this recipe. Chicken thighs tend to be more forgiving and remain juicier due to their higher fat content. The preparation steps for cutting, seasoning, and coating would be the same. The baking time might need a slight adjustment, potentially a few minutes longer, to ensure they are cooked through and crispy. Just make sure to cut them into uniform 1-inch pieces for even cooking.