
Introduction
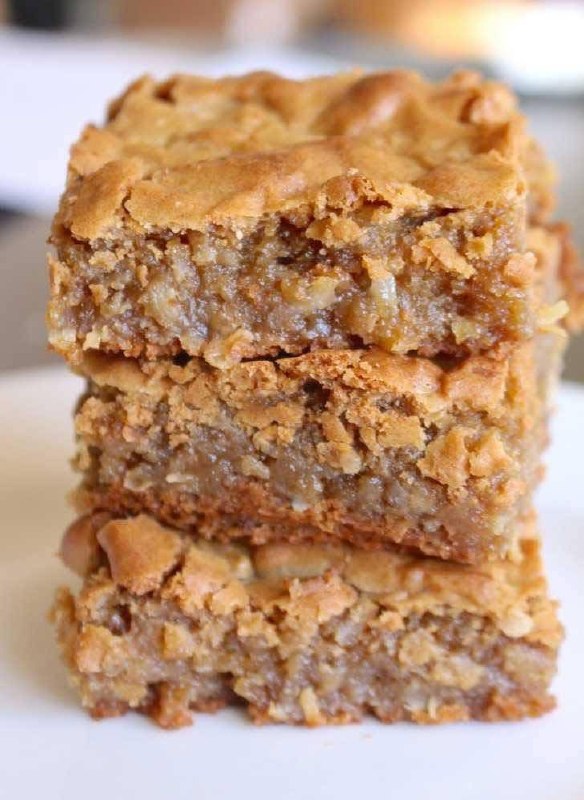
Get ready to fall head over heels for a dessert that’s as comforting as it is irresistibly delicious: Coconut Chewies! Imagine biting into a warm, golden-brown bar, its exterior offering a slight crispness that gives way to a wonderfully moist, dense, and supremely chewy interior. Every mouthful is packed with the tropical sweetness of coconut, perfectly balanced with the rich, caramelized notes of brown sugar. These delightful bars are more than just a treat; they’re a sensory experience that transports you to a sun-drenched paradise with every bite, making them a perennial favorite for good reason.
What makes these Coconut Chewies truly special is their remarkable texture. Unlike a crumbly cookie or a fluffy cake, these bars boast a satisfying chewiness that lingers on the palate, thanks to the generous amount of shredded coconut and the magic of brown sugar. They strike that perfect balance between soft and firm, moist and dense, ensuring each piece is a harmonious blend of flavors and sensations. They’re incredibly easy to whip up, making them an ideal choice for both seasoned bakers and kitchen novices looking for a foolproof recipe that consistently delivers rave reviews.
Whether you’re packing them in lunchboxes, sharing them at a potluck, serving them up with a hot cup of coffee, or simply indulging in a quiet moment of self-care, Coconut Chewies are the ultimate crowd-pleaser. Their universal appeal lies in their familiar, comforting taste and their undeniably addictive texture. So, if you’re searching for a dessert that’s guaranteed to bring smiles, evoke a touch of nostalgia, and satisfy even the most intense sweet cravings, look no further. These homemade Coconut Chewies are about to become your new go-to recipe, promising pure coconut bliss in every single square.
Nutritional Information
Per serving (approximate values):
- Calories: 280
- Protein: 3g
- Carbohydrates: 35g
- Fat: 15g
- Fiber: 2g
- Sodium: 120mg
Ingredients
- 1 cup (2 sticks) unsalted butter, softened
- 1 cup packed light brown sugar
- 1/2 cup granulated sugar
- 2 large eggs
- 1 teaspoon vanilla extract
- 2 cups all-purpose flour
- 1 teaspoon baking powder
- 1/2 teaspoon salt
- 3 cups sweetened shredded coconut
Instructions
- Preheat your oven to 350°F (175°C). Line a 9×13 inch baking pan with parchment paper, leaving an overhang on the sides to easily lift the bars out later. Lightly grease the parchment paper with cooking spray or butter.
- In a large mixing bowl, using an electric mixer on medium speed, cream together the softened unsalted butter, packed light brown sugar, and granulated sugar until the mixture is light and fluffy, about 2-3 minutes. Scrape down the sides of the bowl as needed to ensure everything is well combined.
- Add the large eggs one at a time, beating well after each addition until fully incorporated. Stir in the vanilla extract until just combined.
- In a separate medium bowl, whisk together the all-purpose flour, baking powder, and salt until thoroughly combined. This ensures the leavening agent and salt are evenly distributed throughout the dry ingredients.
- Gradually add the dry ingredients to the wet ingredients, mixing on low speed until just combined. Be careful not to overmix the batter; overmixing can lead to tough bars. The dough will be thick.
- Fold in the sweetened shredded coconut using a spatula or spoon until it is evenly distributed throughout the dough. Ensure every spoonful of dough has a good amount of coconut.
- Evenly spread the coconut mixture into the prepared 9×13 inch baking pan. You may find it easiest to use the back of a spoon or your greased fingertips to press the dough firmly and evenly into the pan, extending all the way to the edges.
- Bake for 25-30 minutes, or until the edges are golden brown and the center is set. A toothpick inserted into the center should come out clean or with moist crumbs attached, but not wet batter. Avoid overbaking, as this can make the bars dry and less chewy.
- Once baked, remove the pan from the oven and place it on a wire rack to cool completely. This step is crucial for the bars to set properly and achieve their signature chewy texture.
- Once completely cooled (this may take 1-2 hours), use the parchment paper overhang to lift the entire slab of Coconut Chewies out of the pan. Place it on a cutting board.
- Using a sharp knife, cut the bars into 24 squares or rectangles (4 rows by 6 columns, or your preferred size). For cleaner cuts, you can chill the bars in the refrigerator for about 30 minutes before cutting.
- Serve and enjoy your delicious homemade Coconut Chewies!
Cooking Tips and Variations
For the best Coconut Chewies, always start with room temperature butter and eggs. This helps them cream together more smoothly with the sugars, creating a lighter, more uniform batter that bakes evenly. If your butter isn’t soft enough, you can cut it into smaller pieces and let it sit for 15-20 minutes, or microwave it on low power in 5-second increments until just softened, but not melted. Overmixing the flour can develop the gluten too much, leading to tough bars instead of wonderfully chewy ones, so mix until just combined.
When pressing the dough into the pan, take your time to ensure it’s an even layer from edge to edge. This promotes uniform baking, preventing some parts from being overdone while others are still undercooked. Lining your baking pan with parchment paper, leaving an overhang on all sides, is a game-changer for easy removal. It prevents sticking and allows you to lift the entire slab out in one piece, making cutting much simpler and cleaner. And speaking of cutting, patience is key! Resist the urge to cut into the bars while they’re still warm. Cooling them completely, or even chilling them for 30 minutes in the refrigerator, will result in much cleaner, less crumbly cuts.
For flavor variations, consider adding 1 cup of mini chocolate chips or chopped nuts (like pecans or walnuts) along with the coconut for an extra layer of texture and taste. A teaspoon of almond extract can be substituted for half of the vanilla extract to enhance the nutty flavor profile. For a zesty twist, add 1 tablespoon of finely grated orange or lemon zest to the batter. If you prefer a richer coconut flavor, you can lightly toast about half a cup of the shredded coconut in a dry skillet over medium-low heat until fragrant and golden brown, then fold it into the batter along with the untoasted coconut. This adds a lovely depth that is simply irresistible.
Storage and Reheating
Once your Coconut Chewies have completely cooled, store them in an airtight container at room temperature for up to 3-4 days. Placing a piece of parchment paper between layers of bars can prevent them from sticking together. For longer storage, you can refrigerate them in an airtight container for up to a week. The chewiness might become slightly firmer when cold, but they will still be delicious.
Coconut Chewies also freeze beautifully. Once completely cooled and cut, place them in a single layer on a baking sheet and freeze for about an hour until firm. Then, transfer the frozen bars to an airtight freezer-safe container or a heavy-duty freezer bag, separating layers with parchment paper. They can be stored in the freezer for up to 3 months. Thaw frozen bars at room temperature for a few hours, or overnight in the refrigerator, before serving. There’s no need to reheat them; they are best enjoyed at room temperature or slightly chilled, where their chewy texture truly shines.
Frequently Asked Questions
What kind of coconut should I use for Coconut Chewies?
For these Coconut Chewies, it is highly recommended to use sweetened shredded coconut. Sweetened coconut adds crucial moisture and a delightful sweetness that is key to the chewy texture and overall flavor profile of the bars. Unsweetened coconut can be used, but it will result in a less sweet and potentially drier bar, so you might need to adjust the sugar content slightly.
My Coconut Chewies turned out dry and crumbly. What went wrong?
The most common reason for dry and crumbly Coconut Chewies is overbaking. Keep a close eye on them in the oven; they should be golden brown around the edges and just set in the center. Overmixing the dough can also lead to a tougher, drier texture. Ensure you mix the dry ingredients into the wet ingredients only until just combined, and no longer.
Can I make these Coconut Chewies gluten-free?
Yes, you can often adapt this recipe to be gluten-free. Substitute the all-purpose flour with a 1:1 gluten-free baking flour blend that contains xanthan gum. The texture might be slightly different, but it should still yield delicious results. Always check the specific recommendations for your chosen gluten-free flour blend, as some may require slight adjustments to liquid content.
How can I get perfectly clean cuts for my Coconut Chewies?
To achieve perfectly clean cuts, the most important step is to ensure the bars are completely cooled before slicing. For even sharper, less crumbly edges, chill the baked and cooled slab of bars in the refrigerator for at least 30 minutes (or even an hour) before cutting. Use a large, sharp knife and wipe it clean between each cut to prevent stickiness and ensure a smooth slice.