
Introduction
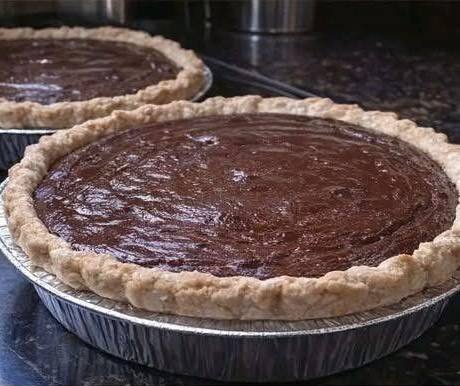
There are some desserts that transcend mere recipes and become woven into the fabric of our memories, and Grandma’s Chocolate Pie is undoubtedly one of them. This isn’t just any chocolate pie; it’s the kind that evokes warm kitchen comforts, the gentle hum of family gatherings, and the unmistakable taste of pure, unadulterated love. With its impossibly rich, velvety smooth chocolate filling nestled within a perfectly flaky, golden crust, this pie is a timeless classic that has graced countless tables and stolen even more hearts. It’s the quintessential dessert for holidays, Sunday dinners, or simply when you crave a slice of homemade bliss.
What makes Grandma’s Chocolate Pie truly special is its deceptive simplicity combined with an unparalleled depth of flavor. Unlike some overly complex desserts, this recipe relies on quality ingredients and straightforward techniques to create magic. The chocolate filling is a dream—creamy, intensely chocolatey, and perfectly set, offering a luxurious experience with every bite. And that crust? It’s the ideal counterpoint, buttery and crisp, offering a delightful textural contrast to the silken filling. This pie isn’t just a dessert; it’s a culinary hug, a taste of tradition, and a testament to the enduring power of a well-loved family recipe.
Whether you’re a seasoned baker or just starting your journey in the kitchen, this Grandma’s Chocolate Pie recipe promises a rewarding experience. It’s versatile enough for any occasion, from a casual weeknight treat to the star of your holiday dessert table. We’ll guide you through every step, ensuring you achieve that perfect balance of rich chocolate, creamy texture, and flaky crust that makes this pie so unforgettable. Get ready to create new cherished memories with a dessert that tastes like home.
Nutritional Information
Per serving (approximate values):
- Calories: 450
- Protein: 7g
- Carbohydrates: 55g
- Fat: 25g
- Fiber: 3g
- Sodium: 250mg
Ingredients
For the Pie Crust (One 9-inch pie crust, homemade or good quality store-bought)
- 1 ¼ cups all-purpose flour
- ½ teaspoon salt
- ½ cup (1 stick) unsalted butter, very cold and cut into ½-inch cubes
- ¼ cup ice water (or more, as needed)
For the Chocolate Filling
- 1 ½ cups granulated sugar
- ½ cup unsweetened cocoa powder (good quality, Dutch-processed for richer flavor)
- ¼ cup all-purpose flour (for thickening)
- ½ teaspoon salt
- 2 cups whole milk
- 4 large egg yolks
- 2 tablespoons unsalted butter
- 1 teaspoon vanilla extract
- 4 ounces semi-sweet chocolate, finely chopped (chocolate chips can work, but chopped bar chocolate melts smoother)
For Garnish (Optional)
- Whipped cream
- Chocolate shavings or cocoa powder
Instructions
- Prepare the Pie Crust: If making homemade crust, in a large bowl, whisk together the flour and salt. Add the cold butter cubes and, using a pastry blender, your fingertips, or a food processor, cut the butter into the flour until the mixture resembles coarse crumbs with some pea-sized butter pieces remaining.
- Gradually add the ice water, one tablespoon at a time, mixing until the dough just comes together. Be careful not to overmix. Form the dough into a disc, wrap tightly in plastic wrap, and refrigerate for at least 30 minutes (or up to 2 days).
- On a lightly floured surface, roll out the chilled dough into a 12-inch circle. Carefully transfer the dough to a 9-inch pie plate. Trim the edges, leaving about a ½-inch overhang, and crimp decoratively. Prick the bottom of the crust all over with a fork.
- Blind Bake the Crust: Preheat your oven to 375°F (190°C). Line the pie crust with parchment paper and fill with pie weights, dried beans, or rice. Bake for 15 minutes. Remove the parchment paper and weights, then continue baking for another 5-10 minutes, or until the crust is lightly golden brown. Remove from oven and let cool completely on a wire rack. Reduce oven temperature to 350°F (175°C).
- Prepare the Chocolate Filling: In a medium saucepan, whisk together the granulated sugar, cocoa powder, flour, and salt until well combined and no lumps remain.
- Gradually whisk in the whole milk until smooth. Place the saucepan over medium heat, stirring constantly, until the mixture thickens and comes to a gentle boil. Continue to cook, stirring, for 1-2 minutes to cook out the flour taste.
- In a small bowl, whisk the egg yolks. Temper the egg yolks by slowly drizzling about ½ cup of the hot chocolate mixture into the yolks while whisking constantly. This prevents the eggs from scrambling.
- Pour the tempered egg yolk mixture back into the saucepan with the remaining chocolate mixture. Continue to cook over medium heat, stirring constantly, for another 1-2 minutes, until the filling is very thick and coats the back of a spoon. Do not boil vigorously once the egg yolks are added.
- Remove the saucepan from the heat. Stir in the 2 tablespoons of butter, vanilla extract, and finely chopped semi-sweet chocolate until the butter and chocolate are completely melted and the filling is smooth and glossy.
- Assemble and Bake the Pie: Pour the hot chocolate filling into the pre-baked and cooled pie crust.
- Carefully transfer the pie to the preheated 350°F (175°C) oven. Bake for 15-20 minutes, or until the edges of the filling are set but the center still has a slight wobble. Do not overbake, as this can cause cracks.
- Chill the Pie: Remove the pie from the oven and let it cool completely on a wire rack at room temperature for at least 1-2 hours. Once cooled to room temperature, loosely cover the pie with plastic wrap and refrigerate for a minimum of 4 hours, or preferably overnight, to allow the filling to fully set.
- Serve and Enjoy: Once thoroughly chilled, slice the pie with a sharp knife. Serve cold, garnished with whipped cream and chocolate shavings or a dusting of cocoa powder, if desired.
Cooking Tips and Variations
Achieving pie perfection is all about a few key details. For a truly flaky crust, ensure your butter is very cold and work the dough as little as possible. Overworking develops gluten, leading to a tough crust. Blind baking is crucial for a chocolate cream pie to prevent a soggy bottom; make sure your crust is golden brown before adding the filling. When making the filling, whisk constantly to prevent scorching and lumps. Tempering the egg yolks slowly is vital to prevent them from scrambling – go slow and steady. For the best flavor, use high-quality cocoa powder and semi-sweet chocolate; the better your ingredients, the richer your pie will taste. Don’t overbake the filling; it will continue to set as it cools and chills. A slight wobble in the center is perfect when you pull it from the oven.
This classic recipe is also wonderfully versatile. You can experiment with different types of chocolate: for a more intense flavor, try bittersweet chocolate; for a milder, sweeter pie, use milk chocolate, adjusting sugar levels if necessary. Add a hint of espresso powder (about 1 teaspoon) to the filling along with the cocoa to deepen the chocolate flavor without making it taste like coffee. A splash of your favorite liqueur, such as Kahlúa, Grand Marnier, or even a good bourbon, can add an adult twist. For a mint chocolate pie, add a few drops of peppermint extract to the filling. You can also vary the crust: a chocolate wafer crust or a graham cracker crust would make a delicious no-bake alternative, though the baking time for the filling would need to be adjusted or it would become a fully no-bake filling. For garnishes, consider toasted coconut flakes, chopped nuts (like pecans or walnuts), or even a sprinkle of sea salt on top for a salted caramel chocolate pie effect. For a gluten-free option, simply use a pre-made gluten-free pie crust or make your own with a gluten-free flour blend.
Storage and Reheating
Grandma’s Chocolate Pie is best enjoyed chilled. Store any leftover pie tightly covered with plastic wrap in the refrigerator. It will keep well for 3-4 days. While technically edible beyond that, the crust may start to soften, and the flavors can diminish. Freezing is generally not recommended for custard-based pies, as the filling can become watery and the texture can change upon thawing, making it less smooth and creamy. If you must freeze it, wrap individual slices tightly in plastic wrap, then aluminum foil, and freeze for up to 1 month. Thaw overnight in the refrigerator before serving. There is no need to “reheat” this pie; it is always served cold. Simply remove it from the refrigerator about 15-20 minutes before serving to take the chill off slightly, which can enhance the flavor and texture of the filling, making it even more luscious.
Frequently Asked Questions
Why did my chocolate pie filling crack?
Cracking in chocolate pie filling is usually caused by overbaking or cooling too quickly. Overbaking dries out the custard, making it more prone to cracking. Cooling the pie slowly at room temperature before refrigerating helps prevent thermal shock that can cause cracks. Ensure you remove the pie from the oven when the edges are set but the center still has a slight wobble.
Can I make this pie ahead of time?
Absolutely! This pie is an excellent make-ahead dessert. In fact, it requires significant chilling time to properly set, so preparing it the day before you plan to serve it is ideal. It allows the flavors to meld and the filling to achieve its perfect creamy texture. Store it covered in the refrigerator.
My pie crust turned out soggy. What went wrong?
A soggy pie crust is a common issue, often due to not blind baking the crust sufficiently or not pricking the bottom before baking. Blind baking creates a barrier that prevents the wet filling from seeping into the dough. Ensure your crust is fully baked and lightly golden before adding the filling. Also, make sure the crust is completely cooled before pouring in the warm filling.
What kind of chocolate is best for this pie?
For the best flavor and texture, use a good quality semi-sweet chocolate bar, finely chopped, rather than chocolate chips. Chocolate chips contain stabilizers that prevent them from melting as smoothly. Dutch-processed cocoa powder is also recommended for a richer, darker chocolate flavor in the filling.