
Introduction
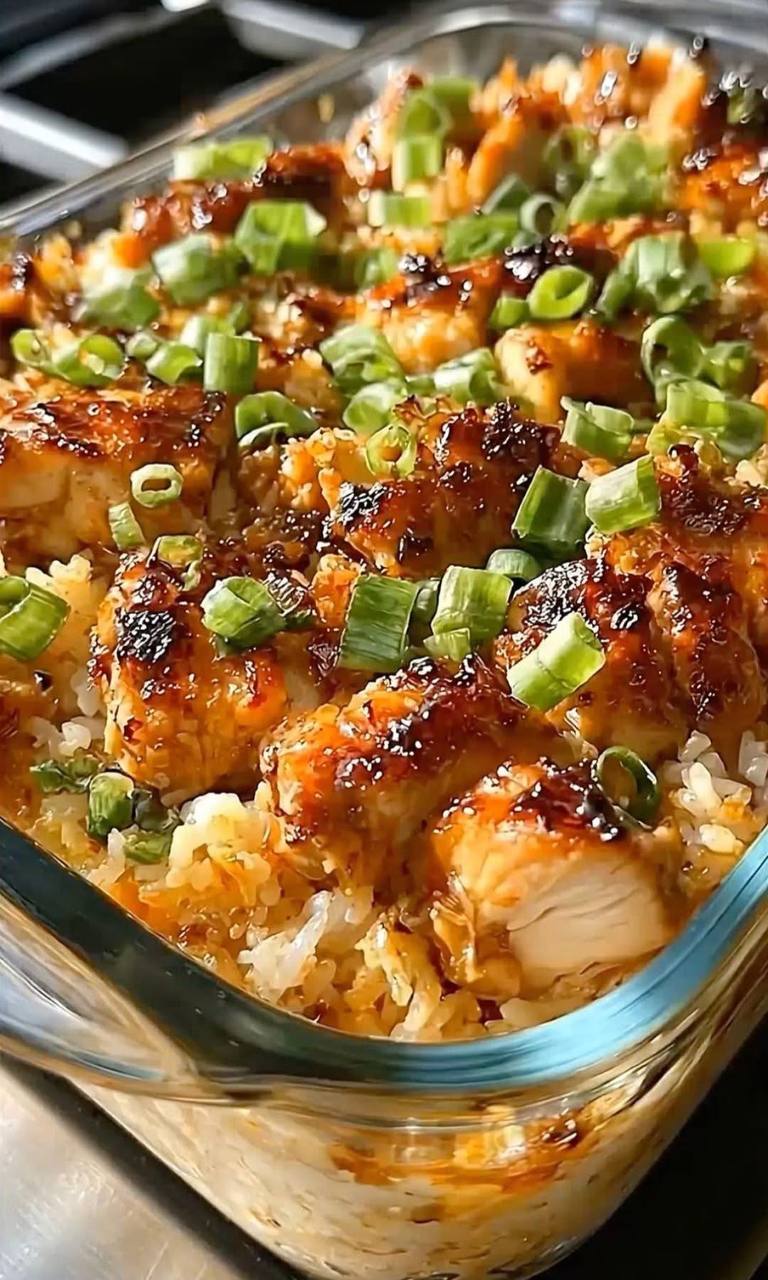
Get ready to transform your weeknight dinner routine with a dish that’s bursting with flavor, incredibly satisfying, and delightfully easy to prepare: Teriyaki Chicken Casserole! This isn’t just another casserole; it’s a harmonious blend of sweet and savory teriyaki goodness, tender chicken, fluffy rice, and vibrant vegetables, all baked together in one comforting dish. Imagine succulent pieces of chicken, coated in a glistening, umami-rich teriyaki glaze, nestled amongst perfectly cooked rice, creating a meal that’s both exotic and familiar. It’s the ultimate comfort food with an Asian-inspired twist, promising to become a new family favorite.
What makes this Teriyaki Chicken Casserole truly special is its effortless elegance. Forget about juggling multiple pots and pans; this recipe streamlines the cooking process into a single baking dish, making cleanup a breeze. It’s the perfect solution for busy evenings when you crave a homemade meal but are short on time. The magic lies in how all the ingredients meld together in the oven, creating layers of flavor that deepen with every bite. From the first tantalizing aroma that fills your kitchen to the last spoonful, this casserole delivers a culinary experience that’s both hearty and surprisingly light.
Whether you’re a seasoned chef or a kitchen novice, this Teriyaki Chicken Casserole recipe is designed for success. It’s a versatile dish that can be customized to your taste, allowing you to incorporate your favorite vegetables or experiment with different rice varieties. The sweet and savory notes of the teriyaki sauce perfectly complement the tender chicken and fluffy rice, creating a balanced and incredibly addictive flavor profile. Prepare to impress your family and friends with this simple yet sophisticated dish that brings the deliciousness of your favorite Asian-inspired flavors right to your dinner table.
Nutritional Information
Per serving (approximate values):
- Calories: 480
- Protein: 35g
- Carbohydrates: 55g
- Fat: 12g
- Fiber: 3g
- Sodium: 850mg
Ingredients
- 2 tablespoons olive oil
- 1.5 pounds boneless, skinless chicken breasts or thighs, cut into 1-inch cubes
- 1 large yellow onion, chopped
- 2 cloves garlic, minced
- 2 cups uncooked white rice, rinsed
- 3.5 cups chicken broth
- 1/2 cup soy sauce (low sodium preferred)
- 1/4 cup brown sugar, packed
- 2 tablespoons rice vinegar
- 1 tablespoon grated fresh ginger
- 1 teaspoon sesame oil
- 1/2 teaspoon black pepper
- 1 cup frozen mixed vegetables (peas, carrots, corn), thawed
- 1/2 cup chopped green onions, for garnish
- 1 tablespoon sesame seeds, for garnish (optional)
Instructions
- Preheat your oven to 375°F (190°C). Lightly grease a 9×13 inch baking dish.
- Heat the olive oil in a large skillet or Dutch oven over medium-high heat. Add the cubed chicken and cook, stirring occasionally, until lightly browned on all sides, about 5-7 minutes. The chicken does not need to be cooked through at this stage. Remove the chicken from the skillet and set aside.
- Add the chopped yellow onion to the same skillet and cook until softened, about 3-5 minutes. Add the minced garlic and cook for another minute until fragrant.
- Stir in the rinsed white rice, chicken broth, soy sauce, brown sugar, rice vinegar, grated ginger, sesame oil, and black pepper. Bring the mixture to a simmer, stirring well to dissolve the brown sugar.
- Carefully pour the rice mixture into the prepared baking dish. Spread it evenly.
- Arrange the browned chicken cubes evenly over the rice mixture.
- Cover the baking dish tightly with aluminum foil.
- Bake for 30 minutes.
- Remove the casserole from the oven and carefully remove the foil. Stir in the thawed frozen mixed vegetables.
- Recover the casserole with foil and bake for an additional 15-20 minutes, or until the rice is tender and has absorbed most of the liquid, and the chicken is cooked through.
- If you prefer a slightly crispier top, remove the foil for the last 5 minutes of baking, or place under the broiler for 1-2 minutes (watch carefully to prevent burning).
- Once baked, remove the casserole from the oven and let it rest, covered, for 5-10 minutes before serving. This allows the flavors to meld and the rice to fully set.
- Garnish with chopped green onions and sesame seeds, if desired, before serving hot.
Cooking Tips and Variations
For the ultimate Teriyaki Chicken Casserole experience, consider these handy tips and creative variations. To prevent the casserole from drying out, ensure your baking dish is tightly covered with foil during the initial baking phase. This traps steam and helps the rice cook perfectly while keeping the chicken moist. Don’t be tempted to overbake; once the rice is tender and the liquid is absorbed, it’s done. Allowing it to rest for 5-10 minutes after baking, still covered, is crucial for the rice to become fluffy and for the flavors to fully meld.
Elevate the flavor by marinating your chicken cubes in a little extra teriyaki sauce (about 1/4 cup) for at least 30 minutes before browning. This infuses the chicken with deeper flavor from the start. If you’re short on time, using pre-cooked rotisserie chicken can significantly cut down on prep. Simply shred or cube the cooked chicken and add it directly to the casserole with the rice mixture before baking, reducing the initial cooking time for the chicken.
This casserole is incredibly versatile. Feel free to add more vegetables! Broccoli florets, sliced bell peppers, or snap peas are excellent additions. You can sauté them briefly with the onions or add them directly with the frozen mixed vegetables. For a different texture, consider adding water chestnuts for a pleasant crunch. If you’re looking to boost the umami, a teaspoon of miso paste dissolved in a little warm water can be added to the sauce mixture. For a spicier kick, a dash of sriracha or red pepper flakes can be incorporated into the teriyaki sauce.
Experiment with different rice varieties: brown rice will work, but it will require more liquid (about 4.5-5 cups chicken broth) and a longer baking time (around 60-75 minutes total). Quinoa can also be used for a gluten-free option, following package directions for liquid and adjusting baking time. For a richer flavor, consider adding a layer of shredded mozzarella or cheddar cheese on top during the last 10 minutes of baking. This creates a gooey, savory crust that complements the teriyaki beautifully. Don’t forget that a drizzle of extra sesame oil or a sprinkle of toasted sesame seeds before serving can enhance the aromatic qualities of the dish.
Storage and Reheating
Storing your Teriyaki Chicken Casserole properly ensures you can enjoy delicious leftovers for days. Once the casserole has cooled completely to room temperature, transfer it to an airtight container. It can be stored in the refrigerator for up to 3-4 days. For longer storage, you can freeze individual portions. Place cooled casserole into freezer-safe containers or heavy-duty freezer bags, removing as much air as possible. It will keep well in the freezer for up to 2-3 months. Thaw frozen casserole overnight in the refrigerator before reheating.
When reheating, for best results, cover individual portions loosely with foil or a microwave-safe lid and microwave on medium power, stirring occasionally, until heated through. This usually takes 2-4 minutes depending on your microwave and portion size. If reheating a larger amount, preheat your oven to 300°F (150°C). Place the casserole in an oven-safe dish, cover it tightly with foil, and bake for 20-30 minutes, or until heated through. Adding a tablespoon or two of chicken broth or water before reheating can help add moisture and prevent the rice from drying out. Avoid overheating, as this can make the chicken tough and the rice dry.
Frequently Asked Questions
What kind of rice is best for Teriyaki Chicken Casserole?
While white rice (like long-grain or jasmine) is commonly used and works wonderfully for its fluffy texture and ability to absorb flavors, you can also use brown rice for a healthier, nuttier alternative. Just be aware that brown rice will require more liquid and a longer baking time. Instant rice is not recommended as it can become mushy in a casserole.
Can I make this casserole ahead of time?
Yes, this casserole is great for meal prep! You can assemble the entire casserole (without baking) up to one day in advance. Cover it tightly with plastic wrap and refrigerate. When ready to bake, remove it from the refrigerator about 30 minutes before baking to allow it to come closer to room temperature, then bake as directed, possibly adding an extra 10-15 minutes to the baking time.
How can I make this casserole spicier?
To add a kick to your Teriyaki Chicken Casserole, you have a few options. You can incorporate 1/2 to 1 teaspoon of red pepper flakes into the teriyaki sauce mixture. Alternatively, add a tablespoon of sriracha or a few drops of your favorite hot sauce directly into the sauce. For an extra layer of heat, a pinch of cayenne pepper can be added to the chicken while browning.
What if my casserole looks dry after baking?
If your casserole appears dry after the recommended baking time, it might be due to variations in oven temperature or dish size. You can try adding a splash (1/4 to 1/2 cup) of additional chicken broth or water, cover it tightly, and bake for another 10-15 minutes. To prevent dryness, always ensure your baking dish is tightly covered with foil during most of the baking process, and avoid overbaking.