
Introduction
There’s something uniquely satisfying about the crisp crunch and tangy burst of a homemade pickle. Forget the limp, overly sweet, or bland store-bought versions; making your own pickles in a mason jar is a culinary adventure that rewards you with vibrant flavor, incredible freshness, and the immense satisfaction of preserving nature’s bounty. It’s a simple art, passed down through generations, that brings a touch of old-world charm and incredible taste to your modern kitchen. Imagine biting into a pickle that perfectly balances sour, salty, and a whisper of spice – a true testament to the magic you can create with just a few humble ingredients.
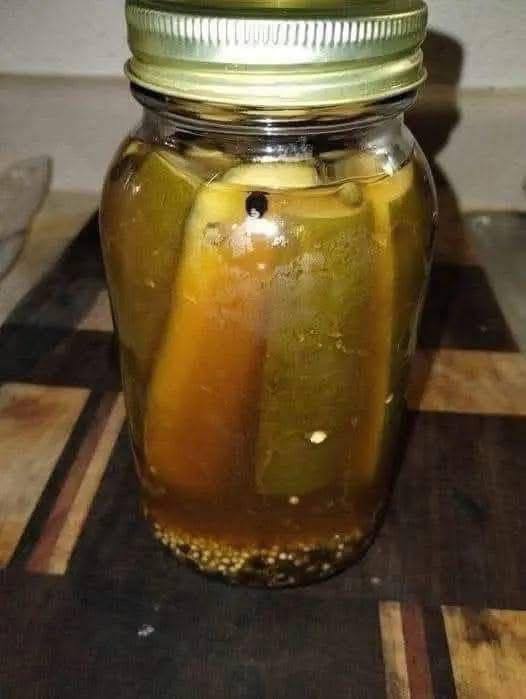
Homemade pickles aren’t just a delicious snack or condiment; they’re a versatile addition to countless meals. Slice them for sandwiches, chop them for salads, serve them alongside grilled meats, or simply enjoy them straight from the jar. Beyond their culinary appeal, making your own pickles allows you to control every ingredient, ensuring no artificial preservatives, unwanted sugars, or excessive sodium. This recipe focuses on creating those classic, irresistible dill pickles, perfectly brined and packed into iconic mason jars, ready to elevate any dish or simply be savored on their own. Get ready to transform ordinary cucumbers into extraordinary culinary delights!
Nutritional Information
Per serving (approximate values for 1 spear, about 28g):
- Calories: 5
- Protein: 0.2g
- Carbohydrates: 1g
- Fat: 0g
- Fiber: 0.5g
- Sodium: 250mg
Ingredients
- 4-5 lbs pickling cucumbers (Kirby or Persian work best), about 15-20 small cucumbers
- 2 cups distilled white vinegar (5% acidity)
- 2 cups filtered water
- 2 tablespoons pickling salt (non-iodized)
- 1 tablespoon granulated sugar (optional, for a slightly sweeter pickle)
- 4-6 cloves garlic, peeled and halved
- 2 tablespoons whole mustard seeds
- 2 tablespoons dill seeds or 4-6 fresh dill sprigs (flowering heads if available)
- 1 teaspoon whole black peppercorns
- 1/2 teaspoon red pepper flakes (optional, for a touch of heat)
- 2 bay leaves
- 4 pint-sized (16 oz) wide-mouth mason jars with lids and bands, sterilized
Instructions
- Prepare Cucumbers: Wash cucumbers thoroughly. For crispier pickles, you can soak them in an ice bath for 1-2 hours. Trim off both ends of the cucumbers (the blossom end contains enzymes that can make pickles soft). You can leave them whole, cut them into spears, or slice them into rounds, depending on your preference. If making spears, cut each cucumber lengthwise into quarters.
- Sterilize Jars and Lids: Wash jars, lids, and bands in hot, soapy water. Rinse well. To sterilize, place jars (without lids) in a large pot on a rack. Fill the pot with water to cover the jars by at least 1 inch. Bring to a rolling boil and boil for 10 minutes. Keep jars in the hot water until ready to use. Place new lids in a separate small saucepan of simmering (not boiling) water to soften the sealing compound. Keep warm until ready to use.
- Prepare Brine: In a medium saucepan, combine vinegar, water, pickling salt, and sugar (if using). Bring the mixture to a boil over medium-high heat, stirring until the salt and sugar are fully dissolved. Reduce heat to low and keep the brine warm.
- Pack Jars: Carefully remove one hot, sterilized jar from the water bath (using canning tongs). Place 1-2 halves of garlic, 1/2 tablespoon mustard seeds, 1/2 tablespoon dill seeds (or 1-2 dill sprigs), 1/4 teaspoon peppercorns, a pinch of red pepper flakes (if using), and 1/2 bay leaf into the bottom of each jar.
- Add Cucumbers: Tightly pack the prepared cucumbers into the jar, arranging them vertically if using spears or whole cucumbers. Leave about 1/2 inch of headspace from the rim of the jar.
- Pour Brine: Ladle the hot brine over the cucumbers, ensuring they are fully submerged. Maintain 1/2 inch of headspace. Tap the jar gently on the counter to release any trapped air bubbles. If necessary, add more brine to maintain headspace.
- Seal Jars: Wipe the rim of the jar clean with a damp paper towel. Center a hot lid on top of the jar, then screw on a band until fingertip tight (snug but not overly tight).
- Process Jars (Water Bath Canning): Carefully place the sealed jars back into the canning pot, ensuring they are covered by at least 1 inch of hot water. Bring the water to a rolling boil. Once boiling, process pint jars for 10 minutes (adjust for altitude if necessary).
- Cool and Check Seals: After processing, turn off the heat and let the jars sit in the hot water for 5 minutes before carefully removing them with canning tongs. Place jars on a wire rack or a towel-lined counter, leaving space between them to cool completely for 12-24 hours. Do not disturb them during this time.
- Check Seals: After cooling, check the seals. The center of the lid should be concave and not flex when pressed. If a lid does not seal, refrigerate the pickles and consume within 2-3 weeks, or reprocess with a new lid.
- Store Pickles: Label and store sealed jars in a cool, dark place for at least 2-4 weeks before opening to allow flavors to develop. Once opened, refrigerate and consume within 2-3 months.
Cooking Tips and Variations
For the crispiest pickles, always use fresh, firm pickling cucumbers. The sooner you pickle them after harvesting, the better their texture will be. If you can’t pickle them immediately, store them in the refrigerator. Soaking cucumbers in an ice bath for an hour or two before packing can also help maintain their crispness. Another trick for extra crispy pickles is to add a grape leaf or a small pinch of black tea leaves to each jar; the tannins in these ingredients help firm up the cucumbers.
Don’t be afraid to experiment with your spice blend! For a spicier pickle, increase the red pepper flakes or add a small dried chili pepper to each jar. For an Italian twist, try adding a pinch of dried oregano and a thin slice of lemon. Sweet pickles can be made by increasing the sugar in the brine to 1/4 to 1/2 cup, and adding cinnamon sticks or cloves. You can also pickle other vegetables using this same brine, such as green beans, carrots, or even small onions. Just ensure they are cut to fit the jars and processed for the appropriate time for their density.
Storage and Reheating
Properly processed and sealed homemade pickles, stored in a cool, dark place (like a pantry), can last for up to one year. The key is to ensure the lid has a strong, concave seal. Once a jar is opened, or if a jar does not seal properly, the pickles must be refrigerated. Refrigerated pickles will typically last for 2-3 months. Always use clean utensils when removing pickles from the jar to prevent contamination, which can shorten their shelf life.
There’s no “reheating” involved with pickles, as they are meant to be enjoyed cold or at room temperature. If you prefer a slightly different texture, you could briefly warm them in the microwave, but this is not standard practice and may affect their crispness. The beauty of pickles is their ready-to-eat nature, providing a refreshing burst of flavor straight from the jar.
Frequently Asked Questions
Why are my homemade pickles soft?
Soft pickles are a common issue and can be caused by several factors. The most frequent culprits are using old or overripe cucumbers, not trimming the blossom end (which contains enzymes that break down pectin), or incorrect processing times. Ensure you use fresh, firm pickling cucumbers, trim the ends, and avoid over-processing. Adding a tannin source like a grape leaf can also help maintain crispness.
What is pickling salt, and can I use regular salt?
Pickling salt is a fine-grained, pure salt without anti-caking agents or iodine. These additives, found in regular table salt, can make your brine cloudy and potentially alter the color and texture of your pickles. While you can use kosher salt (ensure it’s pure and non-iodized), pickling salt is recommended for the clearest brine and best results.
Why is my pickle brine cloudy?
A cloudy brine can be due to several reasons. Using regular iodized salt or salt with anti-caking agents is a common cause. It can also happen if your jars weren’t perfectly clean, if the cucumbers weren’t thoroughly washed, or if there’s a slight fermentation occurring. While a slightly cloudy brine isn’t always a sign of spoilage, if it’s accompanied by an off-odor, mold, or bubbling, it’s best to discard the pickles.
How do I know if my jars have sealed properly?
After your jars have cooled completely for 12-24 hours, check the seals. The center of the lid should be concave (curved inward) and not flex or pop up when you press on it. You should also be able to remove the screw band and lift the jar by the lid without it coming off. If a lid does not seal, refrigerate the pickles immediately and consume them within 2-3 weeks, or reprocess them with a new lid.