
Introduction
There are some desserts that just transport you back to simpler times, to community gatherings, and to the comforting embrace of homemade goodness. Classic Church Cake is precisely one of those desserts. Often found gracing the tables of potlucks, family reunions, and, yes, church events, this beloved confection is a testament to the power of simple ingredients coming together to create something truly magical. It’s not fancy, it doesn’t require obscure techniques, but what it lacks in complexity, it more than makes up for in sheer, unadulterated deliciousness and a comforting familiarity that feels like a warm hug.
What exactly is a “Church Cake”? While the name might conjure images of stained glass and hymnals, it’s actually a broad term for an easy-to-make, crowd-pleasing cake that’s perfect for sharing. Our version is a delightful layered creation, typically starting with a moist cake base, often a classic vanilla or yellow cake, topped with a creamy, dreamy pudding layer, and finished with a fluffy cloud of whipped topping. It’s the kind of cake that disappears quickly, with everyone asking for the recipe, despite its humble origins. This recipe is special because it’s incredibly adaptable, forgiving, and delivers consistent, mouthwatering results every single time, making it a reliable favorite for any occasion.
This particular iteration of Church Cake is a fantastic example of a “poke cake” – a technique where holes are poked into the warm cake, allowing the liquid pudding to seep in, creating an incredibly moist and flavorful dessert. It’s designed for a 9×13 inch pan, making it ideal for feeding a crowd without fuss. Whether you’re a seasoned baker or just starting out, this recipe is your ticket to a dessert that will earn you rave reviews and bring smiles to every face. Get ready to bake a little piece of comfort and nostalgia!
Nutritional Information
Per serving (approximate values):
- Calories: 380
- Protein: 5g
- Carbohydrates: 55g
- Fat: 16g
- Fiber: 1g
- Sodium: 420mg
Ingredients
- 1 (15.25 ounce) box yellow or vanilla cake mix (plus ingredients called for on box: typically eggs, water, vegetable oil)
- 2 (3.4 ounce) packages instant vanilla pudding mix
- 4 cups cold milk (whole or 2%)
- 1 (8 ounce) container frozen whipped topping, thawed (like Cool Whip)
- Optional garnishes: fresh berries, chocolate shavings, sprinkles, powdered sugar
Instructions
- Preheat your oven to the temperature specified on your cake mix box, typically 350°F (175°C). Lightly grease and flour a 9×13 inch baking pan, or spray with non-stick baking spray.
- Prepare the cake batter according to the package directions. In a large bowl, combine the cake mix, eggs, water, and vegetable oil. Beat with an electric mixer on low speed for 30 seconds, then on medium speed for 2 minutes, or until smooth and well combined.
- Pour the prepared cake batter into the greased 9×13 inch baking pan, spreading it evenly.
- Bake the cake according to the package directions, usually for 28-33 minutes, or until a wooden skewer inserted into the center comes out clean.
- Once the cake is baked, remove it from the oven and place it on a wire rack. Let it cool for about 10-15 minutes.
- While the cake is still warm, use the handle of a wooden spoon or a fork to poke holes all over the top of the cake, about 1 inch apart. Make sure to poke deep enough so the pudding can seep into the cake.
- In a separate large bowl, prepare the instant vanilla pudding. Whisk together the two packages of instant vanilla pudding mix with 4 cups of cold milk. Whisk continuously for about 2 minutes, until the mixture thickens.
- Carefully pour the prepared pudding evenly over the warm, poked cake, ensuring the pudding seeps into all the holes. Use an offset spatula or the back of a spoon to gently spread the pudding over the entire surface of the cake.
- Place the cake in the refrigerator and chill for at least 30 minutes to allow the pudding to set completely.
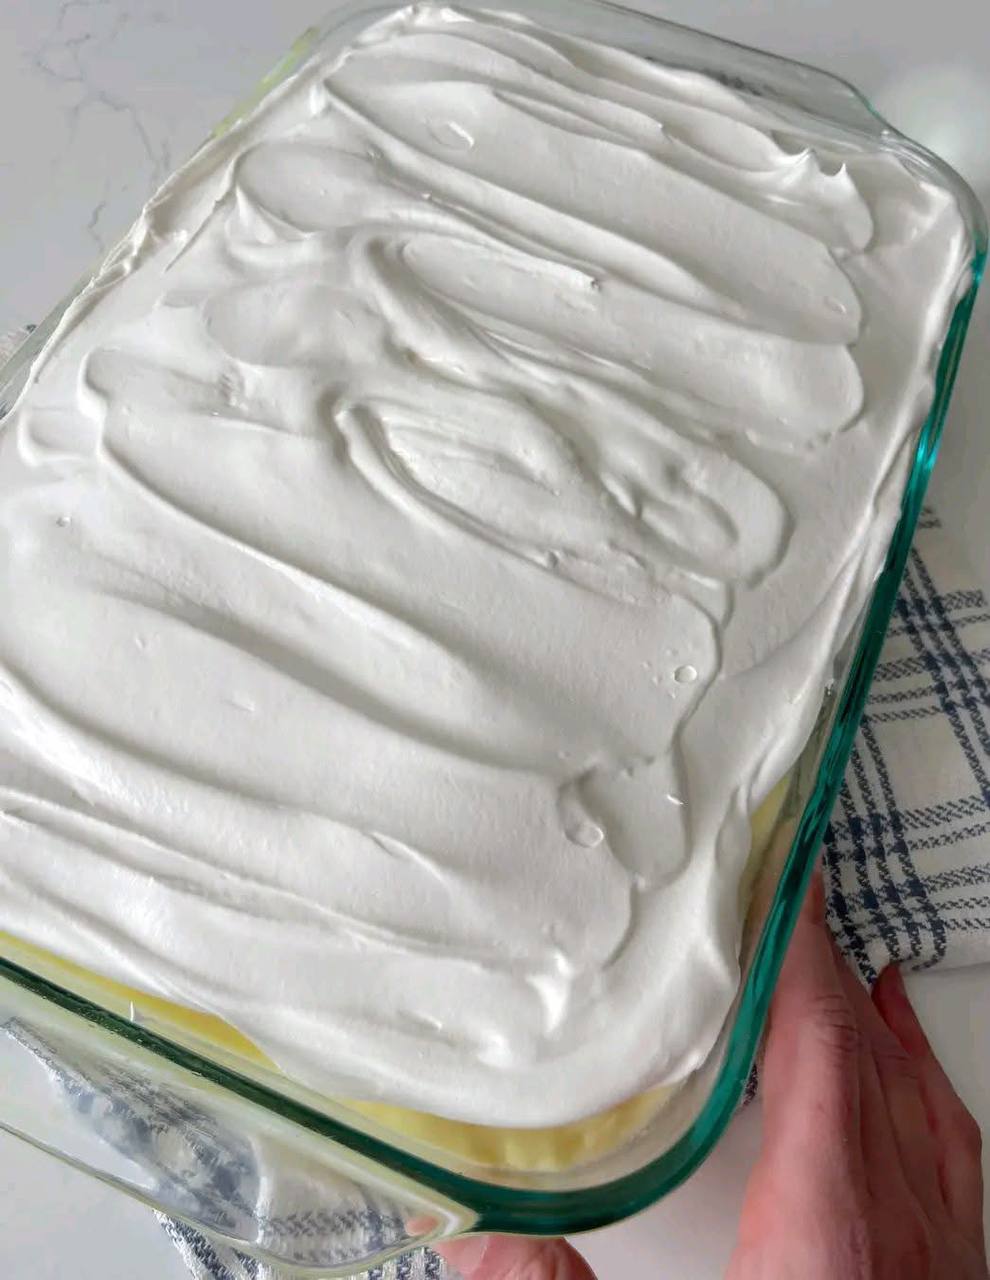
- Once the pudding layer is set and firm, gently spread the thawed whipped topping over the entire surface of the pudding layer, creating a smooth, even layer.
- Return the cake to the refrigerator and chill for at least 2-4 hours, or preferably overnight, to allow all the layers to meld together and the cake to become thoroughly chilled.
- Before serving, you can garnish the cake with fresh berries, chocolate shavings, sprinkles, or a light dusting of powdered sugar, if desired.
- Slice and serve directly from the pan.
Cooking Tips and Variations
For an extra moist cake, ensure you don’t overbake the cake base. The moment a wooden skewer comes out clean, it’s done. Overbaking can lead to a dry cake, which we want to avoid for this delicious, moist dessert. When poking holes, aim for consistent spacing, about an inch apart, and try to go about two-thirds of the way down into the cake. This ensures maximum pudding absorption without compromising the cake’s structure.
Make sure the cake is still warm when you pour the pudding over it. The warmth helps the pudding seep into the holes more effectively, creating that signature moist, flavorful texture. However, ensure the cake isn’t piping hot, as this could cause the pudding to become too thin and not set properly. The 10-15 minute cooling time is usually perfect.
Always allow the pudding layer to set completely in the refrigerator before adding the whipped topping. If the pudding is still warm or too soft, the whipped topping may melt or mix with the pudding, creating a less defined and less appealing layer. An offset spatula is your best friend for spreading both the pudding and the whipped topping smoothly and evenly across the cake.
For variations, don’t be afraid to experiment with different cake mix flavors! A chocolate cake base with chocolate pudding, or even a lemon cake with lemon pudding, could be delightful. You can also vary the pudding flavor – butterscotch, cheesecake, or even pistachio pudding would be fantastic. Instead of instant pudding, you could use homemade pudding for an elevated touch, just ensure it’s still warm enough to seep into the holes. For an extra rich flavor, you can substitute some of the milk for cream in the pudding mixture.
Consider adding chopped nuts like pecans or walnuts between the pudding and whipped topping layer for a textural contrast. Fresh fruit, such as sliced bananas or strawberries, can also be layered on top of the pudding before the whipped topping for added freshness and flavor. For a more decadent touch, drizzle with caramel sauce or chocolate syrup before serving.
Storage and Reheating
Due to the dairy-based ingredients (pudding and whipped topping), Classic Church Cake must be stored in the refrigerator. Cover the baking pan tightly with plastic wrap or aluminum foil to prevent the cake from drying out and to absorb any refrigerator odors. When properly stored, the cake will remain fresh and delicious for 3-4 days.
This cake is best served chilled, directly from the refrigerator. There is no need to reheat it. In fact, reheating would cause the whipped topping and pudding layers to melt and lose their desired texture. Simply take it out of the fridge, slice, and enjoy!
If you have any leftover slices, you can transfer them to individual airtight containers for convenient storage and easy grab-and-go dessert options. This also helps to prevent the entire cake from being exposed to air every time a slice is taken, prolonging its freshness.
Frequently Asked Questions
Why do you poke holes in the cake?
Poking holes in the cake allows the liquid pudding to seep deep into the cake layers. This process saturates the cake with moisture and flavor from the pudding, resulting in an incredibly moist, tender, and flavorful dessert that wouldn’t be achieved with just a simple topping.
Can I use homemade whipped cream instead of store-bought whipped topping?
Yes, you can absolutely use homemade whipped cream! For best results, make sure your homemade whipped cream is stabilized (using a little powdered sugar and cornstarch, or cream of tartar) to help it hold its shape longer, especially if the cake will be sitting out for a period. Store-bought whipped topping tends to be more stable and holds up better over time in the refrigerator.
How far in advance can I make this cake?
This cake is fantastic for making ahead! You can prepare the entire cake 1-2 days in advance. In fact, many people find that the flavors meld and deepen even further after a day in the refrigerator, making it even more delicious. Just ensure it’s well-covered and refrigerated until serving.