
Introduction
There are some desserts that just scream comfort, warmth, and pure, unadulterated deliciousness. A classic cherry crisp is undoubtedly one of them. Imagine juicy, sweet-tart cherries bubbling away under a golden, buttery, and irresistibly crumbly topping. It’s a dessert that evokes memories of summer picnics, cozy autumn evenings, and holiday gatherings. This timeless treat is beloved for its straightforward preparation and its incredible ability to satisfy even the most discerning sweet tooth. It’s the kind of dessert that feels both rustic and elegant, perfect for a casual family meal or a special occasion. And while traditional crisps are fantastic, we’re about to dive into a version that opens up this beloved classic to even more people, without sacrificing an ounce of its charm or flavor.
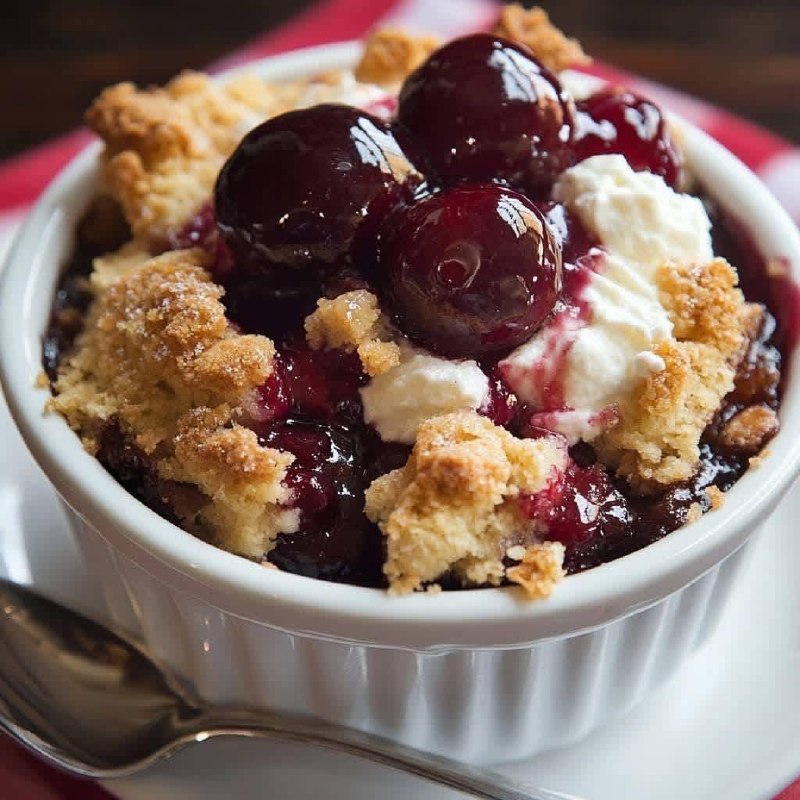
Today, we’re taking that beloved concept and giving it a thoughtful, delicious twist: a Gluten-Free Cherry Crisp that’s just as easy to make and every bit as appealing as its traditional counterpart. Whether you’re navigating dietary restrictions, catering to guests with sensitivities, or simply looking for a fantastic new recipe to add to your repertoire, this gluten-free cherry crisp is a revelation. The beauty of this recipe lies in its simplicity and the satisfying combination it delivers: the vibrant, sweet burst of cherries perfectly complemented by a rich, buttery, and wonderfully crumbly topping. Each spoonful is a delightful textural journey, from the soft, fruit-filled bottom to the crunchy, golden-brown top. You might even find yourself preferring this version to the original!
What makes this particular gluten-free cherry crisp truly special is how seamlessly it integrates gluten-free ingredients without compromising on taste or texture. We’ve worked to ensure that the topping achieves that perfect crisp-crumbly balance, tasting just like the classic version you know and love. Served warm, perhaps with a scoop of vanilla bean ice cream melting into its fruity depths, a dollop of fresh whipped cream, or even a spoonful of creamy Greek yogurt for a lighter touch, this dessert is an absolute showstopper. It’s an easy dessert that delivers big on flavor and comfort, making it a perfect choice for any occasion, from a casual weeknight treat to a festive holiday gathering. Get ready to fall in love with this gluten-free gem!
Nutritional Information
Per serving (approximate values):
- Calories: 380
- Protein: 4g
- Carbohydrates: 60g
- Fat: 15g
- Fiber: 3g
- Sodium: 180mg
Ingredients
- For the Cherry Filling:
- 6 cups fresh or frozen dark sweet cherries, pitted (such as Bing)
- 1/2 cup granulated sugar (adjust based on sweetness of cherries)
- 2 tablespoons gluten-free all-purpose flour blend (with xanthan gum)
- 1 tablespoon fresh lemon juice
- 1 teaspoon pure vanilla extract
- 1/4 teaspoon almond extract (optional, but highly recommended)
- Pinch of salt
- For the Gluten-Free Crumble Topping:
- 1 1/2 cups gluten-free all-purpose flour blend (with xanthan gum)
- 1/2 cup packed light brown sugar
- 1/4 cup granulated sugar
- 1/2 teaspoon ground cinnamon
- 1/4 teaspoon ground nutmeg (optional)
- 1/4 teaspoon salt
- 1/2 cup (1 stick) unsalted butter, very cold and cut into small cubes
- 1/2 cup rolled oats (certified gluten-free if necessary)
- For Serving (Optional):
- Vanilla ice cream
- Whipped cream
- Greek yogurt
Instructions
- Preheat your oven to 375°F (190°C). Lightly grease an 8×8 inch square baking dish or a 9-inch round pie dish. If making individual crisps, grease 6-8 individual ramekins.
- Prepare the Cherry Filling: In a large bowl, combine the pitted cherries, granulated sugar, gluten-free all-purpose flour blend, lemon juice, vanilla extract, almond extract (if using), and a pinch of salt. Gently toss until the cherries are evenly coated.
- Pour the cherry mixture into your prepared baking dish or ramekins, spreading it evenly.
- Prepare the Gluten-Free Crumble Topping: In a separate medium bowl, whisk together the gluten-free all-purpose flour blend, light brown sugar, granulated sugar, cinnamon, nutmeg (if using), and salt.
- Add the very cold, cubed butter to the flour mixture. Using a pastry blender, your fingertips, or a food processor (pulsing briefly), cut the butter into the dry ingredients until the mixture resembles coarse crumbs with some pea-sized pieces of butter remaining.
- Stir in the gluten-free rolled oats until just combined. Be careful not to overmix.
- Evenly sprinkle the crumble topping over the cherry filling in the baking dish or ramekins.
- Bake the Crisp: Place the baking dish on a baking sheet (to catch any potential drips). Bake for 35-45 minutes for a large crisp, or 25-35 minutes for individual ramekins, or until the topping is golden brown and the cherry filling is bubbly and tender.
- If the topping starts to brown too quickly, loosely tent the dish with aluminum foil for the remaining baking time.
- Remove from the oven and let the crisp cool on a wire rack for at least 15-20 minutes before serving. This allows the filling to set slightly and prevents it from being too runny.
- Serve warm, ideally with a scoop of vanilla ice cream, a dollop of whipped cream, or a spoonful of Greek yogurt.
Cooking Tips and Variations
For the absolute best crumble topping, ensure your butter is very cold. This helps create those distinct, crumbly pockets and prevents the topping from becoming too dense or cake-like. If using your hands, work quickly to avoid melting the butter too much. A pastry blender is an excellent tool for this, or you can even briefly pulse the ingredients in a food processor.
When using frozen cherries, there’s no need to thaw them completely before mixing them with the other filling ingredients. However, if they release a lot of liquid as they thaw slightly, drain off any excess to prevent a watery filling. You might also want to increase the gluten-free flour in the filling by an extra teaspoon or two to help thicken it.
The sweetness of cherries can vary greatly. Taste your cherries before you start and adjust the amount of granulated sugar in the filling accordingly. If your cherries are very tart, you might want to add an extra tablespoon or two of sugar. If they’re already quite sweet, you can reduce it slightly.
To prevent the topping from burning while the filling cooks through, keep an eye on it during the last 10-15 minutes of baking. If it’s getting too dark, simply tent the baking dish loosely with aluminum foil. This will protect the topping while allowing the filling to continue bubbling and thickening.
This recipe is incredibly versatile! For a nutty crunch, add 1/2 cup of chopped almonds, pecans, or walnuts to the crumble topping. You can also play with the spices; a pinch of cardamom or a touch of ginger can add a lovely warmth. Feel free to experiment with other fruits too! This base recipe works beautifully with mixed berries (strawberries, blueberries, raspberries), peaches, or apples. Just ensure the fruit is ripe and adjust sugar levels as needed.
For a dairy-free version, substitute the butter in the topping with a good quality plant-based butter alternative. Most gluten-free flour blends already contain xanthan gum, which helps with texture and binding. If your blend does not, add 1/2 teaspoon of xanthan gum to the dry ingredients for the topping, and 1/4 teaspoon to the cherry filling to help with thickness.
Allowing the crisp to cool for at least 15-20 minutes after baking is crucial. This helps the filling set and thicken, ensuring it’s not too runny when you serve it. While it’s tempting to dig in immediately, a little patience will be rewarded with the best texture.
Storage and Reheating
To store any leftover Gluten-Free Cherry Crisp, allow it to cool completely to room temperature. Once cooled, cover the baking dish tightly with plastic wrap or aluminum foil. It can be stored at room temperature for up to 1 day, or in the refrigerator for up to 3-4 days. Storing it in the refrigerator is generally recommended, especially if your kitchen is warm, to maintain freshness and prevent spoilage.
When you’re ready to enjoy your leftovers, you have a few reheating options. For the best results and to revive the crisp’s texture, reheat it in the oven. Preheat your oven to 350°F (175°C). Place the crisp (covered with foil if you want to prevent further browning, or uncovered if you want to crisp up the topping even more) directly into the preheated oven. Reheat for 15-20 minutes, or until warmed through and the topping is crisp again. Individual portions can also be reheated in a toaster oven.
If you’re in a hurry, you can reheat individual servings in the microwave. Place a portion in a microwave-safe bowl and heat on medium power for 30-60 seconds, or until warm. Be aware that microwaving will soften the topping significantly, so it won’t have the same crisp texture as oven reheating. However, the filling will still be delicious and warm.
This cherry crisp also freezes well! To freeze, bake the crisp completely and allow it to cool entirely. Wrap the entire baking dish tightly with several layers of plastic wrap, then an outer layer of aluminum foil. It can be frozen for up to 3 months. To reheat from frozen, remove the plastic wrap and foil, cover loosely with new foil, and bake in a preheated oven at 350°F (175°C) for 45-60 minutes, or until hot and bubbly. Remove the foil for the last 10-15 minutes to re-crisp the topping.
Frequently Asked Questions
What is the best type of gluten-free flour to use for the crisp topping?
For the best results, use a high-quality gluten-free all-purpose flour blend that already contains xanthan gum. These blends are specifically formulated to mimic the texture of wheat flour and provide good structure and binding in baked goods. Brands like Bob’s Red Mill 1-to-1 Baking Flour or King Arthur Gluten-Free Measure for Measure Flour are excellent choices. Avoid using single gluten-free flours like almond or coconut flour on their own, as they will drastically change the texture and absorbency.
Can I use canned cherries for this recipe?
While fresh or frozen cherries are highly recommended for the best flavor and texture, you can use canned cherries if absolutely necessary. If using canned cherries, make sure to drain them very well and rinse them if they are packed in syrup, to prevent the crisp from being overly sweet. You might also need to reduce the amount of added sugar in the filling, as canned cherries are often sweetened. Be aware that the texture of canned cherries will be softer than fresh or frozen.
How do I know when the cherry crisp is fully baked?
You’ll know your cherry crisp is perfectly baked when the topping is a beautiful golden brown and appears crisp, and the cherry filling is visibly bubbling around the edges of the dish and throughout the fruit. The bubbling indicates that the fruit juices have thickened properly. If you’re unsure, you can gently jiggle the dish; the center should be mostly set, not overly liquidy. The aroma of warm cherries and cinnamon will also fill your kitchen, which is a pretty good indicator it’s ready!