
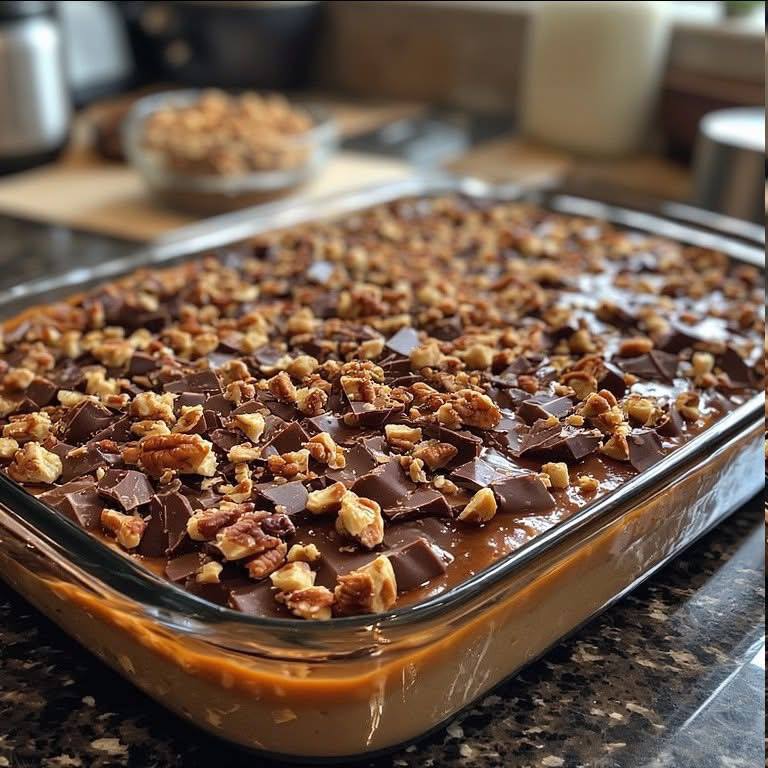
Get ready to indulge in a symphony of textures and flavors with these incredible Caramel Chocolate Crunch Bars! Imagine a buttery, shortbread-like base that crumbles just so, followed by a thick, chewy layer of rich, golden caramel. Then, a generous blanket of smooth, melty chocolate, studded with crunchy, toasted nuts, all coming together in one perfect bite. These bars are a true crowd-pleaser, delivering that irresistible sweet and salty combination that everyone craves, making them an instant hit at potlucks, parties, or simply as a well-deserved treat for yourself.
What makes this recipe truly special is its delightful interplay of contrasts. The snap of the chocolate, the satisfying chew of the caramel, and the tender, slightly crisp base create an experience that’s anything but boring. Plus, they’re surprisingly easy to make, even for novice bakers. With just a few simple steps, you can create a confection that looks and tastes like it came straight from a gourmet bakery, but with all the love and satisfaction of a homemade treat. Get ready to impress everyone with these customizable, irresistible bars!
These layered marvels are a testament to how simple ingredients can create extraordinary results. We’ll walk you through crafting each distinct layer – the sturdy base, the luscious caramel, the decadent chocolate, and the flavorful nut topping – ensuring every element contributes to the ultimate crunchy, chewy, and utterly delicious experience. Whether you’re a caramel connoisseur, a chocolate fiend, or simply someone looking for an easy yet impressive dessert, these Caramel Chocolate Crunch Bars are about to become your new favorite go-to recipe.
Nutritional Information
Per serving (approximate values):
- Calories: 390
- Protein: 4g
- Carbohydrates: 48g
- Fat: 22g
- Fiber: 2g
- Sodium: 150mg
Ingredients
- For the Base:
- 1 cup (2 sticks) unsalted butter, softened
- 1/2 cup granulated sugar
- 1/4 cup packed light brown sugar
- 1 teaspoon vanilla extract
- 2 cups all-purpose flour
- 1/4 teaspoon salt
- For the Caramel Layer:
- 1/2 cup (1 stick) unsalted butter
- 1 cup packed light brown sugar
- 1/2 cup granulated sugar
- 1/2 cup heavy cream
- 1/4 cup corn syrup
- 1 teaspoon vanilla extract
- 1/2 teaspoon salt (or more, to taste, for salted caramel)
- For the Chocolate Topping:
- 1 1/2 cups semi-sweet chocolate chips (or chopped chocolate bar)
- 1 tablespoon unsalted butter
- 1 cup chopped pecans or walnuts, toasted
- Optional: Flaky sea salt, for sprinkling
Instructions
- Prepare the Base: Preheat your oven to 350°F (175°C). Line a 9×13-inch baking pan with parchment paper, leaving an overhang on the sides to easily lift the bars out later.
- In a large bowl, using an electric mixer, cream together the softened unsalted butter, granulated sugar, and light brown sugar until light and fluffy, about 2-3 minutes.
- Beat in the vanilla extract until well combined.
- In a separate bowl, whisk together the all-purpose flour and salt. Gradually add the dry ingredients to the wet ingredients, mixing on low speed until just combined and a soft dough forms. Do not overmix.
- Press the dough evenly into the bottom of the prepared 9×13-inch baking pan. You can use your hands or the back of a spoon.
- Bake the base for 18-22 minutes, or until the edges are lightly golden brown. Remove from the oven and set aside to cool slightly while you prepare the caramel.
- Make the Caramel Layer: In a medium-heavy bottomed saucepan, combine the unsalted butter, light brown sugar, granulated sugar, heavy cream, and corn syrup.
- Place the saucepan over medium heat, stirring constantly with a wooden spoon or heat-proof spatula until the sugars dissolve and the mixture comes to a full boil.
- Once boiling, reduce the heat to medium-low and continue to simmer, stirring occasionally, for 8-10 minutes, or until the caramel thickens and reaches 235-240°F (113-116°C) on a candy thermometer (soft ball stage). If you don’t have a thermometer, drop a small amount into cold water; it should form a soft, pliable ball. Be careful not to burn the caramel.
- Remove the caramel from the heat and stir in the vanilla extract and salt.
- Carefully pour the hot caramel evenly over the slightly cooled baked base. Spread it quickly to cover the entire surface.
- Allow the caramel layer to cool at room temperature for about 30-45 minutes, or until it has set enough that it’s no longer liquid and slightly firm to the touch.
- Prepare the Chocolate Topping and Nuts: While the caramel cools, spread the chopped pecans or walnuts on a baking sheet and toast them in the preheated oven (or a dry skillet on the stovetop) for 5-7 minutes, until fragrant and lightly browned. Watch them closely to prevent burning. Let them cool.
- In a microwave-safe bowl, combine the semi-sweet chocolate chips and 1 tablespoon of unsalted butter. Microwave on high in 30-second intervals, stirring well after each, until the chocolate is completely melted and smooth. Alternatively, melt over a double boiler.
- Pour the melted chocolate over the cooled caramel layer, spreading it evenly with an offset spatula or the back of a spoon.
- Immediately sprinkle the toasted chopped nuts over the melted chocolate. If desired, sprinkle with flaky sea salt for an extra flavor boost.
- Chill and Cut: Place the pan in the refrigerator for at least 2-3 hours, or until the chocolate and caramel are completely set and firm. This is crucial for clean cuts.
- Once thoroughly chilled, lift the bars out of the pan using the parchment paper overhang. Place them on a cutting board.
- Using a large, sharp knife (you can run it under hot water and wipe it dry for even cleaner cuts), cut the bars into desired squares or rectangles. Enjoy!
Cooking Tips and Variations
For the best results, always use high-quality ingredients. Good butter and chocolate make a noticeable difference in the final flavor. When making the base, avoid overmixing the dough once the flour is added; this can lead to a tough base rather than a tender, crumbly one. Press the dough firmly and evenly into the pan to ensure an even bake and a sturdy foundation for your bars.
The caramel layer is the heart of these bars, so pay close attention to it. Using a candy thermometer is highly recommended to achieve the perfect chewy consistency. Aim for the soft ball stage (235-240°F or 113-116°C). If the caramel doesn’t reach a high enough temperature, it will be too soft and runny. If it goes too high, it will be hard and brittle. Stirring constantly during the initial boiling phase helps prevent scorching. If you want a more pronounced salted caramel flavor, feel free to increase the salt in the caramel layer or sprinkle extra flaky sea salt on top of the chocolate.
When it comes to chocolate, feel free to experiment! While semi-sweet is a classic choice, you could use milk chocolate for a sweeter bar or dark chocolate for a richer, more intense flavor. White chocolate could also be used, perhaps with a swirl of milk or dark chocolate for visual appeal. Toasting the nuts is a non-negotiable step; it significantly enhances their flavor and crunch. Don’t skip it! If you’re not a fan of pecans or walnuts, other nuts like almonds or even peanuts could be used. For a nut-free version, consider using toasted shredded coconut or crispy rice cereal in the chocolate layer for added crunch.
For an extra touch of decadence, you could swirl a tablespoon of peanut butter or almond butter into the melted chocolate before spreading it. Another variation involves adding a layer of peanut butter directly over the caramel before the chocolate, creating a “peanut butter cup” inspired crunch bar. To prevent a soggy base, some bakers prefer to blind bake the base for about 10-12 minutes before adding the caramel, then continue baking for the remaining time. However, with this recipe, baking the base fully before adding the caramel should suffice if it’s cooled slightly.
Storage and Reheating
These Caramel Chocolate Crunch Bars are best stored in an airtight container at room temperature for up to 3-4 days. If your kitchen is particularly warm, or if you prefer a firmer bar, they can be stored in the refrigerator for up to 1 week. When stored in the fridge, they will be quite firm, so allow them to sit at room temperature for 15-20 minutes before serving for the best texture.
For longer storage, these bars freeze beautifully. Wrap individual bars tightly in plastic wrap, then place them in a freezer-safe airtight container or freezer bag. They can be frozen for up to 2-3 months. To enjoy from frozen, simply thaw them at room temperature for a few hours, or overnight in the refrigerator. Reheating is generally not recommended as it can affect the texture of the chocolate and caramel; they are best enjoyed chilled or at room temperature.
Frequently Asked Questions
Why did my caramel turn out too hard or too soft?
The most common reason for caramel consistency issues is not reaching the correct temperature. If your caramel is too hard, it likely cooked too long or to too high a temperature. If it’s too soft and runny, it didn’t cook long enough or didn’t reach the soft ball stage (235-240°F or 113-116°C). Using a candy thermometer is crucial for consistent results. Humidity can also play a role, so on very humid days, you might need to cook the caramel for a minute or two longer.
How can I get clean cuts when slicing the bars?
The key to clean slices is thorough chilling. Make sure the bars are completely firm, ideally after at least 2-3 hours in the refrigerator. Before cutting, lift the entire slab of bars out of the pan using the parchment paper overhang. Use a large, sharp knife. For even cleaner cuts, run the knife under hot water for a few seconds, wipe it dry, and then make a cut. Repeat this process for each slice, wiping the knife clean of any sticky residue between cuts.
Can I make these bars ahead of time for a party?
Absolutely! These Caramel Chocolate Crunch Bars are an excellent make-ahead dessert. In fact, they benefit from a good chill, so preparing them a day or two in advance is ideal. Store them in an airtight container in the refrigerator, and then simply cut and serve when you’re ready. This makes them perfect for entertaining, as it frees up your time on the day of your event.
What can I use if I don’t have corn syrup for the caramel?
While corn syrup helps prevent crystallization and contributes to the smooth texture of the caramel, you can substitute it with an equal amount of liquid glucose or golden syrup. If you don’t have any of these, you can omit it, but be aware that your caramel might be slightly more prone to crystallization. To minimize this, ensure all sugar crystals are dissolved before the mixture comes to a full boil, and avoid stirring the caramel too vigorously once it’s boiling.