
Introduction
There are few desserts as universally beloved and comforting as a classic apple pie. The quintessential American dessert, apple pie evokes images of cozy kitchens, family gatherings, and the sweet embrace of autumn. With its flaky, golden-brown crust and a warm, spiced apple filling, it’s a dish that transcends seasons, though it truly shines during the cooler months when fresh apples are abundant. This isn’t just any apple pie; this is a recipe for a homemade, double-crust masterpiece that will fill your home with an irresistible aroma and your heart with pure joy.
What makes a homemade apple pie so special? It’s the meticulous care that goes into each step, from crafting the perfect buttery crust to simmering the apples with just the right balance of sweetness and spice. Forget the store-bought versions; there’s an unparalleled satisfaction in presenting a pie that you’ve created from scratch. This recipe focuses on achieving that ideal balance: a tender, crisp crust that shatters with each bite, encasing a mountain of perfectly cooked apples that are neither too firm nor too mushy, bursting with a comforting blend of cinnamon, nutmeg, and a hint of lemon.
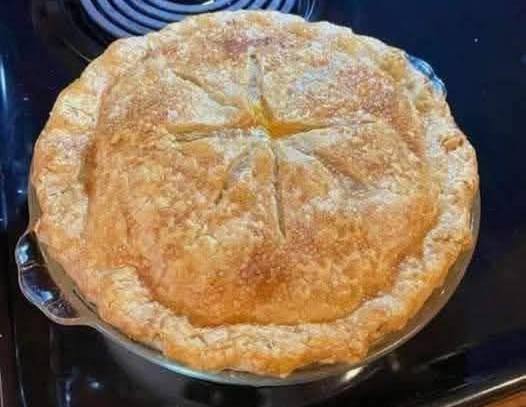
Our classic double-crust apple pie is designed to be approachable for home bakers of all skill levels, while still delivering a show-stopping result. The top crust, with its characteristic vents, not only allows steam to escape, preventing a soggy bottom, but also adds to the pie’s rustic charm. Baked to a beautiful golden hue in a glass dish, this pie is as much a feast for the eyes as it is for the palate. Prepare to impress your family and friends with this timeless dessert that truly embodies the spirit of home baking.
Nutritional Information
Per serving (approximate values):
- Calories: 420
- Protein: 4g
- Carbohydrates: 65g
- Fat: 18g
- Fiber: 5g
- Sodium: 250mg
Ingredients
For the Pie Crust (Double Crust)
- 2 ½ cups all-purpose flour, plus more for dusting
- 1 teaspoon salt
- 1 cup (2 sticks) unsalted butter, very cold and cut into ½-inch cubes
- ½ cup ice water, plus 1-2 tablespoons more if needed
For the Apple Filling
- 6-8 medium apples (about 3 pounds), a mix of Granny Smith, Honeycrisp, and Fuji recommended
- ½ cup granulated sugar
- ¼ cup packed light brown sugar
- 2 tablespoons all-purpose flour (or 1 tablespoon cornstarch for a clearer filling)
- 1 teaspoon ground cinnamon
- ¼ teaspoon ground nutmeg
- ⅛ teaspoon ground cloves (optional)
- 1 tablespoon lemon juice
- 2 tablespoons unsalted butter, cut into small pieces
- 1 large egg, beaten (for egg wash)
- 1 tablespoon coarse sugar (for sprinkling, optional)
Instructions
- Prepare the Pie Crust: In a large bowl, whisk together the flour and salt. Add the cold butter cubes and, using a pastry blender, your fingertips, or a food processor, cut the butter into the flour until the mixture resembles coarse crumbs with some pea-sized pieces of butter remaining.
- Gradually add the ice water, 1 tablespoon at a time, mixing until the dough just comes together. Be careful not to overmix. Divide the dough in half, flatten each half into a disk, wrap tightly in plastic wrap, and refrigerate for at least 30 minutes (or up to 2 days).
- Prepare the Apple Filling: Peel, core, and slice the apples into ¼-inch thick pieces. In a large bowl, combine the sliced apples with granulated sugar, brown sugar, flour (or cornstarch), cinnamon, nutmeg, cloves (if using), and lemon juice. Toss gently until the apples are evenly coated. Set aside while you roll out the crust.
- Roll Out the Bottom Crust: On a lightly floured surface, roll out one disk of chilled pie dough into a 12-inch circle, about ⅛-inch thick. Carefully transfer the dough to a 9-inch pie dish. Trim the edges, leaving about a ½-inch overhang.
- Add the Filling: Pour the apple mixture into the pie crust, mounding it slightly in the center. Dot the top of the apples with the small pieces of butter.
- Roll Out the Top Crust: Roll out the second disk of chilled pie dough into another 12-inch circle. You can either place this whole circle over the filling or cut it into strips for a lattice top. For a classic look, place the whole circle over the filling.
- Seal and Crimp: Trim the top crust, leaving a ½-inch overhang. Fold the top crust overhang under the bottom crust overhang. Crimp the edges together using your fingers or a fork to seal the pie.
- Vent the Top Crust: Cut several slits (at least 4-5) in the top crust to allow steam to escape during baking. A cross pattern is traditional and effective.
- Egg Wash and Sugar (Optional): In a small bowl, beat the egg with 1 teaspoon of water. Brush the top of the pie evenly with the egg wash. If desired, sprinkle the top with coarse sugar for added sparkle and crunch.
- Chill (Optional but Recommended): For the flakiest crust, place the assembled pie in the refrigerator for 15-20 minutes before baking. This helps the butter firm up again.
- Preheat Oven & Bake: Preheat your oven to 425°F (220°C). Place the pie on a baking sheet (to catch any drips). Bake for 15-20 minutes at 425°F, until the crust begins to turn golden.
- Lower Temperature & Finish Baking: Reduce the oven temperature to 375°F (190°C). Continue baking for another 35-50 minutes, or until the crust is deeply golden brown and the filling is bubbly. If the edges of the crust start to brown too quickly, loosely cover them with aluminum foil.
- Cool Completely: This step is crucial! Remove the pie from the oven and place it on a wire rack to cool completely for at least 3-4 hours before slicing and serving. This allows the filling to set properly, preventing a runny pie.
Cooking Tips and Variations
Choosing Your Apples: The best apple pies use a mix of apple varieties. Granny Smith apples provide tartness and hold their shape well, while Honeycrisp and Fuji offer sweetness and a good texture. Avoid apples that break down too easily, like Red Delicious.
Keep it Cold: The key to a flaky pie crust is keeping the butter and water as cold as possible. Work quickly when mixing the dough and don’t be afraid to pop the dough back into the fridge if it starts to get warm.
Don’t Overmix the Dough: Overmixing develops the gluten in the flour, leading to a tough crust. Mix just until the dough comes together.
Preventing a Soggy Bottom: Several strategies can help:
- Blind Baking: For an extra-crisp bottom crust, you can blind bake the bottom crust for 10-15 minutes before adding the filling.
- Egg Wash on Bottom: Brush a thin layer of egg white onto the bottom crust before adding the filling to create a barrier.
- Thickener Choice: Using flour is traditional, but cornstarch or tapioca starch can create a clearer, slightly firmer filling that releases less liquid.
- Baking Stone/Steel: Place your pie dish on a preheated baking stone or steel in the oven to transfer heat more efficiently to the bottom crust.
Spice It Up: Feel free to adjust the spices to your liking. A pinch of cardamom or a tiny bit of fresh ginger can add an exciting twist. A tablespoon of bourbon or rum can also enhance the flavor of the filling.
Add Texture: For a different texture, you can add 1/2 cup of chopped pecans or walnuts to the apple filling.
Lattice Top: Instead of a full top crust, cut the second dough disk into 1-inch wide strips and weave them into a beautiful lattice pattern over the filling. This not only looks stunning but also provides more ventilation.
Sweetness Adjustment: Taste a small piece of your apple mixture before baking (without the raw flour). If your apples are very tart, you might want to add an extra tablespoon or two of sugar.
Crimping the Edges: For a neat and secure edge, ensure both crusts are well-chilled when you crimp them. This helps them hold their shape better during baking.
Storage and Reheating
Storage at Room Temperature: A freshly baked apple pie can be stored at room temperature for up to 2 days, loosely covered with foil or plastic wrap. This is generally preferred for pie with a flaky crust, as refrigeration can sometimes make the crust less crisp.
Refrigeration: If you need to store the pie for longer, or if your kitchen is particularly warm, you can refrigerate it for up to 3-4 days. Wrap it tightly in plastic wrap to prevent it from drying out or absorbing odors from the refrigerator. Keep in mind that refrigeration may slightly alter the texture of the crust, making it less flaky.
Freezing (Unbaked Pie): You can prepare an unbaked pie and freeze it for later. Assemble the pie, but do not egg wash or sprinkle with sugar. Wrap the entire pie tightly in several layers of plastic wrap, then a layer of aluminum foil. Freeze for up to 3 months. When ready to bake, unwrap the frozen pie, egg wash, and bake directly from frozen at 400°F (200°C) for 20 minutes, then reduce to 375°F (190°C) and bake for another 60-90 minutes, or until golden brown and bubbly. You may need to tent the edges with foil to prevent over-browning.
Freezing (Baked Pie): A baked and cooled apple pie can also be frozen. Wrap individual slices or the whole pie tightly in plastic wrap and then foil. Freeze for up to 1-2 months. Thaw overnight in the refrigerator before reheating.
Reheating:
- From Room Temperature: To warm a room temperature pie, place it in a preheated oven at 300°F (150°C) for 15-20 minutes, or until warmed through.
- From Refrigerated: For a refrigerated pie, preheat your oven to 325°F (160°C). Place the pie on a baking sheet and heat for 20-30 minutes, or until the filling is warm and bubbling.
- From Frozen (Baked): Thaw the pie in the refrigerator overnight. Then, follow the instructions for reheating a refrigerated pie.
- Microwave (Individual Slices): While convenient, the microwave will make the crust soggy. It’s best for quickly warming the filling if you don’t mind the crust texture. Heat individual slices for 30-60 seconds, or until warm.
Frequently Asked Questions
What kind of apples are best for apple pie?
A mix of apples is generally recommended for the best flavor and texture. Good choices include tart apples like Granny Smith (which hold their shape well) combined with sweeter, firmer apples such as Honeycrisp, Fuji, Braeburn, or Golden Delicious. Using a combination ensures a complex flavor profile and a filling that isn’t too mushy or too firm.
Why is my pie crust not flaky?
A common reason for a non-flaky crust is that the butter wasn’t cold enough or the dough was overworked. For a flaky crust, the butter needs to remain in small, distinct pieces within the dough. As the pie bakes, these butter pieces melt, creating steam that separates the layers of dough, resulting in flakiness. If the butter melts before baking or the dough is kneaded too much, the gluten develops, leading to a tough, less flaky crust. Always use very cold butter and ice water, and handle the dough as little as possible.
How do I prevent my apple pie from having a runny filling?
Several factors can contribute to a runny filling. Ensure you’re using enough thickener (flour, cornstarch, or tapioca starch) in your apple mixture. The type of apple also plays a role; some apples release more liquid than others. Allowing the pie to cool completely for at least 3-4 hours (or even overnight) before slicing is crucial. As the pie cools, the thickener continues to set, and the juices reabsorb into the apples, resulting in a firmer, less runny filling.
Can I make the pie dough ahead of time?
Absolutely! Pie dough is excellent for making ahead. You can prepare the dough, form it into disks, wrap it tightly in plastic wrap, and refrigerate it for up to 2-3 days. You can also freeze pie dough for up to 3 months. If frozen, thaw it overnight in the refrigerator before rolling it out. This makes pie baking much more manageable, as you can tackle the crust preparation on a separate day.