
Introduction
Craving a delightful dessert but find yourself short on time and energy? Imagine a sweet, velvety treat that requires no baking, minimal fuss, and simply melts in your mouth. This creamy, layered dessert is your answer! It’s the ultimate solution for those moments when you desire something indulgent and satisfying without spending hours in the kitchen. Perfect for a quick weeknight treat or an impressive, yet effortless, addition to any gathering, this recipe embodies simplicity and deliciousness in every spoonful.
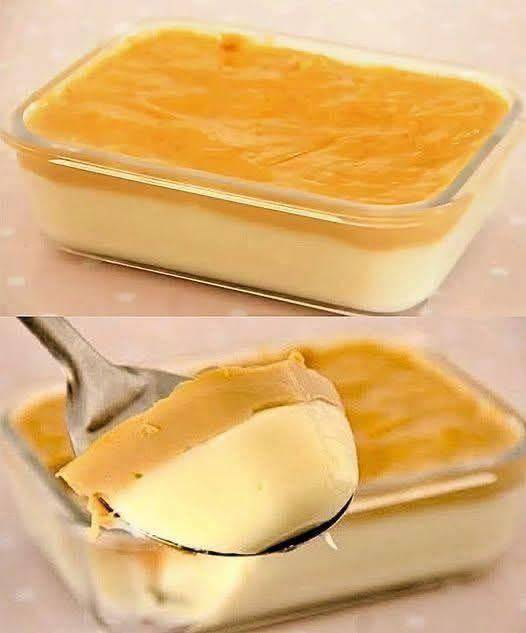
What makes this dessert truly special is its incredible ease and practicality. The name says it all: “just mix and refrigerate.” There’s no oven involved, no complex techniques, and no endless cleanup. You’ll be amazed at how quickly you can assemble the ingredients and let your refrigerator do all the hard work. The result is a beautifully layered dessert with a smooth, rich base and a vibrant, fruity top that’s as pleasing to the eye as it is to the palate. It’s a testament to the fact that extraordinary flavors don’t always require extraordinary effort.
This recipe is designed for maximum convenience without compromising on taste or texture. Whether you’re a seasoned chef or a complete novice in the kitchen, you’ll find this no-bake wonder incredibly forgiving and rewarding. Its creamy consistency and contrasting layers offer a delightful sensory experience, making it an instant crowd-pleaser. Get ready to impress your family and friends with a dessert that tastes gourmet but comes with a secret ingredient: absolute simplicity!
Nutritional Information
Per serving (approximate values):
- Calories: 320
- Protein: 4g
- Carbohydrates: 38g
- Fat: 18g
- Fiber: 2g
- Sodium: 80mg
Ingredients
- 1 cup (240ml) heavy cream, very cold
- 1/2 cup (120g) full-fat cream cheese, softened
- 1/4 cup (50g) granulated sugar (or to taste)
- 1 teaspoon vanilla extract
- 1/2 cup (120g) plain Greek yogurt (optional, for tanginess)
- 1 (14-ounce/397g) can sweetened condensed milk, chilled
- 1 (3-ounce/85g) package fruit-flavored gelatin (e.g., mango, peach, or apricot)
- 1 cup (240ml) boiling water
- 1 cup (240ml) cold water
- 1 cup (200g) fresh or frozen fruit puree (e.g., mango, peach, apricot)
- Optional: 1/4 cup (30g) crushed vanilla wafers or graham cracker crumbs for a bottom crust (not included in primary instructions, but a common variation)
Instructions
- Prepare the Creamy Base: In a large mixing bowl, combine the softened cream cheese, granulated sugar, and vanilla extract. Beat with an electric mixer on medium speed until smooth and creamy, ensuring there are no lumps.
- Add Condensed Milk: Pour in the chilled sweetened condensed milk. Continue to beat on medium speed until thoroughly combined and the mixture is uniform and smooth.
- Whip the Heavy Cream: In a separate, very cold bowl, whip the cold heavy cream until soft peaks form. If using, gently fold in the Greek yogurt at this stage as well, mixing until just combined.
- Combine Base Layers: Gently fold the whipped heavy cream (and yogurt, if used) into the cream cheese and condensed milk mixture. Use a spatula and fold carefully to maintain the airy texture of the whipped cream. Mix until just combined and smooth. Do not overmix.
- Pour the Base Layer: Divide the creamy mixture evenly among your serving dishes (individual glasses, ramekins, or a single 8×8 inch square dish). Ensure the layer is smooth and even.
- Chill the Base Layer: Place the dishes in the refrigerator and chill for at least 2-3 hours, or until the base layer is firm to the touch. This step is crucial to prevent the fruit layer from sinking or mixing.
- Prepare the Fruit Gelatin Layer: Once the base layer is adequately chilled and set, prepare the fruit gelatin. Empty the contents of the fruit-flavored gelatin package into a heatproof bowl.
- Dissolve Gelatin: Carefully pour 1 cup (240ml) of boiling water over the gelatin powder. Stir continuously for at least 2 minutes, or until the gelatin is completely dissolved and there are no granules remaining.
- Add Cold Water and Fruit Puree: Stir in 1 cup (240ml) of cold water into the dissolved gelatin mixture. Then, add the 1 cup (200g) of fresh or frozen fruit puree. Stir well to combine all ingredients thoroughly. If using frozen fruit puree, ensure it’s thawed first.
- Cool the Gelatin Mixture: Allow the fruit gelatin mixture to cool down to room temperature. It’s important that it’s not hot when you pour it over the chilled base, as heat can melt the creamy layer. You can place the bowl in an ice bath for faster cooling, stirring occasionally, but ensure it doesn’t set.
- Pour the Fruit Layer: Once the fruit gelatin mixture has cooled, carefully and slowly pour it over the set creamy base layer in each serving dish. Pour gently over the back of a spoon to prevent creating indentations in the creamy layer.
- Final Chill: Return the dishes to the refrigerator and chill for an additional 4-6 hours, or preferably overnight, until the fruit gelatin layer is completely set and firm.
- Serve and Enjoy: Once fully set, your creamy, layered dessert is ready to be served. Garnish with fresh fruit, a dollop of whipped cream, or a sprinkle of chopped nuts, if desired.
Cooking Tips and Variations
Tips for Best Results:
- Chill Everything: For the creamiest base and quickest setting, ensure your heavy cream, cream cheese (though softened, it should still be cool), and even your mixing bowl and whisk attachments are well-chilled before whipping.
- Don’t Overmix the Base: When folding in the whipped cream, do so gently and only until just combined. Overmixing can deflate the cream, leading to a less airy and dense base.
- Patience with Chilling: The chilling steps are non-negotiable for success. Rushing them will result in layers that mix or a dessert that doesn’t set properly. The base layer must be firm before adding the fruit layer.
- Smooth Gelatin: Ensure the gelatin powder is completely dissolved in boiling water before adding cold water and fruit puree. Undissolved gelatin can lead to a grainy texture.
- Careful Pouring: Pouring the fruit layer over the back of a spoon is a simple trick to prevent it from disturbing the perfectly set creamy base layer, ensuring distinct, beautiful layers.
- Adjust Sweetness: Taste the creamy base mixture before pouring. The amount of sugar can be adjusted based on your preference and the sweetness of the condensed milk. For the fruit layer, if using unsweetened fruit puree, you might want to add a tablespoon or two of sugar to the gelatin mixture.
Recipe Variations:
- Fruit Flavors Galore:
- Berry Bliss: Use strawberry, raspberry, or mixed berry gelatin and fresh berry puree. Garnish with whole berries.
- Tropical Twist: Passion fruit, pineapple, or guava gelatin with their respective purees. A sprinkle of toasted coconut flakes would be divine.
- Citrus Zing: Lemon or lime gelatin with citrus zest in the creamy layer and a corresponding citrus puree.
- Crust Option: For an added texture, press 1/4 cup of crushed vanilla wafers or graham cracker crumbs mixed with 1 tablespoon of melted butter into the bottom of your serving dishes before adding the creamy base. Chill for 15 minutes before proceeding.
- Creamy Base Variations:
- Lighter Version: Substitute some of the heavy cream with low-fat Greek yogurt or light cream cheese for a slightly lighter, tangier base.
- Chocolate Lover’s Dream: Add 2 tablespoons of unsweetened cocoa powder to the cream cheese mixture for a chocolatey base.
- Nutty Flavor: Fold in 1/4 cup of finely chopped toasted nuts (like pecans or walnuts) into the creamy base.
- Garnish Galore:
- Fresh Fruit: Slices of the fruit used in the top layer, or contrasting fruits for visual appeal.
- Whipped Cream: A dollop of freshly whipped cream adds extra indulgence.
- Chocolate Shavings: Dark or white chocolate shavings for an elegant touch.
- Mint Leaves: A fresh mint sprig for color and aroma.
- Toasted Coconut: Adds a lovely texture and tropical flavor.
- Individual vs. Family Style: This recipe works beautifully in individual glasses or ramekins for elegant single servings, or in a larger square or rectangular dish for a family-style dessert that can be scooped.
Storage and Reheating
Storage:
This creamy, layered dessert is best enjoyed chilled. Store any leftovers in an airtight container or covered tightly with plastic wrap in the refrigerator. Proper storage will help maintain its creamy texture and prevent it from absorbing refrigerator odors. It will keep well for up to 3-4 days in the refrigerator. Beyond this time, the gelatin layer may start to weep slightly, and the texture of the creamy base might change, though it would still be safe to eat.
Freezing this dessert is generally not recommended. While technically possible, the texture of both the creamy base (due to the dairy and cream cheese) and the gelatin layer will significantly degrade upon thawing. The dairy components can become grainy or separate, and the gelatin can become watery and lose its smooth consistency. It’s truly a dessert meant to be served fresh and chilled, not frozen.
Reheating:
This dessert is a chilled, no-bake treat and should never be reheated. Reheating would cause the gelatin to melt, the creamy layers to separate and curdle, and the entire dessert to lose its intended structure and appeal. It is designed to be served cold, directly from the refrigerator. If you’ve taken it out for serving and it starts to warm up, simply place it back in the refrigerator to re-chill before serving again, if time permits.
Frequently Asked Questions
Can I use sugar-free gelatin for this recipe?
Yes, you can absolutely use sugar-free gelatin for the fruit layer if you prefer or if you’re managing sugar intake. The setting properties of sugar-free gelatin are similar to regular gelatin, so it will still set up nicely. Just be aware that the overall sweetness of the dessert might be reduced, so you might want to adjust the sugar in the creamy base slightly to your taste, or ensure your fruit puree is naturally sweet.
My creamy base isn’t setting properly. What went wrong?
There are a few common reasons why the creamy base might not set. The most likely cause is that the heavy cream was not whipped enough, or it was overmixed and deflated when combined with the other ingredients. Ensure your heavy cream is very cold before whipping and whip it until it forms soft peaks. Also, ensure your cream cheese is softened but not warm, and that you’re using full-fat cream cheese and sweetened condensed milk, as these contribute significantly to the setting. Lastly, ensure you’ve given it sufficient chilling time – at least 2-3 hours before adding the next layer.
Can I make this dessert vegan?
Adapting this recipe to be fully vegan would require significant substitutions for all dairy products (heavy cream, cream cheese, sweetened condensed milk) and the gelatin. You would need to use plant-based heavy cream alternatives, vegan cream cheese, and a vegan condensed milk substitute. For the gelatin layer, agar-agar or a plant-based gelatin substitute would be necessary. While possible, the texture and taste might differ slightly from the original dairy-based version, and specific quantities for vegan alternatives would need to be adjusted.
How far in advance can I make this dessert?
This dessert is perfect for making in advance! You can prepare the entire dessert up to 24-36 hours before you plan to serve it. This allows ample time for both layers to set completely and for the flavors to meld beautifully. Just make sure to keep it covered tightly in the refrigerator to prevent it from drying out or absorbing any unwanted odors from other foods in the fridge.