
Introduction
Prepare to tantalize your taste buds with a dish that effortlessly combines elegance and simplicity: Crispy Garlic Butter Shrimp! This isn’t just another shrimp recipe; it’s a culinary experience designed to deliver perfectly golden-brown, succulent shrimp enveloped in a rich, aromatic garlic butter sauce. Imagine biting into a shrimp that offers a satisfying snap, followed by a burst of savory, garlicky goodness. It’s the kind of dish that makes an ordinary weeknight feel like a special occasion, yet it’s so quick and easy to prepare, you’ll wonder why you haven’t made it sooner.
What makes this Crispy Garlic Butter Shrimp truly irresistible is the magical combination of textures and flavors. The secret to that coveted crispiness lies in a few crucial steps, especially when starting with frozen shrimp – a common and convenient choice for many home cooks. We’ll guide you through transforming these frosty gems into a restaurant-quality meal, ensuring each shrimp is perfectly cooked, never rubbery, and always bursting with flavor. Whether you’re looking for a speedy main course, a delightful appetizer, or a stunning addition to your pasta or rice, this recipe is incredibly versatile and guaranteed to impress.
This recipe celebrates the humble shrimp, elevating it with the timeless pairing of garlic and butter. It’s a testament to how simple, high-quality ingredients, when prepared correctly, can create something truly extraordinary. Get ready to master the art of crispy shrimp and add a new favorite to your culinary repertoire!
Nutritional Information
Per serving (approximate values):
- Calories: 350
- Protein: 25g
- Carbohydrates: 5g
- Fat: 25g
- Fiber: 1g
- Sodium: 650mg
Ingredients
- 1.5 pounds large frozen shrimp, peeled and deveined (tail on or off, your preference)
- 6 tablespoons unsalted butter, divided
- 5 cloves garlic, minced
- 1 tablespoon olive oil
- 1/2 teaspoon salt
- 1/4 teaspoon black pepper
- 1/4 cup fresh parsley, finely chopped
- 1 tablespoon fresh lemon juice (from about half a lemon)
- Pinch of red pepper flakes (optional, for a little heat)
Instructions
- Thaw the Shrimp: If your shrimp are frozen, place them in a colander under cold running water for about 5-10 minutes, gently separating them until fully thawed. Alternatively, transfer them to a bowl and thaw in the refrigerator overnight.
- Dry the Shrimp Thoroughly: This is the most crucial step for crispiness! Once thawed, spread the shrimp in a single layer on a plate or baking sheet lined with several layers of paper towels. Place more paper towels on top and press firmly to absorb as much moisture as possible. Repeat with fresh paper towels if necessary until the shrimp are as dry as you can get them.
- Season the Shrimp: In a medium bowl, toss the dried shrimp with salt and black pepper. If desired, you can also add a pinch of paprika for extra color and flavor.
- Prepare the Garlic Butter: In a small bowl, combine 4 tablespoons of the unsalted butter with the minced garlic. Set aside.
- Heat the Skillet: Place a large, heavy-bottomed skillet (cast iron or stainless steel works best) over medium-high heat. Add the remaining 2 tablespoons of unsalted butter and the olive oil to the hot skillet. Swirl to coat the bottom of the pan.
- Cook the Shrimp in Batches: Once the butter and oil are shimmering and hot, add about half of the seasoned shrimp to the skillet in a single layer. Do not overcrowd the pan, as this will steam the shrimp instead of searing them, preventing crispiness. Cook for 1-2 minutes per side, until the shrimp turn pink and opaque, and develop a beautiful golden-brown sear.
- Remove First Batch: Transfer the cooked shrimp to a clean plate and set aside.
- Cook Second Batch: Add the remaining shrimp to the skillet and cook in the same manner until pink, opaque, and crispy. Remove from the skillet and add to the plate with the first batch.
- Finish with Garlic Butter: Reduce the heat to medium-low. Add the prepared garlic butter mixture to the skillet. Cook for about 30-60 seconds, stirring constantly, until the garlic is fragrant and lightly golden, being careful not to burn it. If using red pepper flakes, add them now.
- Combine and Serve: Return all the cooked shrimp to the skillet with the garlic butter. Toss gently to coat the shrimp thoroughly. Remove from heat.
- Add Freshness: Stir in the fresh lemon juice and chopped parsley. Toss once more to combine.
- Serve Immediately: Transfer the Crispy Garlic Butter Shrimp to a serving platter and serve hot.
Cooking Tips and Variations
Achieving truly crispy garlic butter shrimp requires attention to detail, but once you master a few key techniques, you’ll be making this dish on repeat. The absolute most critical step, especially when using frozen shrimp, is ensuring they are as dry as possible before hitting the pan. Any residual moisture will create steam, preventing that coveted sear and leaving you with rubbery, steamed shrimp instead of crispy, golden delights. Don’t be shy with the paper towels; press firmly and replace them if they become saturated. High heat is another non-negotiable for crispiness. A screaming hot pan allows the shrimp to sear quickly on the outside while remaining tender on the inside. If your pan isn’t hot enough, the shrimp will release their moisture and steam rather than crisp. Cooking in batches is also paramount. Overcrowding the pan drastically drops the temperature and introduces too much moisture, again leading to steaming. Give each shrimp space to breathe and sear properly.
For an extra layer of crispiness, some chefs swear by a light dusting of cornstarch or baking powder on the dry shrimp before seasoning. This creates a thin, dry coating that helps achieve an even crispier exterior. Just a teaspoon or two for a pound and a half of shrimp is usually sufficient. Another tip for perfectly cooked shrimp is to watch them closely; they cook incredibly fast. As soon as they turn pink and opaque, and curl into a C-shape, they’re done. Overcooking is the quickest way to turn tender shrimp into tough, rubbery bites. Remove them from the heat immediately, even if they’re not quite as crispy as you’d like on one side – it’s better to have tender shrimp than rubbery ones.
This recipe is also incredibly versatile when it comes to variations. To add a bit of heat, increase the amount of red pepper flakes or add a pinch of cayenne pepper. For a different flavor profile, consider adding a splash of dry white wine (like Pinot Grigio or Sauvignon Blanc) to the garlic butter sauce after the garlic has become fragrant, allowing it to reduce slightly before returning the shrimp to the pan. You can also experiment with different fresh herbs; dill, chives, or even fresh oregano could offer interesting twists. For a touch of smoky flavor, a tiny pinch of smoked paprika can be added along with the salt and pepper. If you want to make this a richer, creamier dish, stir in a tablespoon or two of heavy cream to the garlic butter sauce just before tossing in the shrimp. Finally, for an extra burst of freshness, a little lime juice instead of lemon juice can provide a zesty alternative.
Storage and Reheating
Crispy Garlic Butter Shrimp is best enjoyed immediately after cooking, when the shrimp are at their crispiest and the garlic butter is most vibrant. However, if you have leftovers, they can be stored safely and reheated, though the shrimp may lose some of their initial crispiness.
To store, allow the cooked shrimp to cool completely to room temperature (this usually takes about 15-20 minutes). Once cooled, transfer the shrimp and any remaining garlic butter sauce to an airtight container. Store the container in the refrigerator for up to 2-3 days. Avoid leaving cooked shrimp at room temperature for more than two hours, as this can lead to bacterial growth.
For reheating, the goal is to warm the shrimp through without overcooking them, which would make them tough and rubbery. The microwave is the quickest option, but it’s also the most likely to result in rubbery shrimp. If using a microwave, place the shrimp in a microwave-safe dish, cover loosely, and heat on medium power in 30-second intervals until just warmed through. Stirring gently between intervals can help with even heating. Be careful not to overheat.
A better method for reheating, which helps retain more texture, is to use a skillet on the stovetop. Heat a non-stick skillet over medium-low heat. Add the leftover shrimp and any sauce, spreading them in a single layer. Cook for just a few minutes, stirring occasionally, until the shrimp are heated through. Avoid high heat, as this will cook them further and make them tough. You can add a tiny splash of water or chicken broth to create a little steam and prevent drying out. Another good option for reheating is an air fryer or oven. Preheat your air fryer to 300°F (150°C) or oven to 325°F (160°C). Arrange the shrimp in a single layer in the air fryer basket or on a baking sheet. Heat for 3-5 minutes in the air fryer, or 5-7 minutes in the oven, or until just warmed through. This method can help restore some of the crispiness without drying out the shrimp.
If you plan to freeze cooked shrimp, it’s generally not recommended for this dish, as the texture will significantly degrade upon thawing and reheating. The delicate nature of shrimp means that freezing and reheating often results in a very tough and watery product. It’s truly best enjoyed fresh.
Frequently Asked Questions
What kind of shrimp should I use for this recipe?
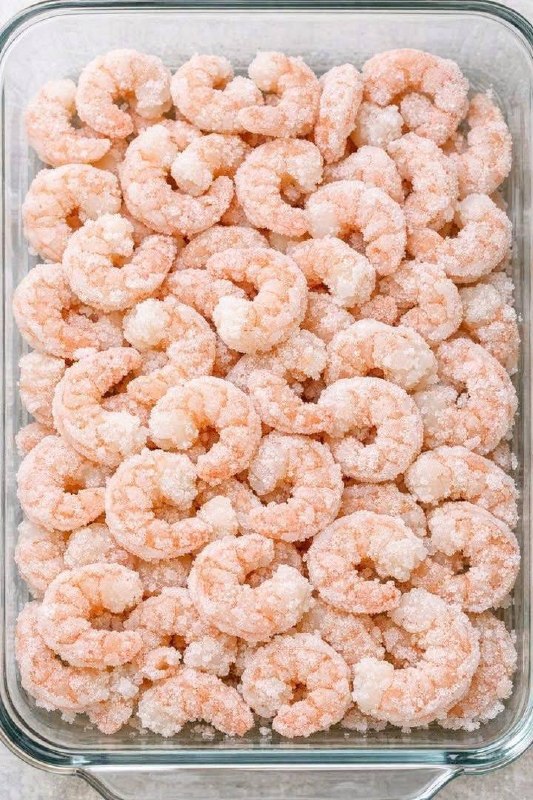
For this recipe, large (21/25 count or 16/20 count) peeled and deveined frozen shrimp are ideal. The image clearly shows frozen shrimp, which are often more convenient and sometimes even fresher than “fresh” shrimp that have been previously frozen and thawed at the seafood counter. You can choose shrimp with the tails on for presentation, or tails off for easier eating. Just ensure they are thawed and thoroughly dried before cooking for the best crispy results.
How do I prevent the shrimp from becoming rubbery?
Preventing rubbery shrimp comes down to two main factors: not overcooking and properly drying them. Shrimp cook very quickly, usually 1-2 minutes per side, depending on their size. As soon as they turn pink and opaque and curl into a C-shape, they are done. Overcooking even by a minute can lead to a rubbery texture. Additionally, ensuring your shrimp are bone-dry before they hit the hot pan helps them sear and crisp up quickly, minimizing the time they spend cooking and reducing the chance of overcooking.
Can I make this recipe ahead of time?
While Crispy Garlic Butter Shrimp is best enjoyed immediately for optimal crispiness and flavor, you can prepare some components ahead of time. You can thaw and thoroughly dry the shrimp, then store them in the refrigerator for up to 24 hours. You can also mince the garlic and chop the parsley in advance. However, the actual cooking of the shrimp and the final tossing in garlic butter should be done just before serving to ensure the best possible texture and taste.
What are some good side dishes to serve with Crispy Garlic Butter Shrimp?
This versatile dish pairs wonderfully with a variety of sides. For a light meal, serve it with a fresh green salad with a simple vinaigrette. For a more substantial dinner, it’s excellent over a bed of linguine or spaghetti, especially if you have extra garlic butter sauce to coat the pasta. Other great options include fluffy white rice, quinoa, couscous, roasted asparagus, steamed broccoli, or crusty bread to soak up all that delicious garlic butter. Lemon wedges are also a must-have for a final squeeze of freshness.