
Introduction
There’s something undeniably magical about a fresh loaf of artisan bread. The crackle of the crust, the soft, airy interior, and that comforting aroma that fills your kitchen – it’s a simple pleasure that elevates any meal. Our Rustic Rosemary Artisan Bread recipe brings that bakery-quality experience right into your home, making it accessible even for beginner bakers. This isn’t just any bread; it’s a celebration of simple ingredients transformed into something extraordinary, with the fragrant addition of fresh rosemary lending an earthy, aromatic depth that is simply irresistible.
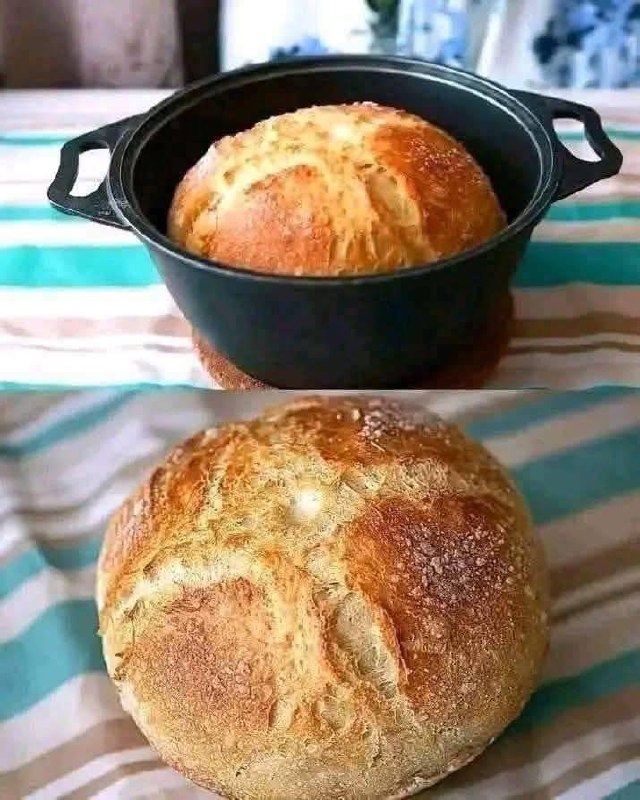
What makes this particular recipe so special is its rustic charm and incredible ease of preparation. Forget complicated kneading techniques or specialized equipment; this is a no-knead wonder that relies on time and a Dutch oven to do all the hard work. The result is a loaf with a perfectly golden, chewy crust and a tender crumb, infused with the herbaceous notes of rosemary. It’s the kind of bread that begs to be torn by hand, shared with loved ones, and savored with every bite, whether alongside a hearty soup or simply with a pat of good butter.
This Rustic Rosemary Artisan Bread is more than just a recipe; it’s an invitation to slow down, enjoy the process of baking, and experience the pure joy of homemade goodness. Its “rustic” nature means no two loaves are exactly alike, each with its own unique character and charm. The irregular shape, the beautiful scoring, and the robust flavor make it a centerpiece on any table, proving that delicious, impressive bread doesn’t have to be difficult to achieve.
Nutritional Information
Per serving (approximate values):
- Calories: 220
- Protein: 7g
- Carbohydrates: 42g
- Fat: 2g
- Fiber: 2g
- Sodium: 350mg
Ingredients
- 3 cups (360g) bread flour (or all-purpose flour)
- 1 ½ teaspoons active dry yeast or instant yeast
- 1 ½ teaspoons fine sea salt
- 1 tablespoon fresh rosemary, finely chopped
- 1 ½ cups (360ml) warm water (105-115°F / 40-46°C)
- Extra flour for dusting
Instructions
- Prepare the Dough: In a large mixing bowl, combine the bread flour, active dry yeast (if using active dry, let it proof in warm water for 5 minutes first, then add to dry ingredients), sea salt, and finely chopped fresh rosemary.
- Add Water and Mix: Pour the warm water into the dry ingredients. Using a wooden spoon or a sturdy spatula, mix until all the flour is incorporated and a shaggy, sticky dough forms. Do not overmix; just ensure there are no dry spots of flour.
- First Rise (Bulk Fermentation): Cover the bowl tightly with plastic wrap or a clean kitchen towel. Let the dough rise at room temperature for 12-18 hours, or until it has more than doubled in size and the surface is dotted with bubbles. A warmer kitchen will result in a faster rise.
- Prepare for Shaping: Once the dough has risen, generously flour a clean work surface. Gently scrape the dough out of the bowl onto the floured surface. The dough will be very wet and sticky – this is normal.
- Shape the Dough: With floured hands, gently fold the edges of the dough towards the center to form a round ball. Avoid overhandling the dough.
- Second Rise (Proofing): Lightly flour a piece of parchment paper (about 12×12 inches) and gently transfer the shaped dough onto it. You can also place the dough in a floured proofing basket (banneton) if you have one, then invert onto parchment. Cover the dough loosely with plastic wrap or a damp kitchen towel and let it rest for 30-60 minutes, or until slightly puffy.
- Preheat Oven and Dutch Oven: About 30 minutes into the second rise, place a 5-6 quart Dutch oven with its lid into your oven. Preheat the oven to 450°F (230°C). It’s crucial that the Dutch oven is fully preheated.
- Score the Dough: Carefully remove the hot Dutch oven from the oven using oven mitts. Lift the dough (still on the parchment paper) and gently lower it into the preheated Dutch oven. Using a sharp knife or a bread lame, score the top of the dough once or twice. A simple cross or a single slash is perfect.
- Bake with Lid On: Place the lid back on the Dutch oven. Bake for 30 minutes with the lid on. The lid traps steam, creating that wonderfully crusty exterior.
- Bake with Lid Off: After 30 minutes, carefully remove the lid from the Dutch oven. Continue to bake for another 15-20 minutes, or until the crust is deeply golden brown and sounds hollow when tapped on the bottom.
- Cool the Bread: Carefully remove the Dutch oven from the oven. Using the parchment paper, lift the bread out and transfer it to a wire cooling rack. Let the bread cool completely for at least 1-2 hours before slicing. Slicing too early can result in a gummy texture.
Cooking Tips and Variations
Achieving that perfect artisan loaf is easier than you think, especially with a few handy tips. For a successful rise, ensure your kitchen isn’t too cold during the first fermentation; a slightly warm spot (around 70-75°F or 21-24°C) is ideal. If your kitchen is chilly, you can place the covered bowl in an unheated oven with just the light on, which provides a gentle warmth. When it comes to scoring, a sharp knife or a dedicated bread lame is your best friend. A quick, confident cut about half an inch deep will allow the bread to expand beautifully during baking, preventing uncontrolled cracks and creating that classic artisan look. Don’t be afraid to experiment with your scoring patterns – a simple cross, a single slash, or even a few parallel lines can yield stunning results.
Preventing sticking in your Dutch oven is key to an easy release. While parchment paper is the simplest solution, you can also lightly dust the bottom of the preheated Dutch oven with cornmeal or semolina before placing the dough in. This creates a barrier and adds a subtle crunch to the bottom crust. Remember, safety first when working with a hot Dutch oven; always use sturdy oven mitts and handle with care.
This recipe is incredibly versatile, allowing for many delicious variations. If you’re a fan of garlic, try adding 1-2 cloves of minced fresh garlic to the dough along with the rosemary. For a different herbaceous note, swap out rosemary for fresh thyme or a blend of Italian herbs. If you enjoy a bit of texture and nuttiness, consider incorporating ¼ cup of chopped walnuts, pecans, or sunflower seeds into the dough during the initial mixing stage. For a slightly cheesy twist, add ¼ cup of grated Parmesan cheese – it pairs wonderfully with rosemary. You can also experiment with different flours; a blend of bread flour and a small amount of whole wheat flour (e.g., 2 ¾ cups bread flour, ¼ cup whole wheat flour) can add more depth of flavor and nutrition, though it might result in a slightly denser crumb. Just ensure your total flour weight remains around 360g.
Storage and Reheating
To keep your Rustic Rosemary Artisan Bread fresh and delicious, proper storage is key. Once completely cooled, the best way to store homemade bread is at room temperature. Avoid refrigerating it, as this can actually dry out the bread and make it stale faster. For short-term storage (1-2 days), simply place the loaf in a large, airtight plastic bag or a bread box. This helps to maintain its moisture and prevent it from going stale. For longer storage, you can freeze the bread. Once cooled, slice the bread and place the slices in a freezer-safe bag or wrap the entire loaf tightly in plastic wrap, then aluminum foil. It can be stored in the freezer for up to 3 months.
When it comes to reheating, there are a few methods depending on whether your bread is fresh or frozen. For a whole loaf that’s a day or two old, you can refresh it by lightly spritzing it with water and placing it in a 350°F (175°C) oven for 5-10 minutes, or until the crust is crisp again and the interior is warmed through. If reheating slices, you can pop them in a toaster or toaster oven until lightly golden and crisp. For frozen slices, you can toast them directly from frozen. If reheating a whole frozen loaf, thaw it completely at room temperature first, then follow the instructions for refreshing an older loaf. The goal is always to bring back that wonderful crusty exterior and soft, warm interior, making it almost as good as freshly baked.
Frequently Asked Questions
Can I make this recipe without a Dutch oven?
While a Dutch oven is highly recommended for achieving the best crust and rise, you can still make this bread without one. Preheat your oven to 450°F (230°C) with a baking stone or heavy baking sheet inside. To create steam, place a shallow pan of hot water on the bottom rack of your oven. Carefully transfer the scored dough onto the hot baking stone/sheet. Bake for 30-35 minutes, or until golden brown and cooked through. The crust might not be as thick and chewy as with a Dutch oven, but it will still be delicious.
What kind of yeast should I use, and do I need to proof it?
This recipe works well with both active dry yeast and instant yeast. If using active dry yeast, it’s a good practice to “proof” it first. Dissolve the yeast in the warm water (105-115°F / 40-46°C) with a pinch of sugar (optional) and let it sit for 5-10 minutes until foamy. If it doesn’t foam, your yeast might be old or the water temperature was off, and it’s best to start with fresh yeast. If using instant yeast, you can mix it directly with the dry ingredients as it doesn’t require proofing.
My dough isn’t rising. What could be wrong?
Several factors can affect dough rising. The most common issues are inactive yeast, water temperature that is too hot or too cold (killing the yeast), or a cold environment. Ensure your yeast is fresh and active. Your warm water should feel like a warm bath, not hot. If your kitchen is cold, find a warmer spot for the dough to rise, like in an unheated oven with the light on, or near a warm (but not hot) appliance. Give the dough ample time to rise; some no-knead recipes require a longer fermentation period.
How can I get a really crisp crust?
The Dutch oven method inherently helps create a fantastic crisp crust by trapping steam. To further enhance crispiness, ensure your Dutch oven is fully preheated before adding the dough. After removing the lid for the final baking stage, you can increase the oven temperature by 10-15°F for the last 5-10 minutes, keeping a close eye to prevent burning. Also, allowing the bread to cool completely on a wire rack is crucial; this prevents condensation and keeps the crust from softening.