
Introduction
There’s a reason why chocolate chip cookies hold a coveted spot in the hearts (and stomachs) of people worldwide: they are the quintessential comfort food. The aroma alone, wafting from a warm oven, is enough to transport you back to childhood memories of warmth, family, and simple joys. These golden-brown disks, studded with melty pockets of chocolate, offer a perfect symphony of textures – a slightly crisp edge yielding to a chewy, tender center. From school lunchboxes to late-night cravings, and from holiday gatherings to a quiet moment with a cup of coffee, the chocolate chip cookie is a universally beloved treat that transcends generations and cultures.
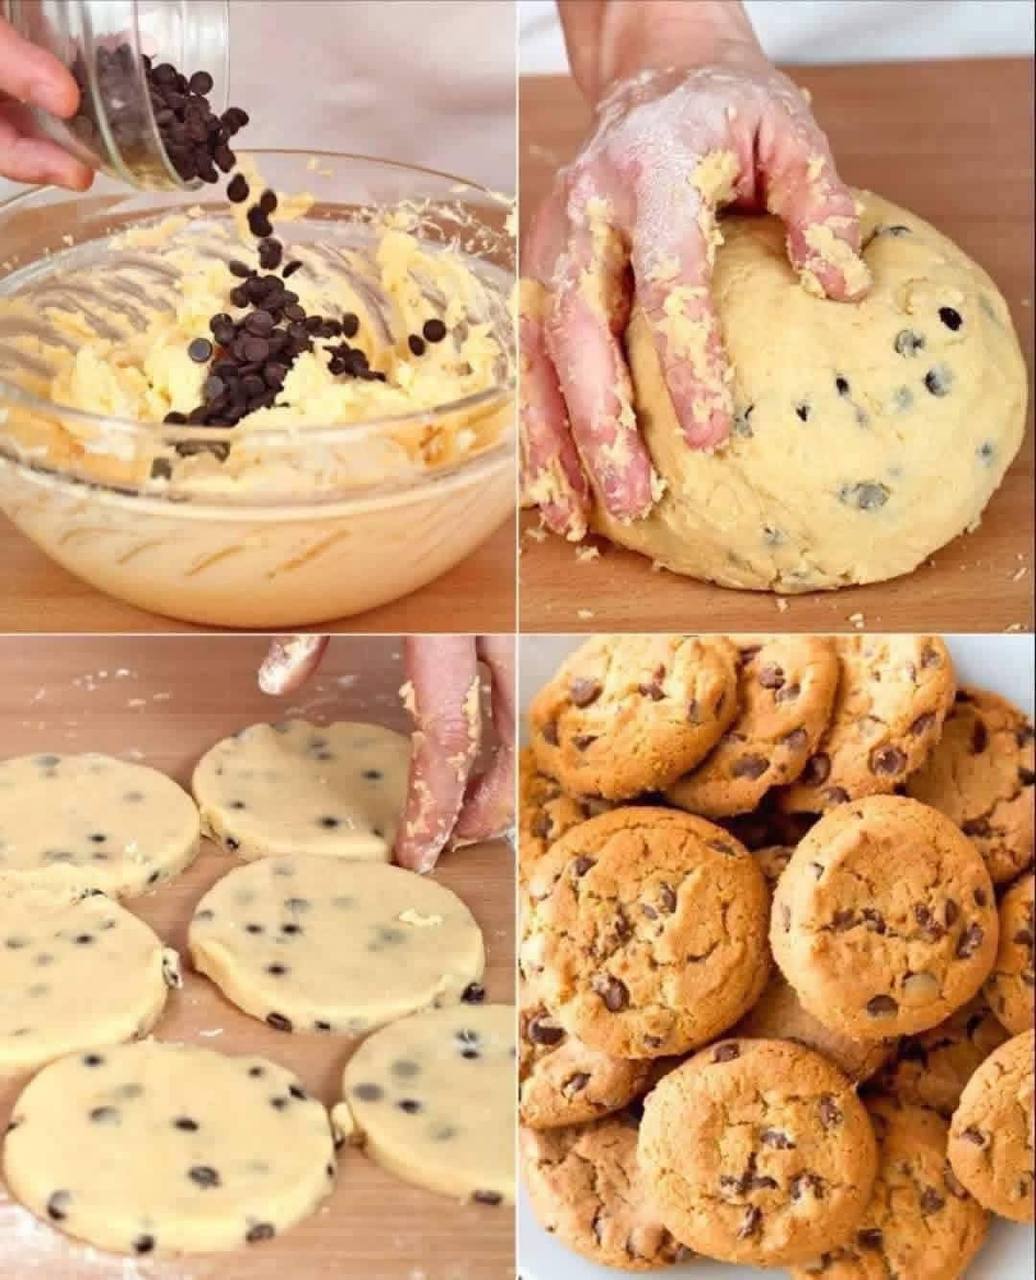
While there are countless ways to craft a chocolate chip cookie, our recipe today focuses on a particularly convenient and satisfying method: the slice-and-bake cookie. This approach takes the guesswork out of portioning and offers the incredible flexibility of having fresh, warm cookies ready at a moment’s notice. Imagine the delight of pulling a pre-made log of dough from your freezer, slicing off a few rounds, and having perfect cookies emerge from the oven in minutes. It’s an ingenious way to ensure you always have a delicious treat on hand, without the immediate mess and effort of a full baking session.
What makes this particular recipe special, beyond its slice-and-bake convenience, is its commitment to achieving that ideal balance of flavor and texture. We’re aiming for a cookie that’s rich and buttery, with just the right amount of sweetness to complement the robust notes of high-quality chocolate. The slight chewiness, combined with those irresistible molten chocolate chips, creates a truly addictive experience. This isn’t just another chocolate chip cookie recipe; it’s an invitation to elevate your baking game with a technique that promises consistent results and unparalleled convenience, ensuring every bite is as perfect as the last.
Nutritional Information
Per serving (approximate values):
- Calories: 180
- Protein: 2g
- Carbohydrates: 25g
- Fat: 9g
- Fiber: 1g
- Sodium: 110mg
Ingredients
- 2 ½ cups (300g) all-purpose flour, plus extra for dusting
- 1 teaspoon baking soda
- ¾ teaspoon salt
- 1 cup (226g) unsalted butter, softened
- ¾ cup (150g) granulated sugar
- ¾ cup (160g) packed light brown sugar
- 2 large eggs, at room temperature
- 2 teaspoons pure vanilla extract
- 1 ½ cups (250g) semi-sweet chocolate chips or chopped chocolate chunks
Instructions
- In a medium bowl, whisk together the all-purpose flour, baking soda, and salt. Set aside.
- In a large bowl, using an electric mixer, cream together the softened unsalted butter, granulated sugar, and light brown sugar on medium speed until light and fluffy, about 2-3 minutes. The mixture should be pale in color and have a smooth, airy consistency.
- Beat in the eggs one at a time, ensuring each egg is fully incorporated before adding the next. Scrape down the sides of the bowl as needed to ensure everything is well combined.
- Stir in the pure vanilla extract until just combined.
- Gradually add the dry ingredients (flour mixture) to the wet ingredients, mixing on low speed until just combined. Be careful not to overmix; stop as soon as no dry streaks of flour remain. Overmixing can lead to tough cookies.
- Fold in the chocolate chips or chopped chocolate chunks by hand using a spatula until they are evenly distributed throughout the dough.
- Divide the dough in half. On a lightly floured surface or a piece of parchment paper, shape each half into a log, approximately 1 ½ to 2 inches in diameter. Aim for a uniform thickness along the entire length of the log for consistent cookie size.
- Wrap each dough log tightly in plastic wrap, twisting the ends to seal. Place the wrapped dough logs in the refrigerator and chill for at least 2 hours, or preferably overnight. Chilling the dough is crucial for the slice-and-bake method, as it solidifies the butter, making the dough easier to slice and preventing excessive spreading during baking.
- When ready to bake, preheat your oven to 375°F (190°C). Line two baking sheets with parchment paper or silicone baking mats.
- Remove one chilled dough log from the refrigerator. Unwrap it and, using a sharp knife, slice the dough into ½-inch thick rounds. For best results and clean cuts, rotate the log slightly with each slice.
- Place the sliced cookie dough rounds about 2 inches apart on the prepared baking sheets.
- Bake for 9-12 minutes, or until the edges are golden brown and the centers are still slightly soft. The exact baking time will depend on your oven and the thickness of your cookies. Do not overbake if you want a chewy center; the cookies will continue to set as they cool.
- Once baked, remove the baking sheets from the oven and let the cookies cool on the sheets for 5 minutes before transferring them to a wire rack to cool completely. This allows them to firm up and prevents them from breaking.
- Repeat with the remaining dough log, or store it in the refrigerator or freezer for future use.
Cooking Tips and Variations
For the ultimate chocolate chip cookie experience, attention to detail is key. Firstly, always use high-quality butter and chocolate chips. The flavor of these ingredients truly shines through in the final product. European-style butter, with its higher fat content, can lend an even richer flavor and superior texture. When it comes to chocolate, opt for brands you enjoy eating on their own; semi-sweet is classic, but a mix of milk chocolate and dark chocolate chips can add wonderful complexity. Another crucial tip is to ensure your butter is truly softened, but not melted, for creaming. It should yield easily to a gentle press but still hold its shape. If your butter is too cold, it won’t cream properly with the sugars, leading to a denser cookie. If it’s too warm or melted, it can result in greasy, flat cookies.
Do not skip the chilling step for the dough. This is perhaps the most important tip for slice-and-bake cookies. Chilling allows the butter to re-solidify, which prevents the cookies from spreading too much in the oven, resulting in a thicker, chewier cookie. It also allows the flavors to meld and develop, leading to a more nuanced taste. For an even more intense flavor, you can chill the dough for up to 72 hours. When slicing, use a sharp, thin knife or even unflavored dental floss for perfectly clean cuts, which will ensure uniform baking. If your knife starts to stick, wipe it clean between slices.
When it comes to baking, resist the urge to overbake. Cookies continue to cook slightly from residual heat after they are removed from the oven. For a chewy cookie, take them out when the edges are golden brown but the centers still look a little soft and slightly underdone. They will firm up as they cool. If you prefer a crispier cookie, bake them for an extra minute or two until they are golden all over.
Variations:
- Nutty Crunch: Add ½ cup of chopped toasted pecans, walnuts, or almonds to the dough along with the chocolate chips for an extra layer of texture and flavor.
- Different Chocolates: Experiment with different types of chocolate! White chocolate chips, milk chocolate chunks, or even a blend of dark and milk chocolate can create unique flavor profiles.
- Spice It Up: A pinch of cinnamon, nutmeg, or even a tiny dash of cayenne pepper can add a warm, subtle complexity to the cookies, complementing the chocolate beautifully.
- Sea Salt Finish: For a gourmet touch, sprinkle a tiny pinch of flaky sea salt on top of each cookie immediately after they come out of the oven. This enhances the chocolate flavor and provides a delightful salty-sweet contrast.
- Oatmeal Chocolate Chip: Reduce the all-purpose flour by ½ cup and add ½ cup of old-fashioned rolled oats for a chewier, heartier cookie.
- Espresso Kick: Dissolve 1 teaspoon of instant espresso powder in the vanilla extract before adding it to the wet ingredients. This won’t make the cookies taste like coffee, but it will significantly deepen and enhance the chocolate flavor.
Storage and Reheating
Proper storage is essential to maintain the freshness and deliciousness of your homemade chocolate chip cookies. Once completely cooled, store baked cookies in an airtight container at room temperature for up to 3-4 days. To prevent them from drying out, you can place a slice of bread in the container with the cookies; the cookies will absorb moisture from the bread, keeping them softer longer. However, be sure to replace the bread every day or two to prevent mold.
For longer storage, baked cookies can be frozen. Once completely cool, arrange them in a single layer on a baking sheet and freeze until solid, about 1-2 hours. Then, transfer the frozen cookies to a freezer-safe airtight container or heavy-duty freezer bag. They can be stored in the freezer for up to 3 months. When you’re ready to enjoy them, simply thaw at room temperature for an hour or so, or reheat gently.
The beauty of the slice-and-bake method extends to dough storage as well. The unbaked dough logs, tightly wrapped in plastic wrap, can be stored in the refrigerator for up to 5-7 days. For even longer storage, the dough logs can be frozen for up to 3 months. When freezing dough logs, wrap them first in plastic wrap, then in aluminum foil or place them in a freezer-safe bag to prevent freezer burn. When you’re ready to bake from frozen, you can slice the frozen dough directly (it might be a bit harder to cut, so use a sturdy, sharp knife) and bake as usual, adding an extra 2-4 minutes to the baking time.
To reheat baked cookies, the best method is a quick warm-up in the oven or microwave. For a whole batch, place cookies on a baking sheet and warm in a preheated 275°F (135°C) oven for about 5-7 minutes, or until just warmed through and the chocolate is slightly gooey. For individual cookies, microwave on a plate for 10-20 seconds, depending on your microwave’s power, until warm and soft. Be careful not to overheat, as this can make them tough.
Frequently Asked Questions
What makes my cookies spread too much?
Cookies spreading too much can be due to several factors. The most common culprits are butter that is too soft or melted, insufficient chilling time for the dough, an oven that isn’t hot enough (causing the butter to melt before the cookies set), or too much leavening agent (baking soda). Ensure your butter is softened but still cool to the touch, and always chill your slice-and-bake dough for the recommended time to solidify the butter and prevent excessive spreading during baking. Also, verify your oven temperature with an oven thermometer.
Can I make this recipe gluten-free?
Yes, you can often adapt this recipe to be gluten-free. Substitute the all-purpose flour with a 1:1 gluten-free baking flour blend that contains xanthan gum. The texture might be slightly different, potentially a bit more crumbly, but the flavor will still be delicious. Follow the rest of the instructions as written, paying close attention to the dough consistency during mixing; gluten-free doughs can sometimes be a bit more delicate.
Why are my cookies hard and dry?
Hard and dry cookies are typically a sign of overbaking. Every oven is different, so the baking time provided is a guideline. For chewy cookies, remove them from the oven when the edges are golden brown but the centers still look slightly soft and glossy. They will continue to firm up as they cool on the baking sheet. Another reason could be too much flour, so ensure you measure your flour correctly, ideally by weight using a kitchen scale, or by spooning flour into your measuring cup and leveling it off, rather than scooping directly from the bag.