
Introduction
There’s nothing quite like the satisfying crunch of perfectly crispy chicken, and with this Crispy Skillet Chicken recipe, you can achieve that golden-brown perfection right in your own kitchen. Forget complicated deep-frying or lengthy baking times; this method focuses on the magic of a hot skillet to deliver incredibly juicy chicken with an irresistibly crunchy skin. It’s a culinary triumph that’s surprisingly simple to master, making it a fantastic addition to your weeknight dinner rotation or a crowd-pleasing dish for a casual gathering.
What makes this skillet chicken truly special is the combination of high heat and a well-seasoned coating, creating a textural contrast that’s hard to beat. The sizzle and aroma that fill your kitchen as the chicken cooks are just a preview of the deliciousness to come. Whether you’re a seasoned home cook or just starting your culinary journey, this recipe provides a straightforward path to a truly memorable meal that’s both flavorful and incredibly satisfying. Get ready to elevate your chicken game and discover the joy of perfectly crispy results, every single time.
Nutritional Information
Per serving (approximate values):
- Calories: 450
- Protein: 45g
- Carbohydrates: 15g
- Fat: 25g
- Fiber: 1g
- Sodium: 600mg
Ingredients
- 4 bone-in, skin-on chicken thighs (about 2-2.5 lbs total)
- 1/2 cup all-purpose flour
- 1 teaspoon salt
- 1/2 teaspoon black pepper
- 1/2 teaspoon garlic powder
- 1/4 teaspoon paprika
- 1/4 teaspoon dried thyme
- 2 tablespoons olive oil (or other high-smoke point oil like avocado or grapeseed)
- 1 tablespoon unsalted butter
Instructions
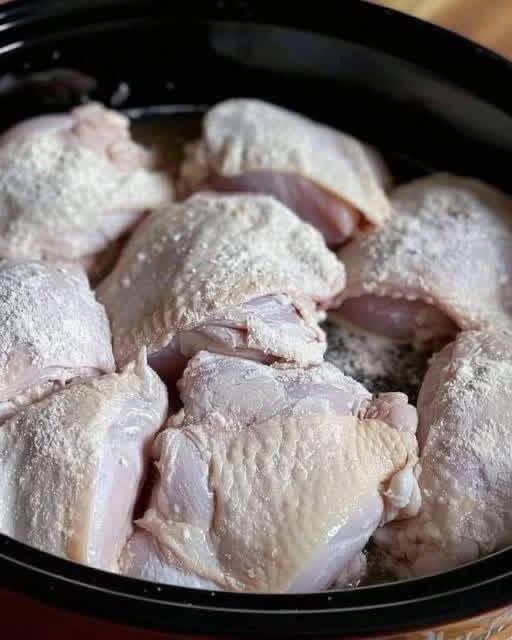
- Pat the chicken thighs very dry with paper towels. This is a crucial step for achieving crispy skin.
- In a shallow dish, whisk together the flour, salt, black pepper, garlic powder, paprika, and dried thyme until well combined.
- Dredge each chicken thigh in the flour mixture, ensuring it’s evenly coated on all sides. Gently shake off any excess flour.
- Heat the olive oil in a large, heavy-bottomed skillet (cast iron is ideal) over medium-high heat until shimmering, about 2-3 minutes.
- Carefully place the chicken thighs, skin-side down, into the hot skillet. Do not overcrowd the pan; cook in batches if necessary.
- Reduce the heat to medium and cook for 8-10 minutes, undisturbed, until the skin is deeply golden brown and crispy. You should hear a consistent sizzle.
- Flip the chicken thighs over to the bone side and add the butter to the skillet. Continue to cook for another 8-10 minutes, basting occasionally with the melted butter and pan drippings.
- Use a meat thermometer to check the internal temperature of the thickest part of the chicken, avoiding the bone. The chicken is done when it reaches 165°F (74°C).
- Once cooked through, remove the chicken from the skillet and transfer it to a wire rack set over a baking sheet. This allows air to circulate and prevents the skin from getting soggy.
- Let the chicken rest for 5-10 minutes before serving. This allows the juices to redistribute, resulting in more tender and flavorful meat.
Cooking Tips and Variations
Achieving truly crispy skillet chicken is all about technique and a few key considerations. First and foremost, always ensure your chicken is as dry as possible before dredging. Moisture is the enemy of crispiness, so patting it thoroughly with paper towels removes surface water, allowing the skin to crisp up beautifully. Don’t be shy with the heat, but also don’t let it get too high too quickly. Starting on medium-high for the initial sear on the skin side helps render the fat and create that desirable golden crust, then reducing it to medium ensures the chicken cooks through without burning the exterior. A heavy-bottomed skillet, especially cast iron, is a game-changer here as it distributes heat evenly and maintains a consistent temperature, which is vital for uniform cooking and crisping. Avoid overcrowding the pan; if you try to cook too many pieces at once, the temperature of the oil will drop, and the chicken will steam rather than sear, leading to soggy skin. Cook in batches if necessary, giving each piece enough space to develop its crust.
For even more flavor in your coating, consider adding a pinch of cayenne pepper for a subtle kick, or a touch of onion powder for extra savory depth. If you prefer a slightly thicker crust, you can double-dredge the chicken: after the first flour coating, dip it quickly in an egg wash (one egg whisked with a tablespoon of water) and then back into the flour mixture before cooking. This creates a more substantial and even crispier exterior. For a gluten-free option, you can substitute the all-purpose flour with a 1:1 gluten-free flour blend or even almond flour, though the texture of the crust might vary slightly. Experiment with different herbs and spices in your flour mixture to match your taste preferences – Italian seasoning, smoked paprika, or dried oregano are all excellent choices. You can also finish the chicken in the oven if you prefer. After searing both sides on the stovetop, transfer the skillet to a preheated oven at 375°F (190°C) and bake for 10-15 minutes, or until the internal temperature reaches 165°F (74°C). This can be particularly useful if your chicken pieces are very thick and you want to ensure they cook through without over-browning the exterior.
Storage and Reheating
Leftover crispy skillet chicken can be stored in an airtight container in the refrigerator for up to 3-4 days. To maintain the crispy texture when reheating, avoid the microwave if possible, as it tends to make the skin soggy. The best method for reheating is in an oven or a toaster oven. Preheat your oven to 350°F (175°C) and place the chicken on a wire rack set over a baking sheet. Heat for 15-20 minutes, or until warmed through and the skin has re-crisped. Alternatively, you can reheat it in a dry skillet over medium-low heat for about 5-7 minutes per side, gently pressing down on the chicken to help re-crisp the skin. Be careful not to overheat, as this can dry out the chicken.
Frequently Asked Questions
Why is my chicken skin not crispy?
The most common reasons for non-crispy chicken skin are not properly drying the chicken before cooking, overcrowding the pan, or not using enough heat. Ensure the chicken is patted very dry, cook in batches if necessary to give each piece space, and make sure your skillet is hot enough to create a good sear.
Can I use boneless, skinless chicken thighs or breasts?
While this recipe is optimized for bone-in, skin-on chicken thighs due to their fat content and ability to stay juicy, you can adapt it for boneless, skinless thighs or breasts. Cooking times will be significantly shorter (around 4-6 minutes per side for boneless cuts), and you’ll need to be extra careful not to overcook them to prevent dryness. The crispy skin element will, of course, be absent with skinless cuts, but the seasoned coating will still provide a delicious crust.
What kind of skillet is best for crispy chicken?
A heavy-bottomed skillet is best, with cast iron being the gold standard. Cast iron skillets retain and distribute heat very evenly, which is crucial for developing a consistent, crispy crust and cooking the chicken through without hot spots. Stainless steel or other heavy-gauge skillets can also work well, but avoid thin, lightweight pans that can lead to uneven cooking and burning.
How do I know when the chicken is fully cooked?
The safest and most accurate way to determine if chicken is fully cooked is by using a meat thermometer. Insert the thermometer into the thickest part of the chicken thigh, avoiding the bone. The chicken is cooked when it reaches an internal temperature of 165°F (74°C). While visual cues like golden-brown skin and clear juices are helpful, a thermometer provides certainty.