
Introduction
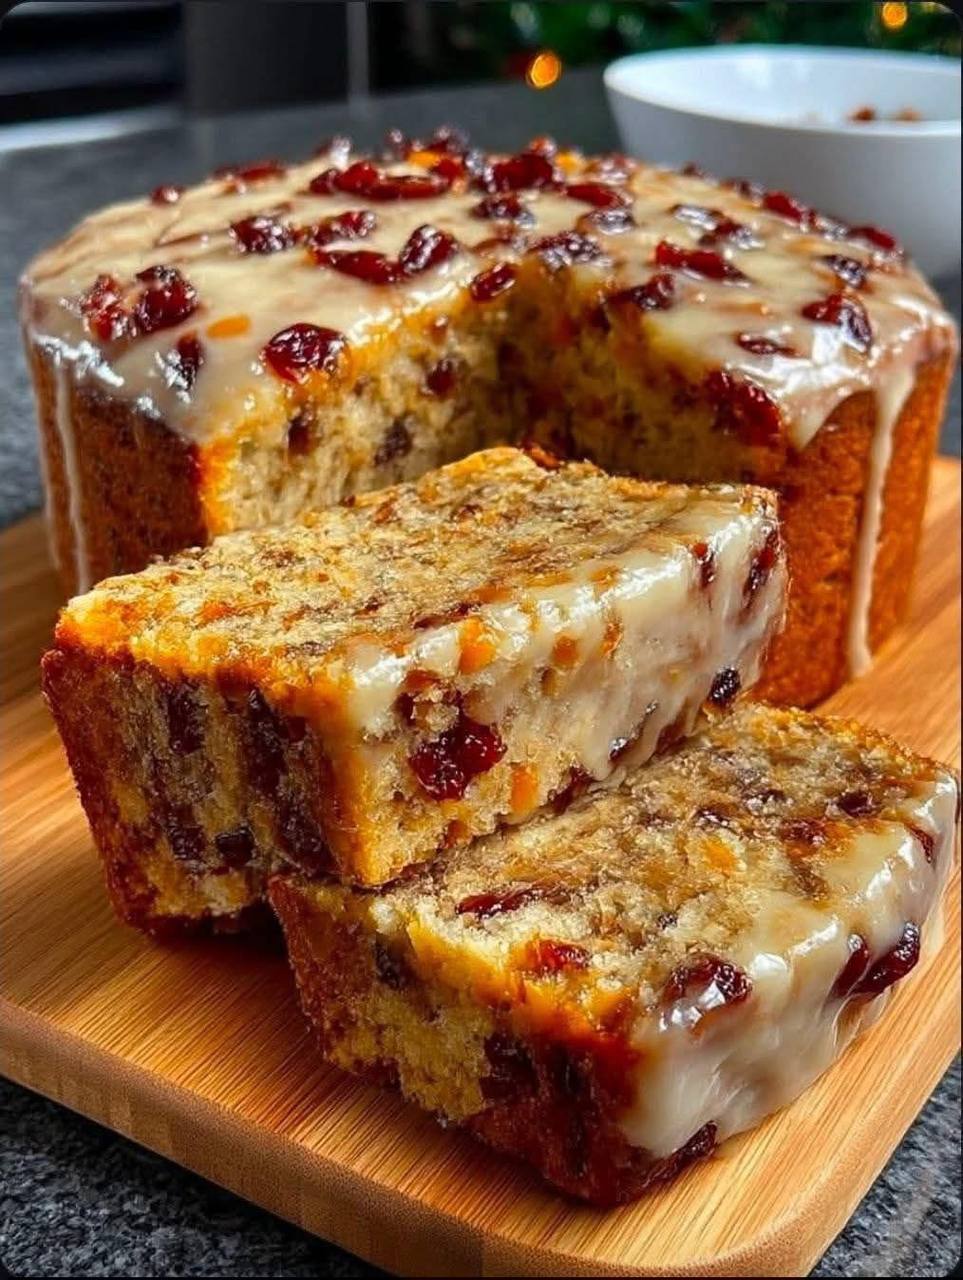
Ah, fruitcake. The very word conjures up images of dense, dry bricks of candied fruit, often passed around with a polite, but forced, smile during the holidays. It’s a dessert that has, unfairly, earned itself a rather bad rap over the years. But what if I told you there’s a fruitcake that breaks all the stereotypes? A fruitcake so moist, so flavorful, and so utterly delightful that it will convert even the most staunch fruitcake skeptics? Prepare to meet your new holiday baking hero: the Never-Fail Fruit Cake.
This isn’t your grandma’s fruitcake (unless your grandma was a baking genius, in which case, she probably already knew this secret). This recipe is designed from the ground up to deliver a consistently moist, tender crumb packed with vibrant fruit and subtle spice, all crowned with a simple, elegant glaze. We’ve taken all the common pitfalls of fruitcake – the dryness, the overwhelming density, the fruit sinking to the bottom – and engineered them out of the equation. This is the fruitcake that promises perfection, and delivers every single time.
What makes it so “never-fail”? It’s a combination of clever ingredient choices, precise measurements, and a few simple techniques that ensure your fruit stays suspended, your cake bakes evenly, and the finished product is a masterclass in moist, fruity goodness. Whether you’re a seasoned baker or a complete novice, this recipe will guide you to a triumphant fruitcake experience, making it the star of your holiday table or a much-appreciated gift.
Nutritional Information
Per serving (approximate values):
- Calories: 380
- Protein: 5g
- Carbohydrates: 60g
- Fat: 15g
- Fiber: 3g
- Sodium: 250mg
Ingredients
- 1 cup (2 sticks) unsalted butter, softened
- 1 cup granulated sugar
- 4 large eggs, at room temperature
- 1 teaspoon vanilla extract
- 2 ½ cups all-purpose flour, plus 2 tablespoons for coating fruit
- 1 teaspoon baking powder
- ½ teaspoon baking soda
- ½ teaspoon salt
- 1 teaspoon ground cinnamon
- ½ teaspoon ground nutmeg
- ¼ teaspoon ground cloves
- ½ cup buttermilk (or ½ cup milk mixed with ½ tablespoon lemon juice or white vinegar, let sit for 5 minutes)
- 1 ½ cups mixed dried fruit (such as cranberries, golden raisins, chopped apricots, candied cherries)
- ¾ cup chopped pecans or walnuts
- For the Glaze:
- 1 ½ cups powdered sugar
- 2-3 tablespoons milk or orange juice
- ½ teaspoon vanilla extract (optional)
Instructions
- Preheat your oven to 325°F (160°C). Grease and flour a 9-inch round cake pan or a 9×5-inch loaf pan. For extra insurance against sticking, line the bottom with parchment paper.
- In a medium bowl, whisk together the 2 ½ cups all-purpose flour, baking powder, baking soda, salt, cinnamon, nutmeg, and cloves. Set aside.
- In a separate large bowl, using an electric mixer, cream together the softened butter and granulated sugar until light and fluffy, about 3-4 minutes.
- Add the eggs one at a time, beating well after each addition. Scrape down the sides of the bowl as needed. Stir in the vanilla extract.
- In a small bowl, toss the mixed dried fruit and chopped nuts with the reserved 2 tablespoons of flour. This crucial step helps prevent the fruit from sinking to the bottom of the cake during baking.
- Gradually add the dry ingredients to the wet ingredients, alternating with the buttermilk, beginning and ending with the dry ingredients. Mix on low speed until just combined. Be careful not to overmix, as this can lead to a tough cake.
- Gently fold in the flour-coated dried fruit and nuts until evenly distributed throughout the batter.
- Pour the batter into the prepared cake pan and spread evenly.
- Bake for 60-75 minutes for a round cake, or 70-85 minutes for a loaf cake, or until a wooden skewer or toothpick inserted into the center comes out clean. If the top starts to brown too quickly, you can loosely tent it with aluminum foil.
- Once baked, remove the cake from the oven and let it cool in the pan for 15-20 minutes before inverting it onto a wire rack to cool completely.
- Prepare the Glaze: In a small bowl, whisk together the powdered sugar, 2 tablespoons of milk or orange juice, and optional vanilla extract until smooth. Add more liquid a teaspoon at a time if needed to reach a pourable, but not too thin, consistency.
- Once the cake is completely cool, drizzle the glaze evenly over the top, allowing it to drip down the sides. Let the glaze set for about 15-20 minutes before slicing and serving.
Cooking Tips and Variations
To truly achieve a “never-fail” fruitcake, attention to detail makes all the difference. One of the most common issues with fruitcake is dry fruit. To combat this, consider soaking your dried fruit before tossing it with flour. A quick soak in warm water, fruit juice (like apple or orange), or even a splash of brandy or rum for an adult version, for about 30 minutes, then draining thoroughly, will plump up the fruit and ensure it stays juicy within the cake. Just be sure to pat it dry before tossing with flour to prevent adding too much moisture to your batter.
The flour coating for the fruit and nuts is absolutely essential for preventing them from sinking. Don’t skip this step! The thin layer of flour creates a barrier that helps suspend the heavier ingredients in the batter as it bakes. For an even more robust cake, you can gently dust the bottom of your prepared pan with a little extra flour after greasing and before adding the parchment paper. This provides an extra non-stick layer.
Don’t be afraid to experiment with your dried fruit and nut choices. While cranberries and pecans are classic, feel free to substitute. Chopped dried figs, dates, cherries, or even a mix of tropical dried fruits like mango and pineapple can add wonderful flavor and texture. For nuts, almonds, hazelnuts, or a combination can be fantastic. Just ensure the total quantity of dried fruit and nuts remains consistent to maintain the cake’s structure.
For a richer, deeper flavor profile, you can swap out some of the granulated sugar for brown sugar, which adds a hint of molasses. Additionally, a tablespoon or two of dark molasses can be added to the batter for a more traditional, darker fruitcake. If you’re a fan of citrus, add the zest of one orange or lemon to the batter along with the wet ingredients. This brightens the flavor considerably and complements the fruit beautifully.
If you’re making this fruitcake for the holidays and want to infuse it with alcohol, you have a couple of options. You can soak your dried fruit in brandy, rum, or whisky overnight (or for several days) before baking, ensuring you drain it well and still toss it with flour. Alternatively, once the cake is baked and cooled, you can “feed” it by brushing it with a tablespoon or two of your chosen spirit every few days for a week or two before serving. Wrap the cake tightly in cheesecloth soaked in alcohol, then in foil, to allow the flavors to meld. This traditional method significantly enhances the cake’s complexity and moisture over time.
Finally, avoid the temptation to open the oven door too frequently during baking. This can cause temperature fluctuations that lead to an unevenly baked or sunken cake. Rely on the visual cues and the toothpick test for doneness. Every oven is different, so it’s always a good idea to know your oven’s quirks and adjust baking time accordingly.
Storage and Reheating
Proper storage is key to maintaining the incredible moistness and flavor of your Never-Fail Fruit Cake. Once completely cooled and glazed, the cake can be stored at room temperature in an airtight container for up to 5-7 days. To prevent it from drying out, you might consider placing a piece of parchment paper or plastic wrap directly on the cut surface of the cake before covering it. This creates a barrier against air exposure.
For longer storage, fruitcakes are excellent candidates for freezing. Wrap the entire cooled, unglazed cake (or individual slices) tightly in plastic wrap, then again in aluminum foil. Place it in a freezer-safe bag or container. It can be frozen for up to 3 months. When you’re ready to enjoy it, simply thaw the cake overnight in the refrigerator or at room temperature. Once thawed, you can then apply the glaze if it wasn’t already on the cake.
Reheating fruitcake is generally not necessary, as it is best served at room temperature. However, if you prefer a slightly warm slice, you can gently warm individual portions in the microwave for 10-15 seconds, or in a preheated oven at 250°F (120°C) for about 5-10 minutes. Be careful not to overheat, as this can dry out the cake. If your cake was frozen and you’re serving it warm, allow it to thaw completely first.
Frequently Asked Questions
Why does my fruitcake always turn out dry?
Dryness in fruitcake is often due to overbaking or insufficient moisture in the batter. Our recipe addresses this by using buttermilk for extra tenderness and precise baking times. Additionally, ensuring your dried fruit is plump (by soaking it if desired) and not overmixing the batter helps retain moisture.
How do I prevent the fruit from sinking to the bottom of the cake?
The secret is to lightly toss your dried fruit and nuts with a couple of tablespoons of flour before adding them to the batter. This creates a thin coating that helps suspend the heavier ingredients throughout the cake during baking, preventing them from sinking to the bottom.
Can I make this fruitcake ahead of time?
Absolutely! Fruitcakes are one of those rare desserts that often taste even better a few days after baking, as the flavors have time to meld and deepen. You can bake this cake up to a week in advance, store it properly, and then glaze it just before serving. For longer storage, it freezes beautifully for up to 3 months.
What’s the best way to serve fruitcake?
This Never-Fail Fruit Cake is delicious on its own, but it also pairs wonderfully with a variety of accompaniments. Serve it with a cup of hot tea or coffee, a dollop of whipped cream, a scoop of vanilla ice cream, or even a slice of sharp cheddar cheese for a traditional British pairing. The simple glaze adds enough sweetness and visual appeal, making it perfect for any occasion.