
Introduction
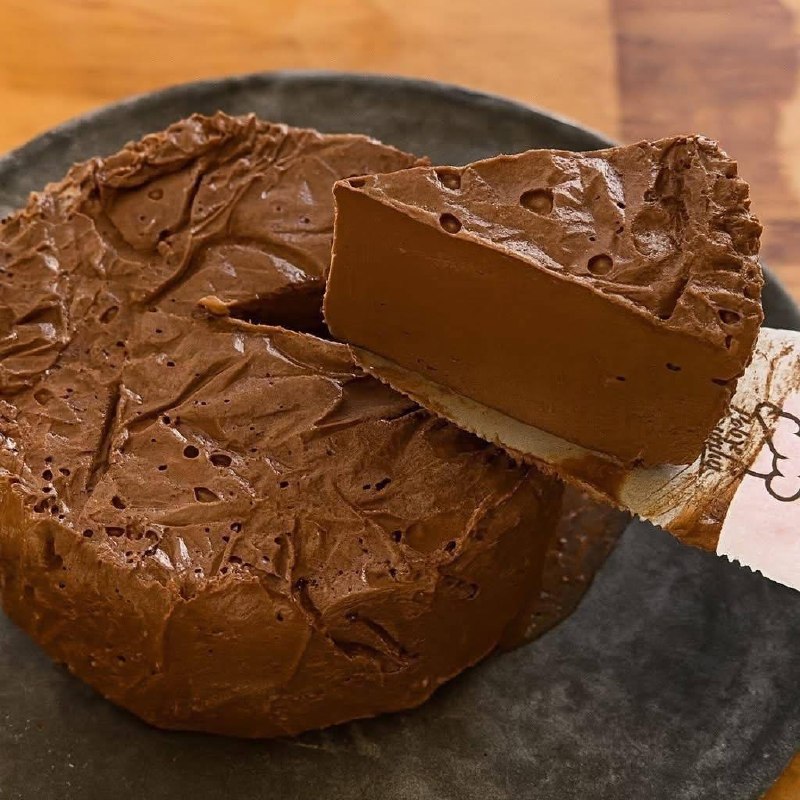
Indulge in the velvety smoothness, the rich, deep flavor, and the ethereal melt-in-your-mouth texture of chocolate mousse. More than just a dessert, chocolate mousse is an experience, a symphony of luxurious tastes and delicate sensations that has captivated palates for centuries. Originating from the sophisticated kitchens of France, this iconic sweet treat has earned its place in culinary history as the epitome of elegant indulgence. Its enduring popularity stems from its ability to be both intensely satisfying and surprisingly light, a perfect balance that leaves you craving just one more spoonful.
At its heart, chocolate mousse is a marvel of culinary engineering, transforming simple ingredients like chocolate, eggs, and sugar into something extraordinary. The magic lies in the incorporation of air, typically through meticulously whipped egg whites or cream, which gives the mousse its characteristic airy, cloud-like consistency. While the concept might seem straightforward, mastering the art of chocolate mousse involves a delicate touch and an understanding of how each component contributes to the final, sublime result. From its glossy sheen to its profound chocolatey essence, every aspect of a well-made mousse speaks of refined taste and culinary artistry.
In this comprehensive guide, we’ll embark on a delicious journey into the world of chocolate mousse. We’ll begin with the beloved classic, a recipe that honors tradition while delivering unparalleled flavor. But we won’t stop there. We’ll also explore exciting variations that add new dimensions to this timeless dessert, along with invaluable tips and tricks to ensure your mousse is nothing short of perfection. Whether you’re a seasoned baker or a curious beginner, prepare to elevate your dessert game and discover the joy of creating truly spectacular chocolate mousse.
Nutritional Information
Per serving (approximate values):
- Calories: 350
- Protein: 7g
- Carbohydrates: 30g
- Fat: 25g
- Fiber: 3g
- Sodium: 60mg
Ingredients
- 200g (7 oz) high-quality dark chocolate (70% cocoa solids or higher), finely chopped
- 100g (3.5 oz) unsalted butter, cut into cubes
- 4 large eggs, separated
- 75g (1/3 cup) granulated sugar
- 1/4 teaspoon salt
- 1 teaspoon vanilla extract (optional)
- 1 tablespoon coffee liqueur or strong brewed espresso (optional, enhances chocolate flavor)
Instructions
- Prepare your workspace: Ensure all your ingredients are measured and ready. Have two large, clean, and dry mixing bowls for the egg whites and yolks, and a medium heatproof bowl for melting chocolate.
- Melt the chocolate and butter: In the heatproof bowl, combine the finely chopped dark chocolate and cubed unsalted butter. Place the bowl over a saucepan of simmering water (ensure the bottom of the bowl does not touch the water – this is a double boiler). Stir occasionally until the chocolate and butter are completely melted and smooth. Alternatively, microwave in 30-second intervals, stirring after each, until smooth. Remove from heat and let cool slightly.
- Whisk egg yolks: In a large mixing bowl, whisk the egg yolks with half of the granulated sugar (about 37-38g or 3 tablespoons) until the mixture is pale yellow and slightly thickened. If using, stir in the vanilla extract and coffee liqueur/espresso into the egg yolk mixture.
- Combine chocolate and egg yolks: Gradually pour the slightly cooled melted chocolate and butter mixture into the egg yolk mixture, whisking constantly until well combined and smooth. Set aside.
- Whip egg whites: In another very clean and dry large mixing bowl, using an electric mixer with clean beaters, begin whipping the egg whites on medium speed. Once they become frothy, add the salt. Gradually add the remaining granulated sugar (about 37-38g or 3 tablespoons) one tablespoon at a time, continuing to whip on medium-high speed. Continue whipping until the egg whites form stiff, glossy peaks. Be careful not to overbeat, as they can become dry and crumbly.
- Fold egg whites into chocolate mixture (first addition): Take about one-third of the whipped egg whites and gently fold them into the chocolate-egg yolk mixture. This first addition helps to lighten the chocolate mixture, making it easier to incorporate the remaining whites without deflating them. Use a spatula and a gentle, upward motion, turning the bowl as you fold.
- Fold in remaining egg whites: Add the remaining whipped egg whites to the chocolate mixture. Gently fold them in using the same upward, scooping, and turning motion. Be careful not to overmix; stop folding as soon as no streaks of white remain. The goal is to retain as much air as possible for a light, airy mousse.
- Portion and chill: Carefully spoon the chocolate mousse into individual serving glasses, ramekins, or a larger serving bowl. Cover with plastic wrap and refrigerate for at least 4 hours, or preferably overnight, to allow the mousse to set and flavors to meld.
- Serve: Serve chilled, garnished as desired with cocoa powder, chocolate shavings, fresh berries, or a dollop of whipped cream.
Cooking Tips and Variations
To achieve the perfect chocolate mousse every time, ingredient quality is paramount. Using a high-quality dark chocolate (70% cocoa solids or higher) will significantly impact the depth and richness of your mousse. Cheap chocolate can result in a grainy texture and a less intense flavor. When whipping egg whites, ensure your bowl and whisk are absolutely clean and free of any grease or egg yolk, as even a tiny amount can prevent the whites from reaching stiff peaks. For best results, use room temperature eggs, as their whites whip up more easily and to a greater volume. The gentle folding technique is crucial; think of it as incorporating air rather than mixing. Over-folding will deflate the egg whites, leading to a dense mousse. Chilling is not just for setting; it allows the flavors to deepen and the texture to fully develop, so don’t rush this step.
Variations on the Classic:
- Espresso Chocolate Mousse: For a delightful coffee kick that enhances the chocolate flavor, add a shot of strong brewed espresso (about 1-2 tablespoons) or 1 teaspoon of instant espresso powder (dissolved in a tiny bit of hot water) to the melted chocolate mixture.
- Dark and White Chocolate Mousse: Create a visually stunning dessert by layering. Prepare a batch of the classic dark chocolate mousse. For the white chocolate layer, melt 200g (7 oz) good quality white chocolate with 50g (1.7 oz) butter. Whisk 3 egg yolks with 50g (1/4 cup) sugar until pale, then combine with the melted white chocolate. Whip 200ml (3/4 cup) heavy cream to soft peaks and gently fold into the white chocolate mixture. Layer the dark and white mousses in glasses, chilling each layer for 30 minutes before adding the next, then chill completely.
- Orange Chocolate Mousse: Introduce a bright, citrusy note by adding the zest of one orange and a splash (1-2 tablespoons) of orange liqueur (like Grand Marnier or Cointreau) to the melted chocolate mixture. The orange pairs beautifully with dark chocolate.
- Mint Chocolate Mousse: Infuse your mousse with a refreshing mint flavor by adding 1/2 teaspoon of pure mint extract to the melted chocolate mixture. For a natural mint flavor, you can steep fresh mint leaves in warm milk or cream, then strain and use that infused liquid in a different, cream-based mousse recipe.
- Vegan Chocolate Mousse: For a dairy-free and egg-free option, substitute the eggs and butter. Melt 200g (7 oz) good quality vegan dark chocolate with 1 can (400ml/13.5 oz) full-fat coconut cream (chilled overnight, scoop out the thick cream, discard liquid). Whip 1/2 cup aquafaba (liquid from a can of chickpeas) with 1/4 teaspoon cream of tartar and 1/4 cup sugar until stiff peaks form. Fold the aquafaba into the chocolate-coconut cream mixture. This creates a surprisingly light and rich vegan mousse.
- Mousse with Gelatin: For a firmer, more stable mousse, especially if using a mold, you can incorporate gelatin. Bloom 1 teaspoon of unflavored gelatin in 2 tablespoons of cold water for 5 minutes. Gently warm it until dissolved, then stir into the slightly cooled melted chocolate mixture before adding to the egg yolks. This will give it more structure, akin to a Bavarian cream, but still light.
Storage and Reheating
Chocolate mousse is best enjoyed chilled and fresh. Store any leftover mousse in an airtight container or covered individual serving dishes in the refrigerator for up to 3-4 days. While it remains delicious, the texture is at its peak within the first 1-2 days. It does not reheat well, as the delicate airy structure would be destroyed by heat, turning it into a melted puddle. Chocolate mousse is a dessert that is always served cold. Freezing is generally not recommended for traditional mousse made with raw eggs, as it can alter the texture significantly upon thawing, making it watery or grainy. If you have a gelatin-stabilized mousse, it might freeze slightly better, but it’s still preferable to consume it fresh and chilled.
Frequently Asked Questions
Why did my chocolate mousse turn out dense instead of airy?
A dense mousse is almost always due to deflated egg whites. This can happen if your egg whites weren’t whipped to stiff, glossy peaks, or if they were over-whipped and became dry. More commonly, it’s caused by over-mixing or folding too vigorously when combining the whipped egg whites with the chocolate mixture. Remember to use a gentle, upward folding motion to preserve the air.
Can I make chocolate mousse without raw eggs?
Yes, you can! There are several methods. One popular way is to use whipped cream instead of egg whites to lighten the chocolate base. Another is to make a “cooked” custard base with egg yolks that is then folded with whipped cream. For a vegan option, aquafaba (chickpea brine) can be whipped into stiff peaks and folded into a melted chocolate and coconut cream base, yielding a surprisingly light and airy result.
How long does chocolate mousse need to chill?
For the best results, chocolate mousse should chill for a minimum of 4 hours to allow it to fully set and for the flavors to meld beautifully. However, chilling it overnight (8-12 hours) is ideal, as this gives it the perfect firm yet creamy texture and a more developed flavor profile.