
Introduction
There’s something undeniably satisfying about a jar of vibrant, crunchy pickled vegetables. They transform ordinary meals into extraordinary culinary experiences, adding a zesty kick, a tangy crunch, and a burst of fresh flavor. While store-bought options are readily available, making your own homemade pickled vegetable jars elevates this simple pleasure to an art form. Imagine the crisp snap of a fresh cucumber, the subtle sweetness of a carrot, and the satisfying tang of cabbage, all infused with your choice of aromatic spices. This recipe isn’t just about preservation; it’s about crafting a personalized flavor bomb that enhances everything from a humble sandwich to a gourmet charcuterie board.
Why embark on this pickling adventure? For starters, freshness is paramount. When you pickle your own vegetables, you control the quality and origin of every ingredient, ensuring peak flavor and nutritional value. The customization possibilities are endless; you can tailor the spice profile to your exact preferences, making them as mild or as fiery as you desire. Beyond the delicious taste, homemade pickled vegetables offer significant health benefits, often acting as natural probiotics and being packed with vitamins and minerals. Plus, it’s surprisingly cost-effective, allowing you to enjoy gourmet-quality condiments without the hefty price tag. Get ready to create a colorful medley that’s as beautiful to behold as it is delightful to eat.
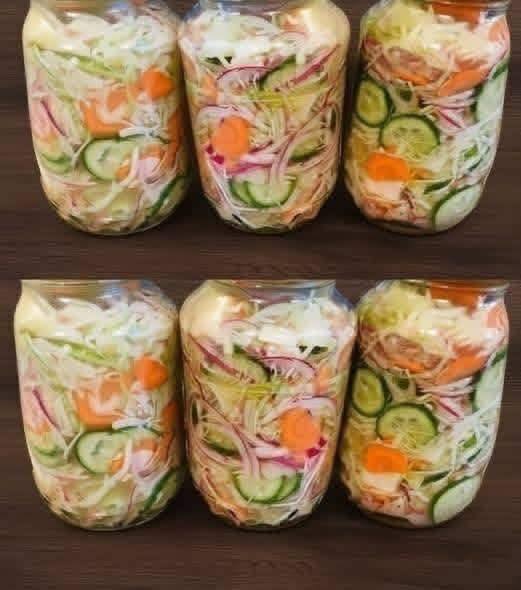
This recipe will guide you through crafting a batch of quick, refrigerator pickles – perfect for ensuring a vibrant, crunchy texture and rich flavor without the complexities of traditional canning. We’ll focus on a colorful mix, much like the inviting jars you see, featuring crisp cabbage, sweet carrots, refreshing cucumbers, and sharp red onion. These jars will become your secret weapon in the kitchen, ready to liven up any dish as a side, a topping, or a delicious snack straight from the jar. So, roll up your sleeves, gather your freshest produce, and prepare to fill your kitchen with the delightful aroma of homemade goodness!
Nutritional Information
Per serving (approximate values):
- Calories: 25
- Protein: 1g
- Carbohydrates: 5g
- Fat: 0g
- Fiber: 2g
- Sodium: 250mg
Ingredients
- 4 cups thinly sliced green cabbage (about 1/2 small head)
- 2 cups thinly sliced carrots (about 3-4 medium carrots)
- 2 cups thinly sliced cucumber (about 2 medium cucumbers)
- 1 cup thinly sliced red onion (about 1 small onion)
- 3 cups white vinegar (5% acidity)
- 3 cups water
- 3 tablespoons pickling salt (non-iodized)
- 3 tablespoons granulated sugar
- 4 cloves garlic, peeled and smashed
- 2 teaspoons mustard seeds
- 1 teaspoon dill seeds
- 1 teaspoon black peppercorns
- 1/2 teaspoon red pepper flakes (optional, for a kick)
- Fresh dill sprigs (optional, for garnish and flavor)
Instructions
- Begin by washing and sterilizing your jars and lids. Even for refrigerator pickles, clean jars are crucial for food safety and optimal storage. Wash jars and lids in hot, soapy water, then rinse thoroughly. For extra assurance, you can submerge them in boiling water for 10 minutes, then carefully remove and let them air dry completely on a clean towel or rack.
- Prepare all your vegetables. Thinly slice the green cabbage, carrots, cucumbers, and red onion. Aim for uniform thickness to ensure even pickling and a consistent texture. For carrots and cucumbers, you can use a mandoline for perfectly even slices, or a sharp knife if you prefer. Shred the cabbage thinly.
- In a large saucepan, combine the white vinegar, water, pickling salt, and granulated sugar. Bring the mixture to a rolling boil over medium-high heat, stirring occasionally to ensure the salt and sugar dissolve completely. Once dissolved, reduce the heat to low and keep the brine warm while you pack your jars.
- Carefully pack the prepared vegetables into your sterilized jars. For a visually appealing presentation, layer the different vegetables, interspersing them with the smashed garlic cloves, mustard seeds, dill seeds, black peppercorns, and red pepper flakes (if using). If you have fresh dill sprigs, tuck them in as well. Pack the vegetables snugly but don’t force them in, ensuring there’s about 1/2 inch of headspace from the rim of the jar.
- Once the jars are packed, carefully pour the hot pickling brine over the vegetables. Make sure the brine completely covers the vegetables. Use a non-metallic utensil (like a chopstick or a small spatula) to gently release any trapped air bubbles by pushing it down the sides of the jar. Top off with more brine if necessary, maintaining that 1/2 inch headspace.
- Wipe the rims of the jars clean with a damp cloth. This ensures a good seal. Place the lids on the jars and screw on the bands until they are fingertip tight.
- Allow the jars to cool completely at room temperature. As they cool, you might hear a “pop” as the lids seal, which is normal even for refrigerator pickles. Once cooled, transfer the jars to the refrigerator.
- For the best flavor, allow the pickled vegetables to rest in the refrigerator for at least 24-48 hours before consuming. This waiting period allows the flavors to meld and the vegetables to properly absorb the brine.
Cooking Tips and Variations
For the crispiest pickles, always start with the freshest, firmest vegetables you can find. Limp or old vegetables will result in soggy pickles. When slicing, aim for consistent thickness. This not only makes for a prettier jar but also ensures that all vegetables pickle at a similar rate and have a uniform crunch. Using non-iodized salt, often labeled as pickling salt or kosher salt, is essential. Iodized salt can make your brine cloudy and may impart an off-flavor.
Don’t be afraid to experiment with your vinegar choice! While white vinegar provides a classic, sharp tang, apple cider vinegar offers a slightly fruitier, milder flavor, and rice vinegar can give a delicate, Asian-inspired twist. You can also play with the spice profile. For a spicier kick, increase the red pepper flakes or add sliced jalapeños. For a sweeter pickle, slightly increase the sugar content. A more herbaceous version could include fresh thyme, rosemary, or bay leaves. Consider adding other vegetables like cauliflower florets, bell pepper strips, or green beans for even more variety. Remember to always leave adequate headspace in your jars; vegetables can expand, and you need room for the brine to properly circulate.
Storage and Reheating
These homemade pickled vegetable jars are designed as “refrigerator pickles” or “quick pickles,” meaning they are not processed for shelf-stable long-term storage. They must be stored in the refrigerator immediately after cooling. When properly stored in sealed jars in the refrigerator, these pickles will maintain their crispness and vibrant flavor for up to 3-4 weeks. Always ensure the vegetables remain submerged in the brine; if any pieces float above the liquid, they are more susceptible to spoilage. Use a clean utensil each time you retrieve pickles from the jar to prevent introducing bacteria. Since these are a cold condiment, reheating is not applicable or recommended; they are best enjoyed chilled straight from the fridge.
Frequently Asked Questions
Can I use other types of vegetables for pickling?
Absolutely! The beauty of homemade pickles is the endless customization. Feel free to experiment with other firm vegetables like cauliflower florets, bell pepper strips, green beans, asparagus, or even radishes. Just ensure they are fresh and cut into uniform pieces for even pickling.
Why did my brine become cloudy?
A cloudy brine can sometimes be caused by using iodized salt, which reacts with the vegetables and can lead to a murky appearance. It can also happen if your vegetables weren’t thoroughly washed, or if there’s some yeast growth. While not always harmful if it’s just a little cloudy, if it’s very cloudy, smells off, or shows signs of mold, it’s best to discard the batch to be safe. Always use non-iodized pickling or kosher salt for best results.
How long do I need to wait before eating the pickles?
While you can technically eat them after just a few hours, the flavors truly develop and the vegetables absorb the brine best after at least 24-48 hours in the refrigerator. For a deeper, more melded flavor, waiting 3-5 days is even better. The longer they sit (up to their recommended storage limit), the more pronounced the pickled taste will be.
Is it safe to reuse the pickling brine?
It is generally not recommended to reuse the pickling brine for another batch of fresh vegetables. While it might seem economical, the brine’s acidity and flavor profile will have been diluted by the first batch of vegetables, and its preservative qualities will be diminished. For optimal safety and flavor, always prepare a fresh batch of brine for each new set of pickled vegetables.